Migrate from Railway to Render
Bring your Railway apps and data to the Render platform.
Welcome! Let's move your Railway apps and datastores over to Render. You'll learn:
- How Railway concepts translate to the Render platform
- How to recreate your Railway services on Render
- How to move your Railway datastores to Render Postgres and Key Value instances
If you hit any bumps, don't hesitate to contact our support team at support@render.com.
Why migrate?
Developers who switch from Railway to Render consistently find benefits in the following areas:
- Reliable infrastructure: Many developers who move from Railway to Render cite reliability as a primary reason for switching, and report improved uptime after migrating. Render provides zero-downtime deploys by default, managed databases with built-in failover, and no resource contention between plan tiers.
- More control over compute: On Render, you choose an instance type with fixed CPU and RAM for each service. That makes it easier to reason about capacity and performance as you migrate.
- Fully managed datastores: Render Postgres includes point-in-time recovery, read replicas, and high availability out of the box. Railway's database templates are unmanaged Docker containers that you must maintain yourself.
- Native log streaming: Render log streams send your logs directly to providers like Datadog, Grafana Cloud, and others. Railway lacks native log drain support.
- Built-in DDoS protection: Every Render service includes DDoS mitigation at no extra cost.
- No deployment pausing: Railway might pause deployments for Free and Hobby users during high-traffic periods. Render does not pause deployments based on platform load.
Concept mapping
Railway and Render share many of the same concepts (projects, services, custom domains, cron jobs), so much of the platform will feel familiar. Here are the key differences to keep in mind:
- Compute model: Railway's compute is usage-based, where each service autoscales up to your plan's vCPU and RAM limits. On Render, you select a fixed instance type with defined CPU and RAM.
- Configuration: Railway splits configuration across service variables, shared variables, and reference variables (using
${{ }}template syntax). On Render, you use environment variables and environment groups. - Datastores: Railway databases are unmanaged Docker containers backed by volumes. Render provides fully managed Render Postgres databases and Render Key Value instances. Render Postgres includes built-in backups and high availability.
For a full feature-by-feature comparison, expand the mapping below:
Show terminology mapping
Compute
| Railway | Render |
|---|---|
|
Service |
Service |
|
Usage-based compute (vCPU/RAM per plan) |
Instance type (Free, Starter, Standard, etc.) |
|
Service with public domain |
Web service |
|
Service without public domain |
Private service or background worker |
|
Cron job (scheduled service) |
Cron job |
|
Service variables |
Environment variables |
|
Shared variables |
Deployment
| Railway | Render |
|---|---|
|
Railpack auto-build / custom build command |
Build command |
|
Custom start command / Procfile |
Start command |
|
Pre-deploy command |
Pre-deploy command |
|
Healthcheck endpoint | |
|
Zero-downtime deploys (deployment overlap) |
This is the default behavior for Render services. |
|
GitHub auto-deploy on push | |
|
Environments (production, staging, PR) |
Storage
| Railway | Render |
|---|---|
|
Volumes (persistent storage mounted to a service) |
Disks (persistent storage mounted to a service) |
Networking
| Railway | Render |
|---|---|
|
Private networking ( | |
|
Railway-provided domain ( |
Render subdomain ( |
|
Custom domains |
Observability
| Railway | Render |
|---|---|
|
Log Explorer / deployment logs | |
|
Webhooks (Discord, Slack) |
Datastores
| Railway | Render |
|---|---|
|
Railway PostgreSQL (template) |
Render Postgres (fully managed) |
|
Railway Redis (template) |
Render Key Value (fully managed, Redis®-compatible) |
Infrastructure as Code
| Railway | Render |
|---|---|
|
|
1. Prepare to migrate
Now, let's make sure you have all the accounts and app details you need to migrate successfully.
Create your Render account
Signing up is fast and free:
Catalog your Railway resources
Open your Railway project and note the following for each service:
- Service type: Does the service have a public domain (web service), no public domain but still receive internal traffic (private service), no public domain and process jobs (background worker), or a cron schedule (cron job)?
- Build and start commands: Find these in your Railway service's Settings tab under Build and Deploy. If your repo includes config files such as
railway.toml,railway.json,railpack.json, or aProcfile, note any relevant commands there as well.- On Render, each distinct process (e.g.,
web,worker) becomes a separate service. - The start command for each process serves as the corresponding Render service's start command.
- On Render, each distinct process (e.g.,
- Pre-deploy command (if any): Found in service Settings under Deploy.
- All service variables and shared variables (i.e., environment variables)
- Pay special attention to reference variables that use Railway's template syntax (e.g.,
${{ Postgres.DATABASE_URL }}). You'll replace these with actual Render datastore URLs later.
- Pay special attention to reference variables that use Railway's template syntax (e.g.,
- Attached databases: Any PostgreSQL and Redis® database services in the project
2. Recreate your app on Render
Next, let's spin up Render resources that correspond to your Railway services and datastores.
Create datastores
We recommend creating any necessary Render Postgres and Key Value instances before you deploy the apps that use them. This way, your apps can connect to those datastores on their very first deploy.
We won't move your existing data from Railway to Render yet.
We'll do this as part of the final migration process.
Follow these steps for each Railway PostgreSQL and Redis database service you want to move:
-
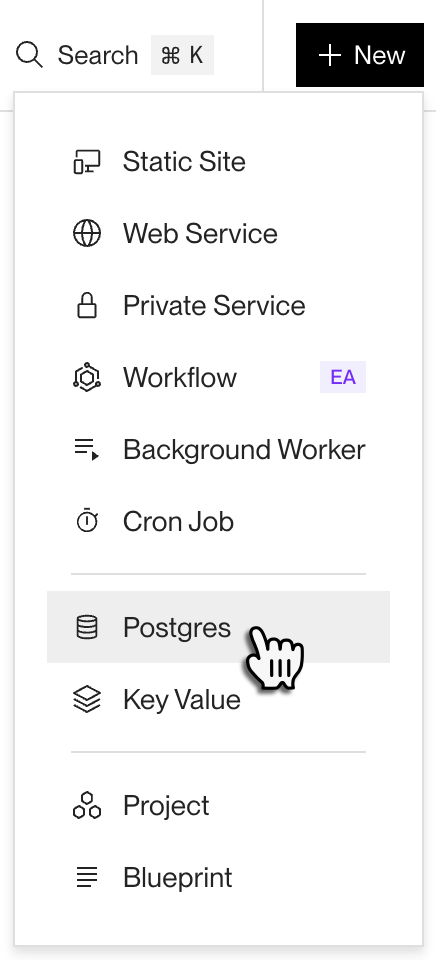
In the Render Dashboard, click New > Postgres or New > Key Value:
-
Specify the following:
- Your datastore's name
- The region where you want to host the datastore
- Which instance type to run on
- Free instance types are available for Render Postgres and Key Value to help you get started. See details.
- Your starting storage (Postgres only)
- Feel free to start with a small amount of storage (1 GB or 5 GB) for testing. You can increase a database's storage later, but only once every 12 hours.
-
Click the Create button.
Render provisions your new datastore, and it becomes available within a minute or two.
-
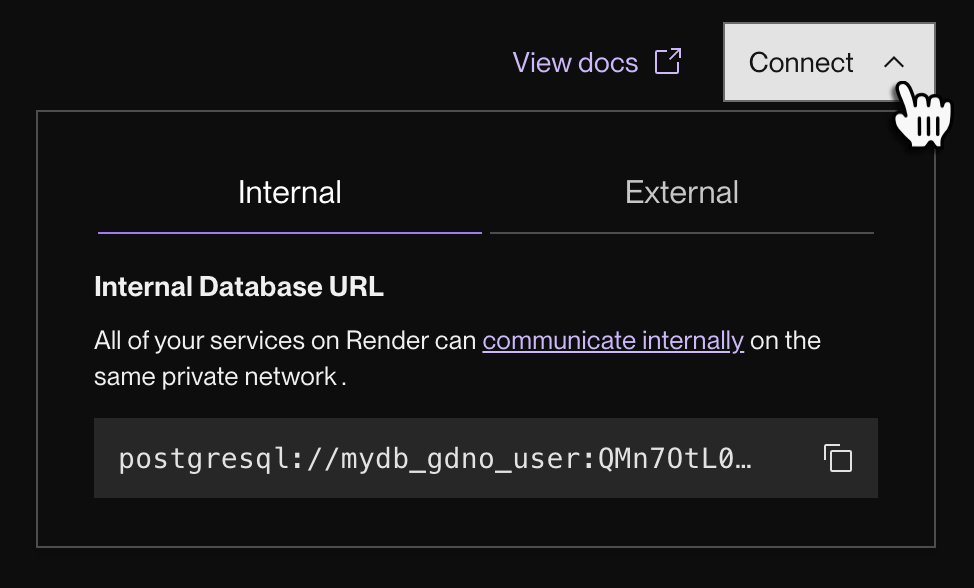
After your datastore becomes available, open its Info page in the Render Dashboard and click the Connect dropdown in the top right:
-
Copy your datastore's internal URL. Your Render services will use this URL to connect to the datastore over a private network.
- External clients (like your local development environment) can instead connect to the datastore via its external URL, which is available in the same dropdown.
-
Repeat this set of steps for each Railway PostgreSQL and Redis database service you want to move.


Create services
Let's look at how to recreate your Railway services on Render.
Web services
If your Railway service has a public domain assigned, it receives HTTP traffic from the internet. On Render, this corresponds to a web service. Every web service receives an onrender.com subdomain, and you can add your own custom domains.
-
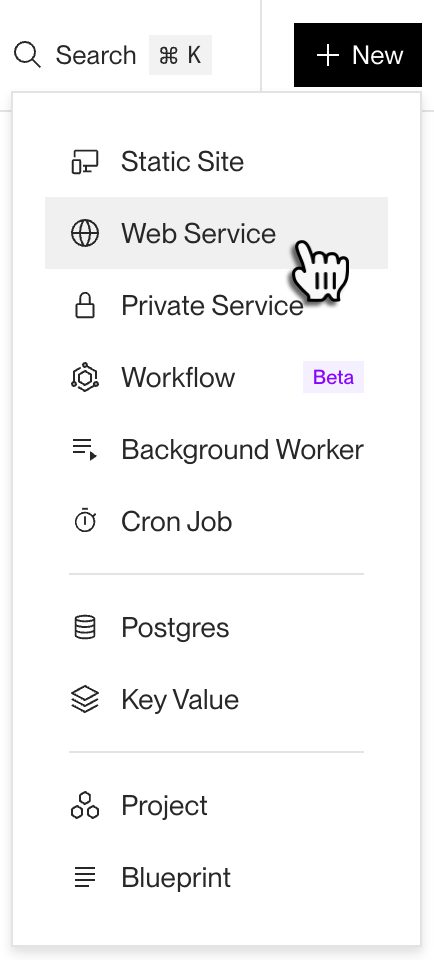
In the Render Dashboard, click New > Web Service:
-
Specify the following:
- Your project repo and branch to deploy (from GitHub, GitLab, or Bitbucket)
- Your app's language (Node.js, Python, etc.)
- The region where you want to host the service
- Choose the same region as your datastores to enable low-latency private network communication.
- Which instance type to run on
- Render offers a free instance type for hobby projects and testing out the platform.
-
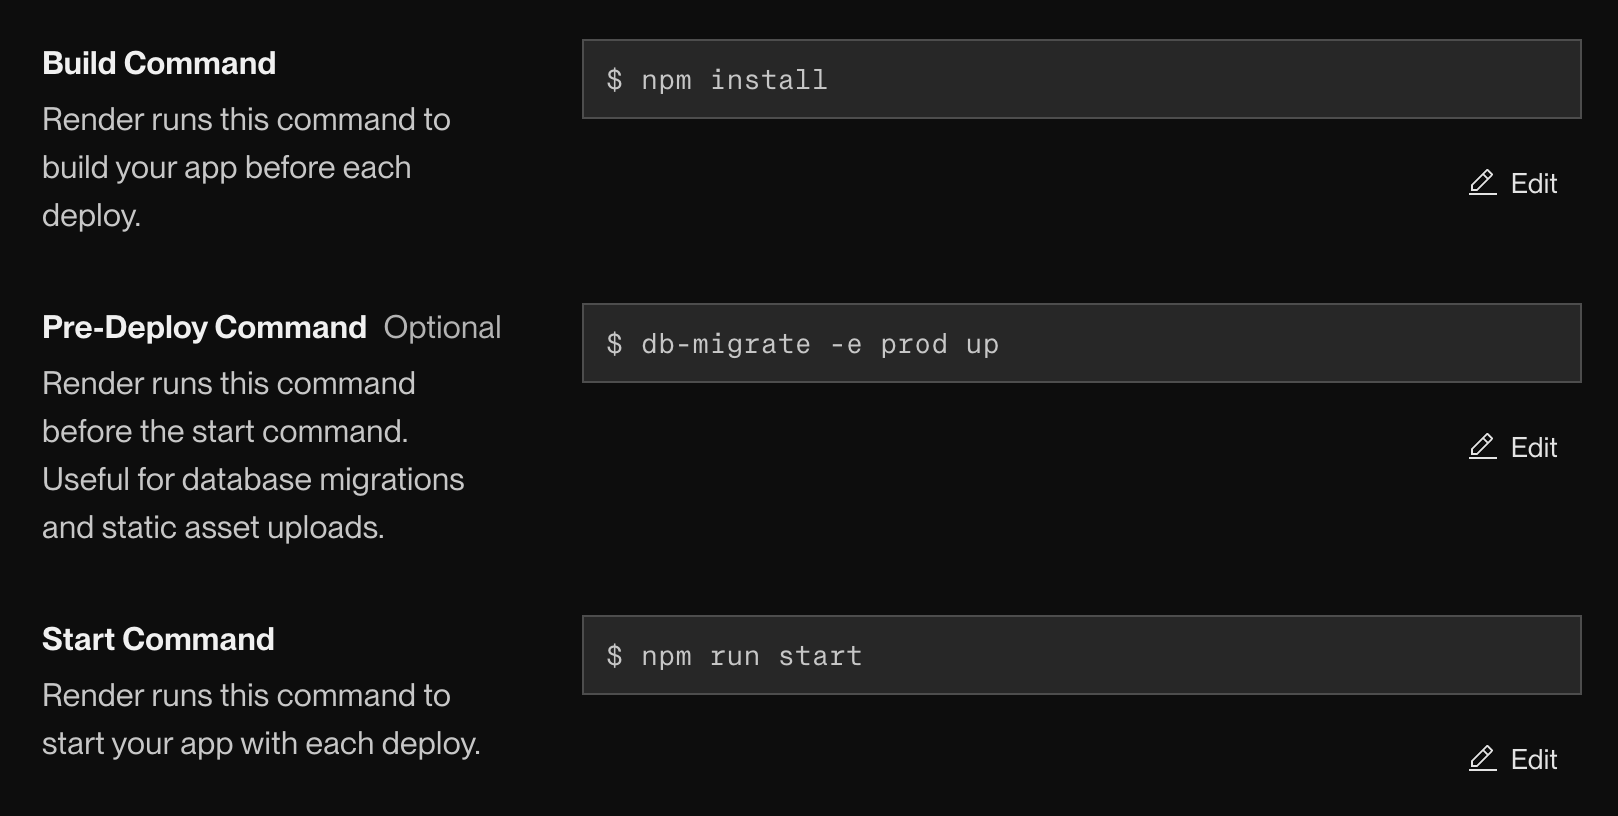
Provide the commands that Render will use to build and run your code:
Command Value Build Command
Provide the same build command from your Railway service settings. Common examples include
npm installfor Node.js orpip install -r requirements.txtfor Python.If your Railway service used Railpack's auto-detected build command, provide the equivalent command explicitly.
Pre-deploy Command (optional)
Provide the same pre-deploy command from your Railway service settings, if any.
Like Railway, Render runs the pre-deploy command before each deploy of your service. Use it to run database migrations and other setup tasks.
Start Command
Provide the same start command from your Railway service settings.
Common examples include
npm run startfor Node.js andgunicorn your_application.wsgifor Python.Here's an example of these commands for a Node.js app:
-
Set any required environment variables for your web service:
- For datastore connections, provide the internal datastore URLs you copied earlier.
- On Railway, these are often set via reference variables like
${{ Postgres.DATABASE_URL }}. On Render, setDATABASE_URLandREDIS_URLdirectly to your Render datastore internal URLs.
- On Railway, these are often set via reference variables like
- For service-to-service communication, Railway uses
service-name.railway.internal. On Render, services in the same private network communicate viaservice-name:portwith no internet roundtrip. - For other environment variables, copy over the values from your Railway service variables and shared variables.
- You can make changes to your service's environment variables at any time after your service is created. See details.
- For datastore connections, provide the internal datastore URLs you copied earlier.
-
If your Railway service had a healthcheck endpoint configured, set the same path under your Render service's Health Check Path setting. Render pings this path and waits for a
200response before routing traffic to a new deploy. -
If your Railway service used a volume for persistent storage, add a Render Disk to your service. Specify the same mount path you used on Railway. Note that Render Disks are per-service and not shared across services.
-
Click Deploy Web Service.


You're all set! Render kicks off your service's first deploy. You can view the build logs in the Render Dashboard.
When the deploy completes, your service is live at its onrender.com subdomain. If you encounter any issues, see Troubleshooting Deploys.
Private services and background workers
If your Railway service runs continuously without a public domain, it might map to one of two Render service types:
- Use a private service if the service receives traffic only from other services on a private network.
- Use a background worker if the service does not receive requests and instead processes jobs from a queue or runs other background work.
If your Railway service is a queue processor or another non-request-driven process, create a Render background worker:

The steps for creating a background worker are similar to those for creating a web service. The key differences are:
- Your background worker probably doesn't need to run a pre-deploy command if your web service already handles database migrations.
- Render does not provide a free instance type for background workers.
For any Railway service that stays internal but still receives requests, create a private service instead. For any Railway service that runs jobs in the background, create a background worker and specify the appropriate build and start command.
Cron jobs
If your Railway service is configured with a cron schedule, it corresponds to a Render cron job. Railway and Render both use standard crontab expressions for scheduling.
In the Render Dashboard, click New > Cron Job and provide the same schedule and start command from your Railway service settings.
Services do not share environment variables by default.
If your web service and background workers require some of the same environment variables, you can do one of the following:
- Manually set the environment variables for both services
- Create an environment group and apply it to both services
3. Swap over to your Render infrastructure
With everything up and running on Render, we're ready to move your data and DNS configuration over from Railway.
This final step (moving your data and DNS configuration) requires downtime for your app, even if brief.
Schedule your migration for off hours to minimize the impact on your users.
Scale up your Render datastores
Before you move over your data, make sure your Render Postgres and Key Value instances have sufficient storage and compute resources to handle your current requirements. You can upgrade as needed in the Render Dashboard.
Render Postgres
- You can increase your storage once every 12 hours. You can't decrease it.
- You can change your instance type (upgrade or downgrade) at any time. Your database is unavailable for a few minutes during the change.
Render Key Value
- You can upgrade your instance type at any time. Your Key Value instance is unavailable for a few minutes during the change.
- You can't downgrade your instance type.
Stop your Railway services
Railway does not have a built-in maintenance mode. To stop your services from accepting traffic during the migration:
- In the Railway Dashboard, click on each service to open it.
- Find the active deployment and open its 3-dot menu.
- Click Remove to stop the deployment.
This stops your service entirely. Repeat for each service in your Railway project.
Removing a deployment stops all traffic to that service.
Unlike a maintenance mode, Railway does not display a maintenance page. Requests to your Railway domain fail until you either redeploy on Railway or point your DNS to Render.
Export data from Railway Postgres
-
Confirm that TCP Proxy is enabled on your Railway Postgres service (it's enabled by default for Railway database templates).
-
Get your public database connection URL.
In the Railway Dashboard, open your Postgres service and find the
DATABASE_PUBLIC_URLvariable. -
Create a backup of your database.
Import data into Render Postgres
-
Obtain your Render Postgres database's External Database URL from its Info page in the Render Dashboard.
-
Import
railway_backup.dumpinto your Render Postgres database.
For large databases, consider using the --jobs flag with both pg_dump and pg_restore to speed up the process.
For example, pg_dump --jobs 4 and pg_restore --jobs 4 run four parallel workers.
Export and import Railway Redis data
If you're migrating a Railway Redis service to Render Key Value:
-
Confirm that TCP Proxy is enabled on your Railway Redis service.
-
Get your Railway Redis public connection URL from the Redis service's variables (
REDIS_URLwith the TCP Proxy host and port). -
Use
redis-clito export your data and import it into your Render Key Value instance: -
Import the data into your Render Key Value instance using the Render Key Value external connection URL from the Render Dashboard:
Alternatively, if your dataset is small, you can use the
DUMPandRESTOREcommands to transfer keys individually.
Update your DNS records
If your Railway service uses a custom domain, follow the instructions to update your DNS configuration to point to Render instead of Railway. Apply each app's custom domain to the corresponding Render web service.
Note that it takes some time for your DNS changes to propagate, and for Render to then provision a TLS certificate for your domain.
Troubleshooting
If you run into issues during your migration, check the following first:
- Database connections fail: Replace Railway reference variables like
${{ Postgres.DATABASE_URL }}and${{ Redis.REDIS_URL }}with the actual internal URLs for your Render datastores. - Your build fails on Render: Railway's Railpack often auto-detects build behavior. On Render, you might need to specify an explicit build command.
- Your app can't find persisted data: Confirm that your Render Disk mount path matches the path your app used on Railway.
- Your app doesn't start listening for traffic: Make sure your app listens on the
PORTenvironment variable that Render provides.
For more help with general deploy issues, see Troubleshooting Deploys.
Next steps
Congratulations! You've successfully migrated your Railway app to Render.
Next, explore more of Render's capabilities. Here are a few to get you started:
- Learn about additional service types you can deploy on Render, such as cron jobs.
- Control access to your Render Postgres database and Key Value instance.
- Invite team members to join you on Render, and configure their user roles.
- Use Render's Infrastructure as Code to define and modify your services.