Persistent Disks
Preserve your service's filesystem changes across deploys.
You can attach a persistent disk to a paid Render web service, private service, or background worker. This enables you to preserve local filesystem changes across deploys and restarts.
By default, Render services have an ephemeral filesystem.
This means that without a persistent disk, any changes you make to a service's local files are lost every time the service redeploys or restarts.
Persistent disks are useful for services such as:
- Infrastructure components (Elasticsearch, Kafka, RabbitMQ, etc.)
- A blogging platform or CMS (WordPress, Ghost, Strapi, etc.)
- Collaboration apps (Mattermost, GitLab, Discourse, etc.)
- Custom datastores (MySQL, MongoDB, etc.)
Persistent disks use the same high-performance SSDs as Render Postgres and Key Value instances. All disks are encrypted at rest, and so are their automatic daily snapshots.
Setup
Before you attach a persistent disk, it's helpful to understand important limitations and considerations.
You create persistent disks from the Render Dashboard. You can do so during service creation (click Advanced at the bottom of the creation form), or any time after creation from your service's Disks page:
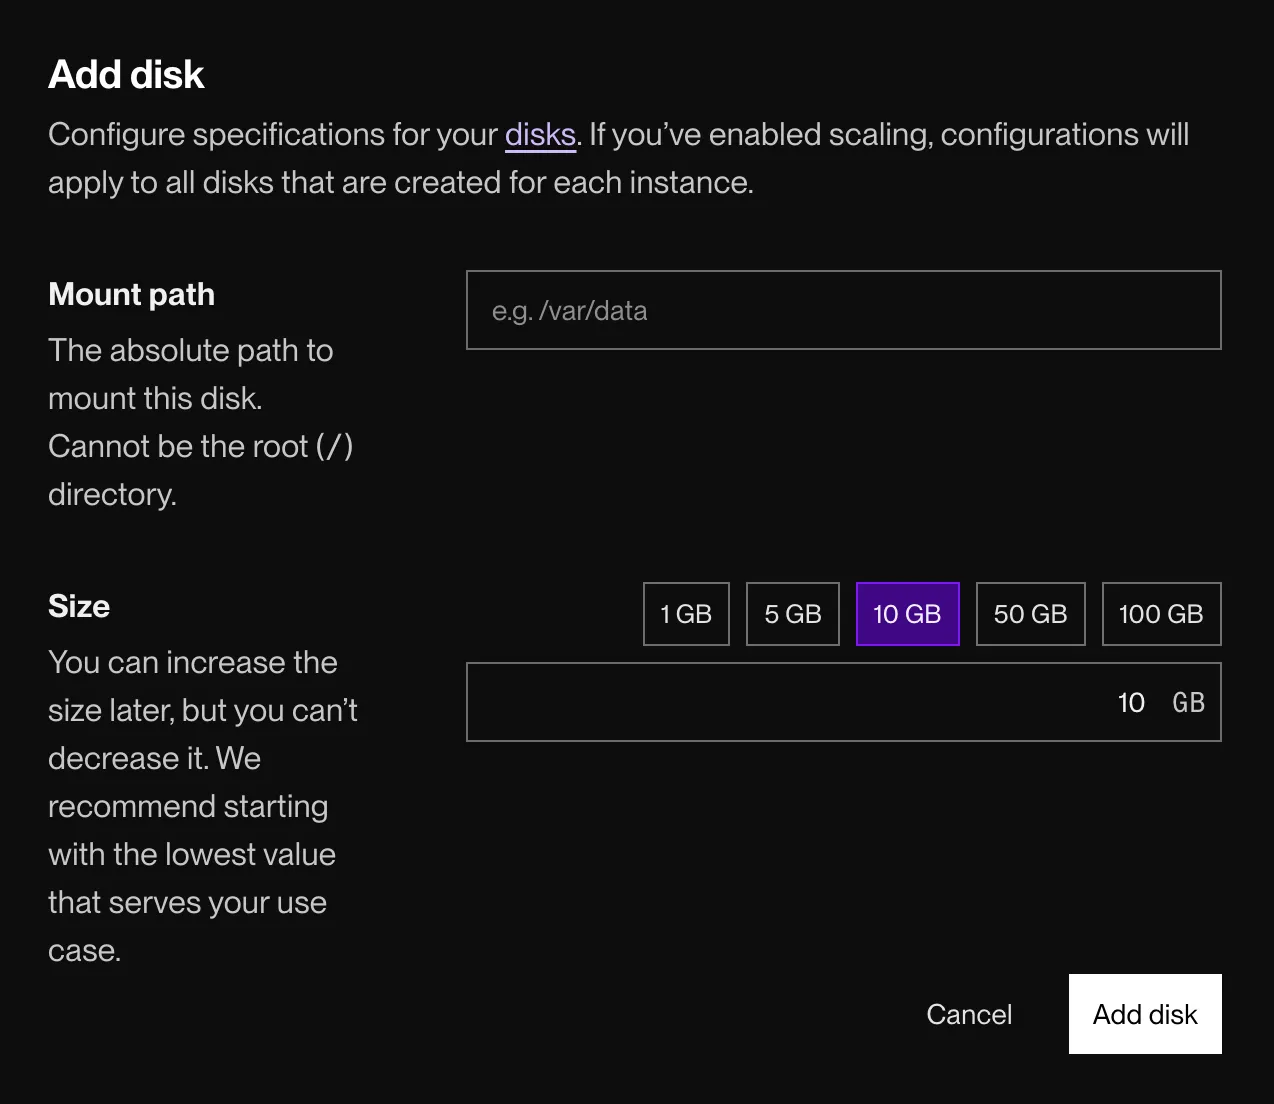
- Set your disk's mount path.
- Only filesystem changes under this path are preserved across deploys and restarts! The rest of your service's filesystem remains ephemeral.
- For more details, see Mount path.
- Choose a disk size.
- You can increase your disk's size later, but you can't decrease it. Pick the smallest value that currently works for your service.
- Click Add disk.
After you save, Render triggers a new deploy for your service. The disk becomes available as soon as the deploy is live.
Mount path
When you attach a persistent disk to a service, you specify its absolute mount path. Only data written under this path is preserved across deploys and restarts.
You can mount a disk at any path except those listed below.
Specify a mount path according to how your service stores data:
- If your framework writes to a relative path (e.g., Rails Active Storage uses
./storagefor file uploads), mount your disk at the absolute version of that path or an ancestor of it. See the table below for mount paths by runtime. - Otherwise, use a standalone directory like
/var/dataand configure your application to write persistent data there.
To mount your disk in a subdirectory of your service's source code, the absolute path depends on your runtime:
| Runtime | Source code path | Example disk mount path |
|---|---|---|
|
Node.js, Python, Ruby, Elixir, and Rust |
|
|
|
Go |
|
|
|
Docker |
Your Dockerfile's |
|
Disallowed mount paths
You cannot mount a disk at any of these exact mount paths:
/(filesystem root)/opt,/opt/render,/opt/render/project,/opt/render/project/src/home,/home/render/etc,/etc/secrets
You can mount a disk at a subdirectory within one of these paths. For example, you can mount your disk at /opt/render/project/src/uploads.
Monitoring usage
View your disk's usage over time from your service's Disks page in the Render Dashboard:

Disk snapshots
Render automatically creates a snapshot of your persistent disk once every 24 hours. If your disk experiences critical data loss or corruption, you can completely restore its state to any available snapshot. Snapshots are available for at least seven days after they're created.
Important:
- If you restore a snapshot, all changes to your disk that occurred after the snapshot are lost.
- Render doesn’t support restoring only a portion of a disk snapshot.
- Do not restore a snapshot of a disk that's used for a custom database instance. See details.
Restore a snapshot from your service's Disks page in the Render Dashboard:

Restoring a custom database
If you use a persistent disk specifically to back a custom database instance on Render (such as MySQL or MongoDB), do not perform a disk restore for database recovery purposes. If you do, your database might restore to a corrupted state.
Instead, create regular backups of your database using a tool like mysqldump for MySQL or mongodump for MongoDB. Restore your database's state using one of these backups.
Transferring files
You can securely transfer files between your disk-backed service and your local machine using a tool like SCP or Magic-Wormhole.
SCP
After you set up SSH for your service, you can transfer files using SCP.
For example, if your ssh command looks like this:
Then your scp commands look like this:
We recommend using SCP with the -s flag to use the more modern SFTP protocol. Future releases of SCP will default to using SFTP, and this flag will no longer be needed.
Magic-Wormhole
The Magic-Wormhole library enables you to transfer files to and from your disk-backed service without using SSH and SCP.
-
In the Render Dashboard, go to your service's Shell page.
-
If you have a Docker-image-backed service, use the shell to install
magic-wormhole:- Run
apt update && apt install magic-wormholeor the equivalent for your environment. - The
magic-wormholelibrary is pre-installed on all Render native runtimes.
- Run
-
Use the shell to transfer your file with the
wormholecommand: -
Note the code that appears in the output from
wormhole. Then, from any internet-connected machine, install magic-wormhole and runwormhole receive, entering in the code when prompted.
Disk limitations and considerations
When attaching a persistent disk to your service, note the following:
-
Only filesystem changes under your disk's mount path are preserved across deploys and restarts.
- The rest of your service's filesystem remains ephemeral.
-
A persistent disk is accessible by only a single service instance, and only at runtime. This means:
-
You can't access a service's disk from any other service.
-
You can't scale a service to multiple instances if it has a disk attached.
-
You can't access persistent disks during a service's build command or pre-deploy command (these commands run on separate compute).
-
You can't access a service's disk from a one-off job you run for the service (one-off jobs run on separate compute).
-
-
Adding a disk to a service prevents zero-downtime deploys. This is because:
-
When you redeploy your service, Render stops the existing instance before bringing up the new instance.
-
This instance swap takes a few seconds, during which your service is unavailable.
-
This is a necessary safeguard to prevent data corruption that can occur when different versions of an app read and write to the same disk simultaneously.
-
-
You can't add a disk to a cron job service.
- As an alternative, you can add a disk to a background worker, which is useful for processes that run continuously and don’t expose a port.
-
You can increase your disk's size later, but you can't decrease it. Pick the smallest value that currently works for your service.
- Increasing a disk's size does not cause downtime. The additional storage becomes available to your service within a few seconds.