SSH and Shell Access
Connect to your services from your terminal or the Render Dashboard.
You can initiate a shell session to your Render service from its Shell page in the Render Dashboard:

If your service is scaled to multiple instances, you can connect to a specific instance using the Instance dropdown.
You can also SSH into your services from the terminal after completing setup.
Compatible service types
Support for shell access varies by service type:
| Service type | Dashboard shell | SSH |
|---|---|---|
|
Paid web service | 🟢 | 🟢 |
| 🟢 | 🟢 | |
| 🟢 | 🟢 | |
|
🟨 | ❌ | |
|
Free web service | ❌ | ❌ |
|
Other service types (static sites, datastores) | ❌ | ❌ |
SSH setup
1. Generate an SSH key pair
Skip this step if you already have an SSH key on your machine that you want to use.
-
Run the following command to generate an Ed25519 key pair in the
~/.sshdirectory:You can optionally use a different key type.
-
The command prompts you to provide an optional passphrase for your private key (recommended for added security).
-
The command generates two files in your
~/.sshdirectory:~/.ssh/id_ed25519(private key)~/.ssh/id_ed25519.pub(public key)
Your private key is a secret credential. Don't share it with anyone.
To enable SSH access, you'll share the public key with Render.
2. Add your public key to your Render account
-
Open your Account settings page in the Render Dashboard.
-
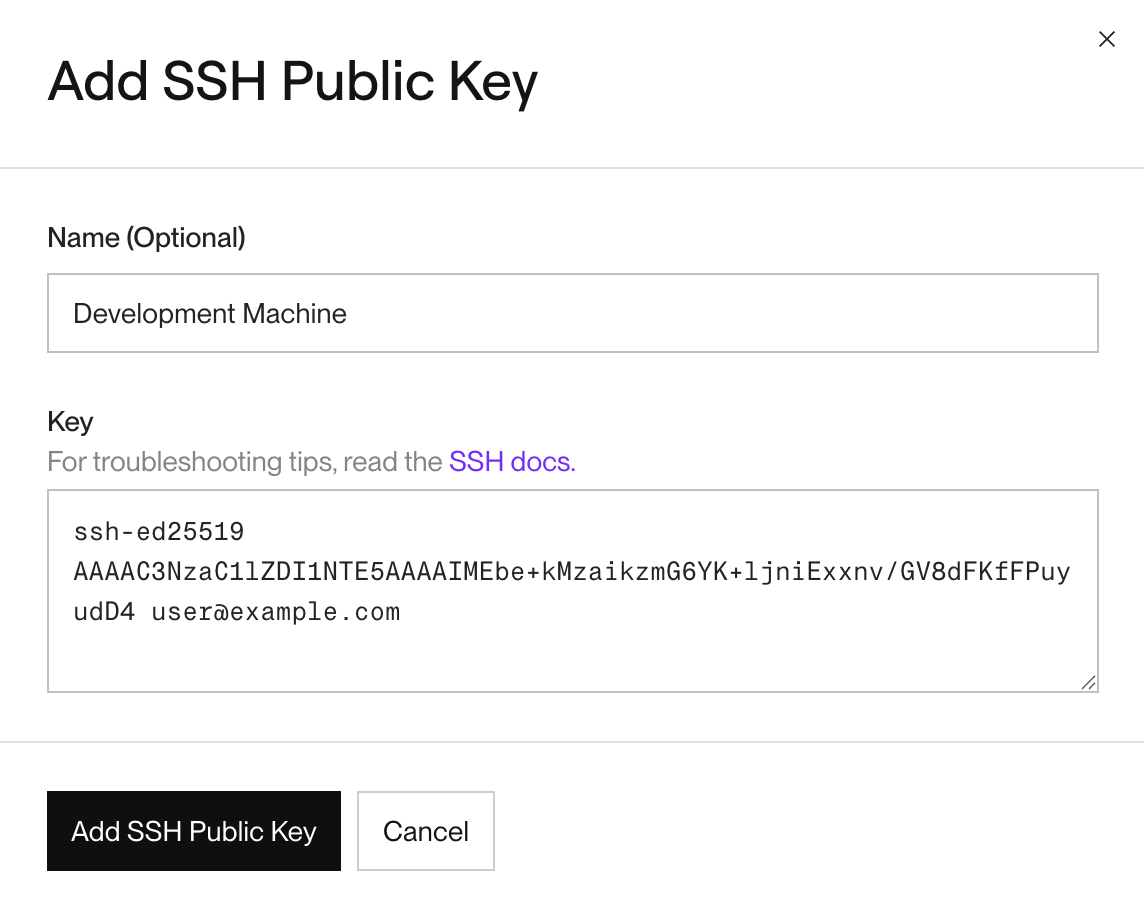
Find the SSH Public Keys section and click + Add SSH Public Key. The creation dialog appears.
-
Provide a descriptive Name for the key (e.g., "Personal Laptop").
-
Copy the full contents of your public key file (ends in
.pub) to your clipboard.On macOS, you can use the
pbcopycommand to copy the file to your clipboard: -
Paste your public key into the Key field:

-
Click Add SSH Public Key button to save your key.
All set! You're ready to start an SSH session.
Starting an SSH session
After completing SSH setup, you can start SSH sessions from your terminal using the Render CLI, or by running the ssh command directly.
Select a method from the tabs below:
-
Install and log in to the Render CLI if you haven't already.
-
Run the following command:
This opens an interactive menu that lists your workspace's SSH-compatible services.
-
Use the arrow keys to select a service and press Enter. The interactive menu closes and the SSH session starts.
To skip menu-based selection, you can include your service's ID directly in the render ssh command:
-
In the Render Dashboard, open the settings for the service you want to connect to.
-
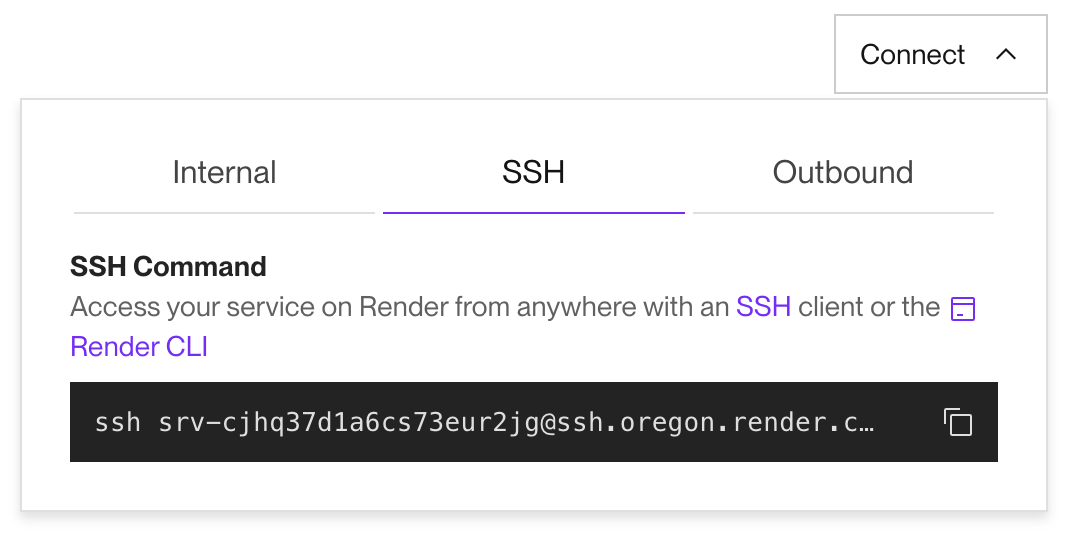
Click the Connect dropdown in the upper right and select the SSH tab:

Don't see the SSH tab? The selected service is not SSH-compatible. See Compatible service types.
-
Copy the SSH command to your clipboard.
-
Paste the SSH command into your terminal and run it.
-
You might see a warning like this:
If you do, confirm that the fingerprint in the message matches Render’s public key fingerprint for your region. If it does, type
yesto continue. -
If you receive a "permission denied" message, see Troubleshooting permission failures.
Connecting to a specific instance
By default, SSH sessions connect to a random running instance of your service. To connect to a specific instance, include that instance's 5-character slug in the hostname of your SSH command:
As shown above, you append the instance slug to the service's ID (separated by a hyphen) to form the complete hostname.
Instance slugs are visible in your service's logs and application metrics. You cannot SSH into an instance that is no longer running.
Troubleshooting permission failures
If you receive a "Permission denied" error, Render rejected the incoming SSH session. Take the following steps first to troubleshoot this issue:
Confirm which SSH key you're using
Add the "verbose" flag (-v) to your SSH command to get more details about which key is being used:
Confirm which keys are attached to your Render account
-
List any keys you have loaded into the ssh-agent.
This should should print out a long string of numbers and letters.
-
Open your settings page in the Dashboard and find the list of SSH public keys.
-
Compare the list of SSH keys with the output from the
ssh-addcommand.
If you don't see your public key listed, you can add it to your account.
Render's public key fingerprints
Public key fingerprints can be used to validate a connection to a remote server.
Render’s public SSH key fingerprints are as follows:
| Region | Fingerprint |
|---|---|
|
Oregon |
|
|
Ohio |
|
|
Virginia |
|
|
Frankfurt |
|
|
Singapore |
|
You can also directly add Render's public keys to your $SSH_DIR/known_hosts file. Render's full set of entries is as follows:
Usage details
Supported key types
Render supports the following key types:
ed25519ecdsarsa
Render also supports U2F/FIDO hardware authenticated keys like a YubiKey.
ed25519-skecdsa-sk
Cron job connections
When you connect to a cron job from the Dashboard shell, Render spins up a new, temporary instance of the service and connects to it. This instance includes your cron job's latest build and configuration. It does not automatically execute the cron job's command. After you close the shell session, Render deprovisions the instance.
It is not possible to connect to the actual cron job instances that run as part of your cron schedule.
Automatic session closure
Render automatically closes a service's active SSH sessions in the following cases:
- The service is redeployed or restarted for any reason.
- Render is scheduled to perform maintenance on underlying infrastructure that enables SSH connections.
- In this case, Render gives existing connections one hour before automatically closing them.
For long-running commands, consider spinning up a one-off job instead of SSHing into an active instance.
Memory usage
SSH and dashboard shell sessions use the same memory pool that's allocated for your service instance. Using SSH requires about 2 MB of memory, plus about 3 MB for each active session (not including memory used by processes executed during the session).
As an example, let's say we SSH into one service instance from two different computers to run bash. In this case, memory usage would look like this:
- 8 MB for SSH
- 2 MB for SSH access
- 2x3 MB for the two SSH sessions
- 7 MB for bash
- 2x3.5 MB for the two bash processes
Total memory usage in this case is about 15 MB.