Configuring Cloudflare DNS
This guide assumes you've already added a custom domain from Cloudflare to your service in the Render Dashboard. If you haven't done this yet, first read Custom Domains.
Common setup
Most commonly when setting up a Cloudflare custom domain, you add a CNAME record for the root domain, along with another for the www subdomain.
Remove all AAAA records for your domain if it has any. AAAA records map a domain to a corresponding IPv6 record, but Render does not yet support IPv6 addresses. As a result, AAAA records can interfere with your custom domain's behavior on Render.
-
Log in to your Cloudflare dashboard and select your domain from the Home page to open its settings.
-
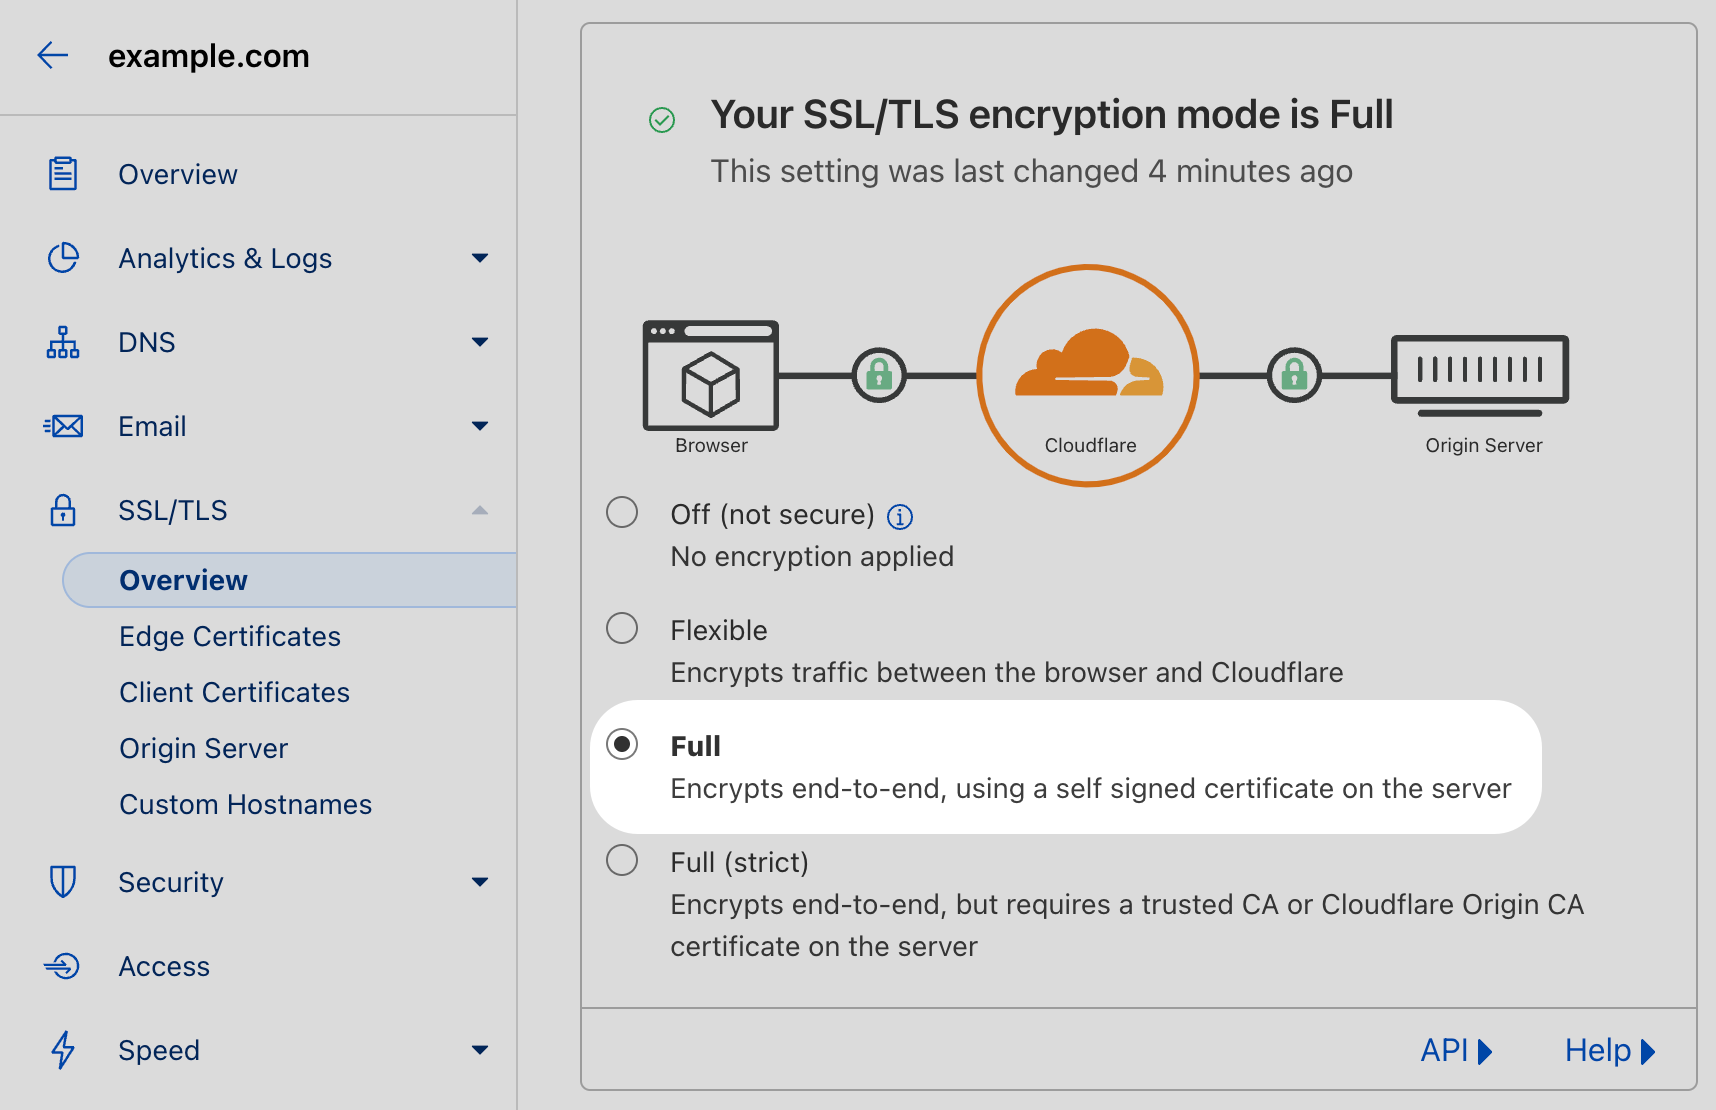
Navigate to SSL/TLS > Overview. Set your encryption mode to Full:
-
Navigate to DNS > Records and click Add record.
-
Create a new CNAME record that points to your Render service's
onrender.comsubdomain (obtain this value in the Render Dashboard):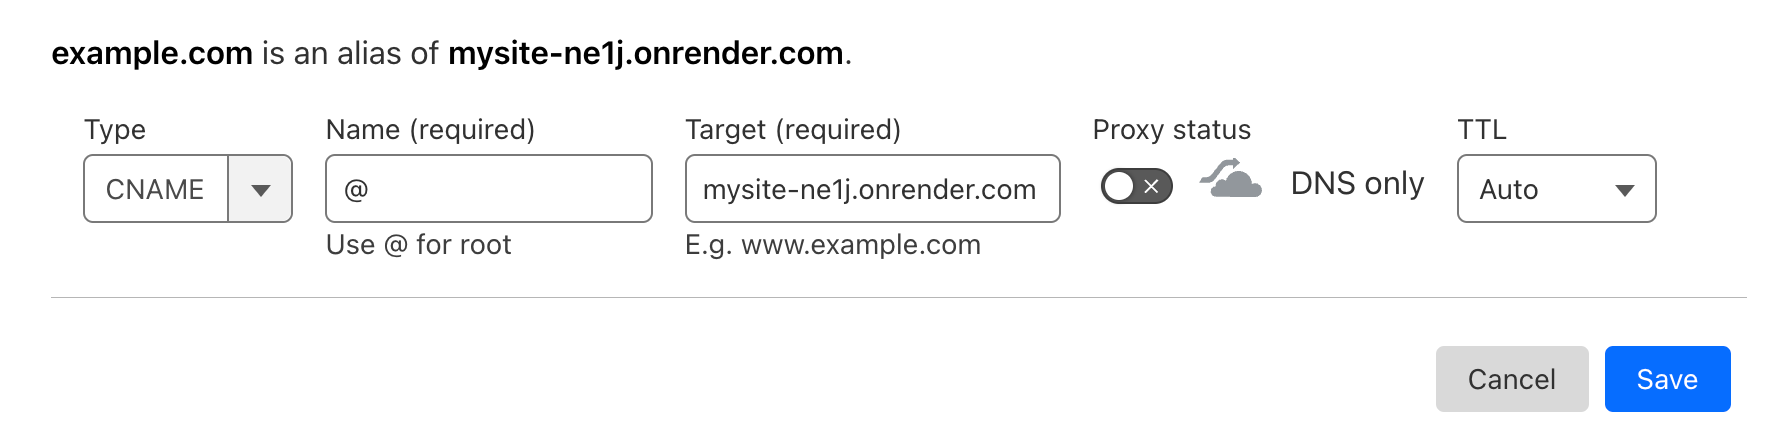
- Set Name to
@to specify your root domain (next you'll add a separate record forwww). - Set Target to your Render service's subdomain (e.g.,
example.onrender.com). - Set Proxy status to DNS only. This ensures that requests go to Render instead of Cloudflare, so that we can verify the domain and issue a certificate.
Click Save.
- Set Name to
-
Repeat the previous step to create a second CNAME record.
- This time, set Name to
wwwand provide the same values as before for Target and Proxy status.
Click Save.
- This time, set Name to
-
Your completed configuration should resemble this:


That's it! DNS changes might take a few minutes to propagate, after which your domain points to your Render service. You can check the status of your service's certificates and manually request verification in the Render Dashboard under Custom Domains:

After the Render Dashboard indicates that your certificates are issued and valid, you can optionally set Proxy status to Proxied for your CNAME records.
Adding a wildcard custom domain without the base domain
Your Cloudflare domain requires some additional configuration if all of the following are true:
- You're adding a wildcard custom domain (e.g.,
*.example.com) to your Render service. - You are not adding the corresponding base domain (e.g.,
example.com) to your service. - You've enabled proxying for your base domain (i.e., Proxy status is set to Proxied).
Origin override with a Cloudflare Worker
To direct wildcard traffic to Render while directing base domain traffic elsewhere, you can use a Cloudflare Worker to perform an origin override.
The instructions below assume the following:
- You have the custom Cloudflare domain
example.com. - You want your Render web service
example.onrender.comto serve traffic for*.example.com - You want
base-domain-origin.comto serve traffic forexample.com.
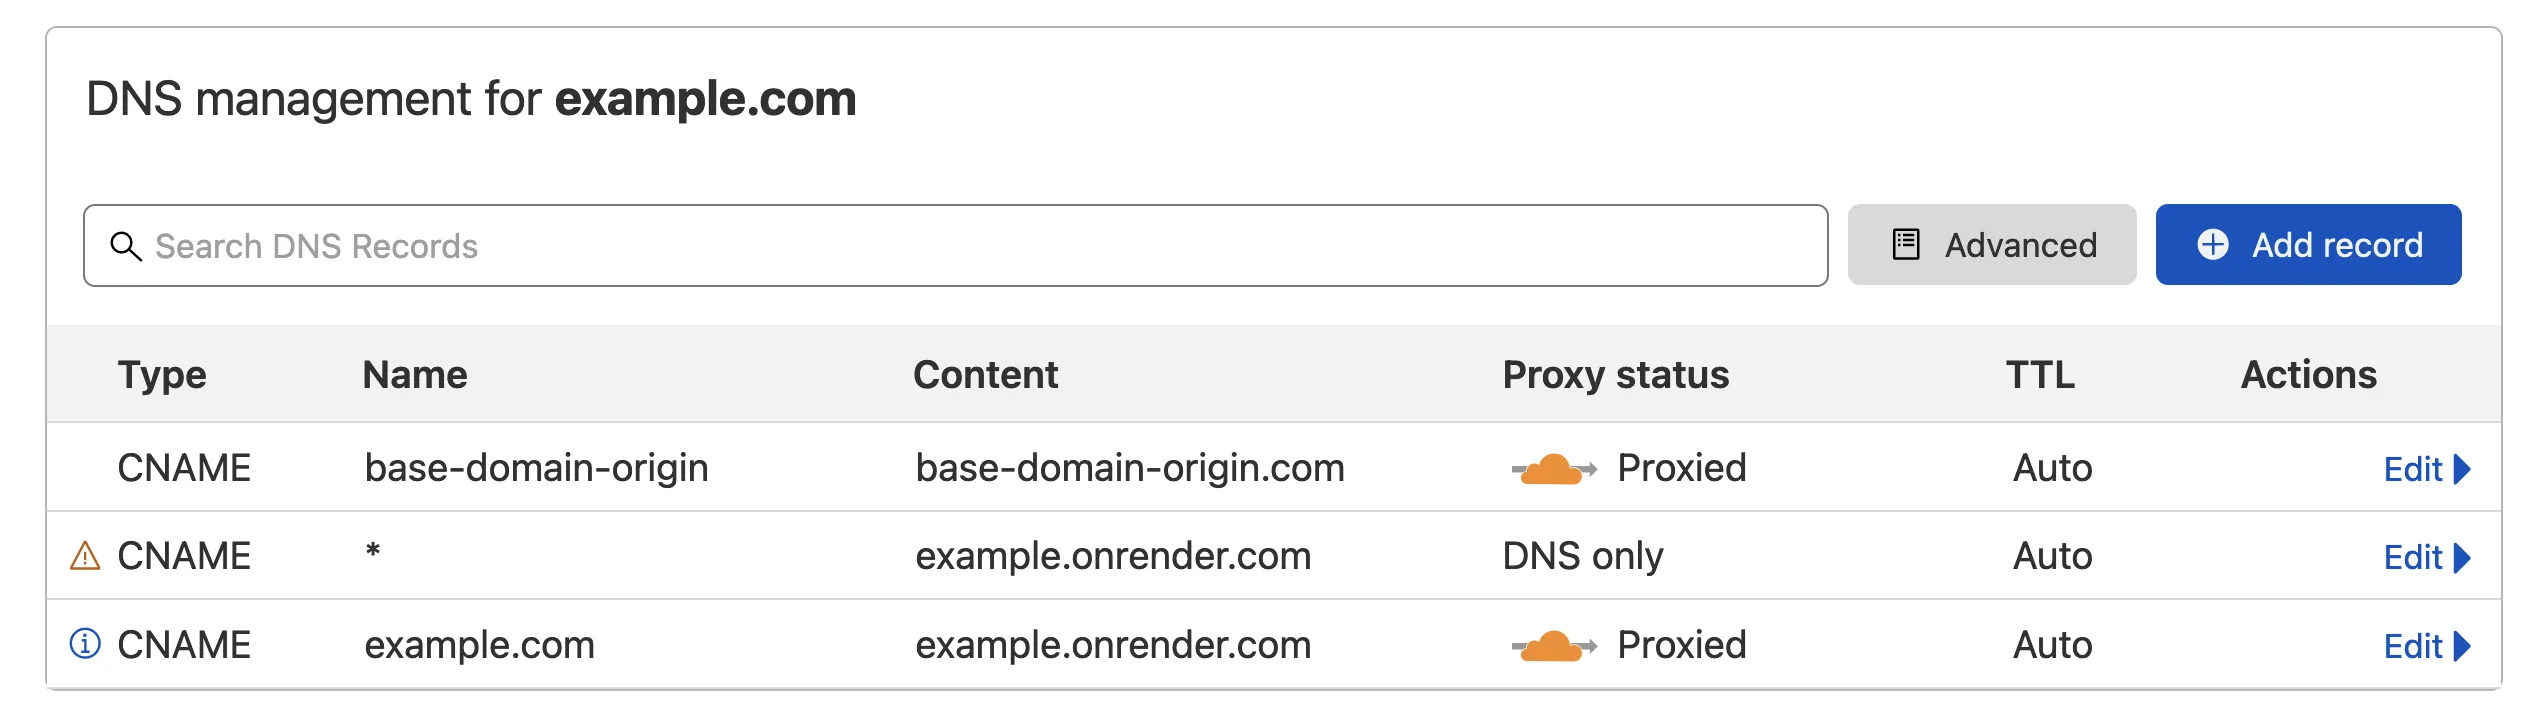
1. Add a DNS record pointing to base-domain-origin.com

2. Create a Worker
-
Navigate to Workers -> Overview -> Create Service
-
Name your service
base-domain-override, select HTTP Handler, and click Create service
-
Scroll down and click Quick Edit.
-
Add the following configuration. Replace
example.comwith your custom domain and make sure thebase-domain-originsubdomain matches the DNS record you created in the first step.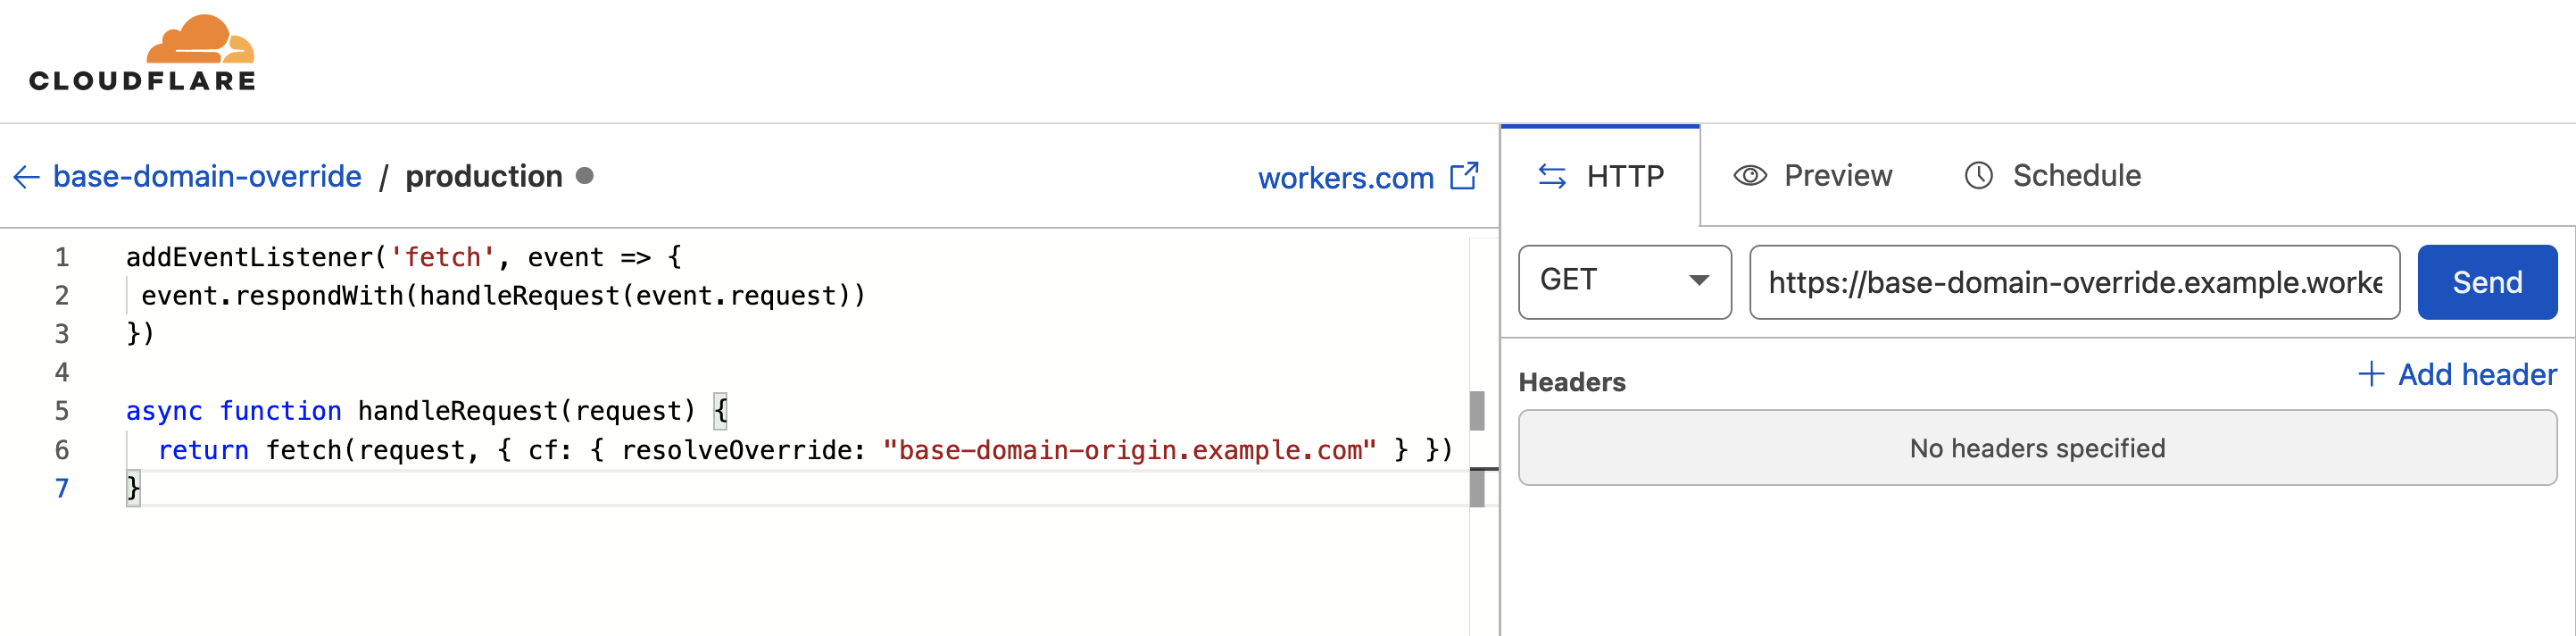
-
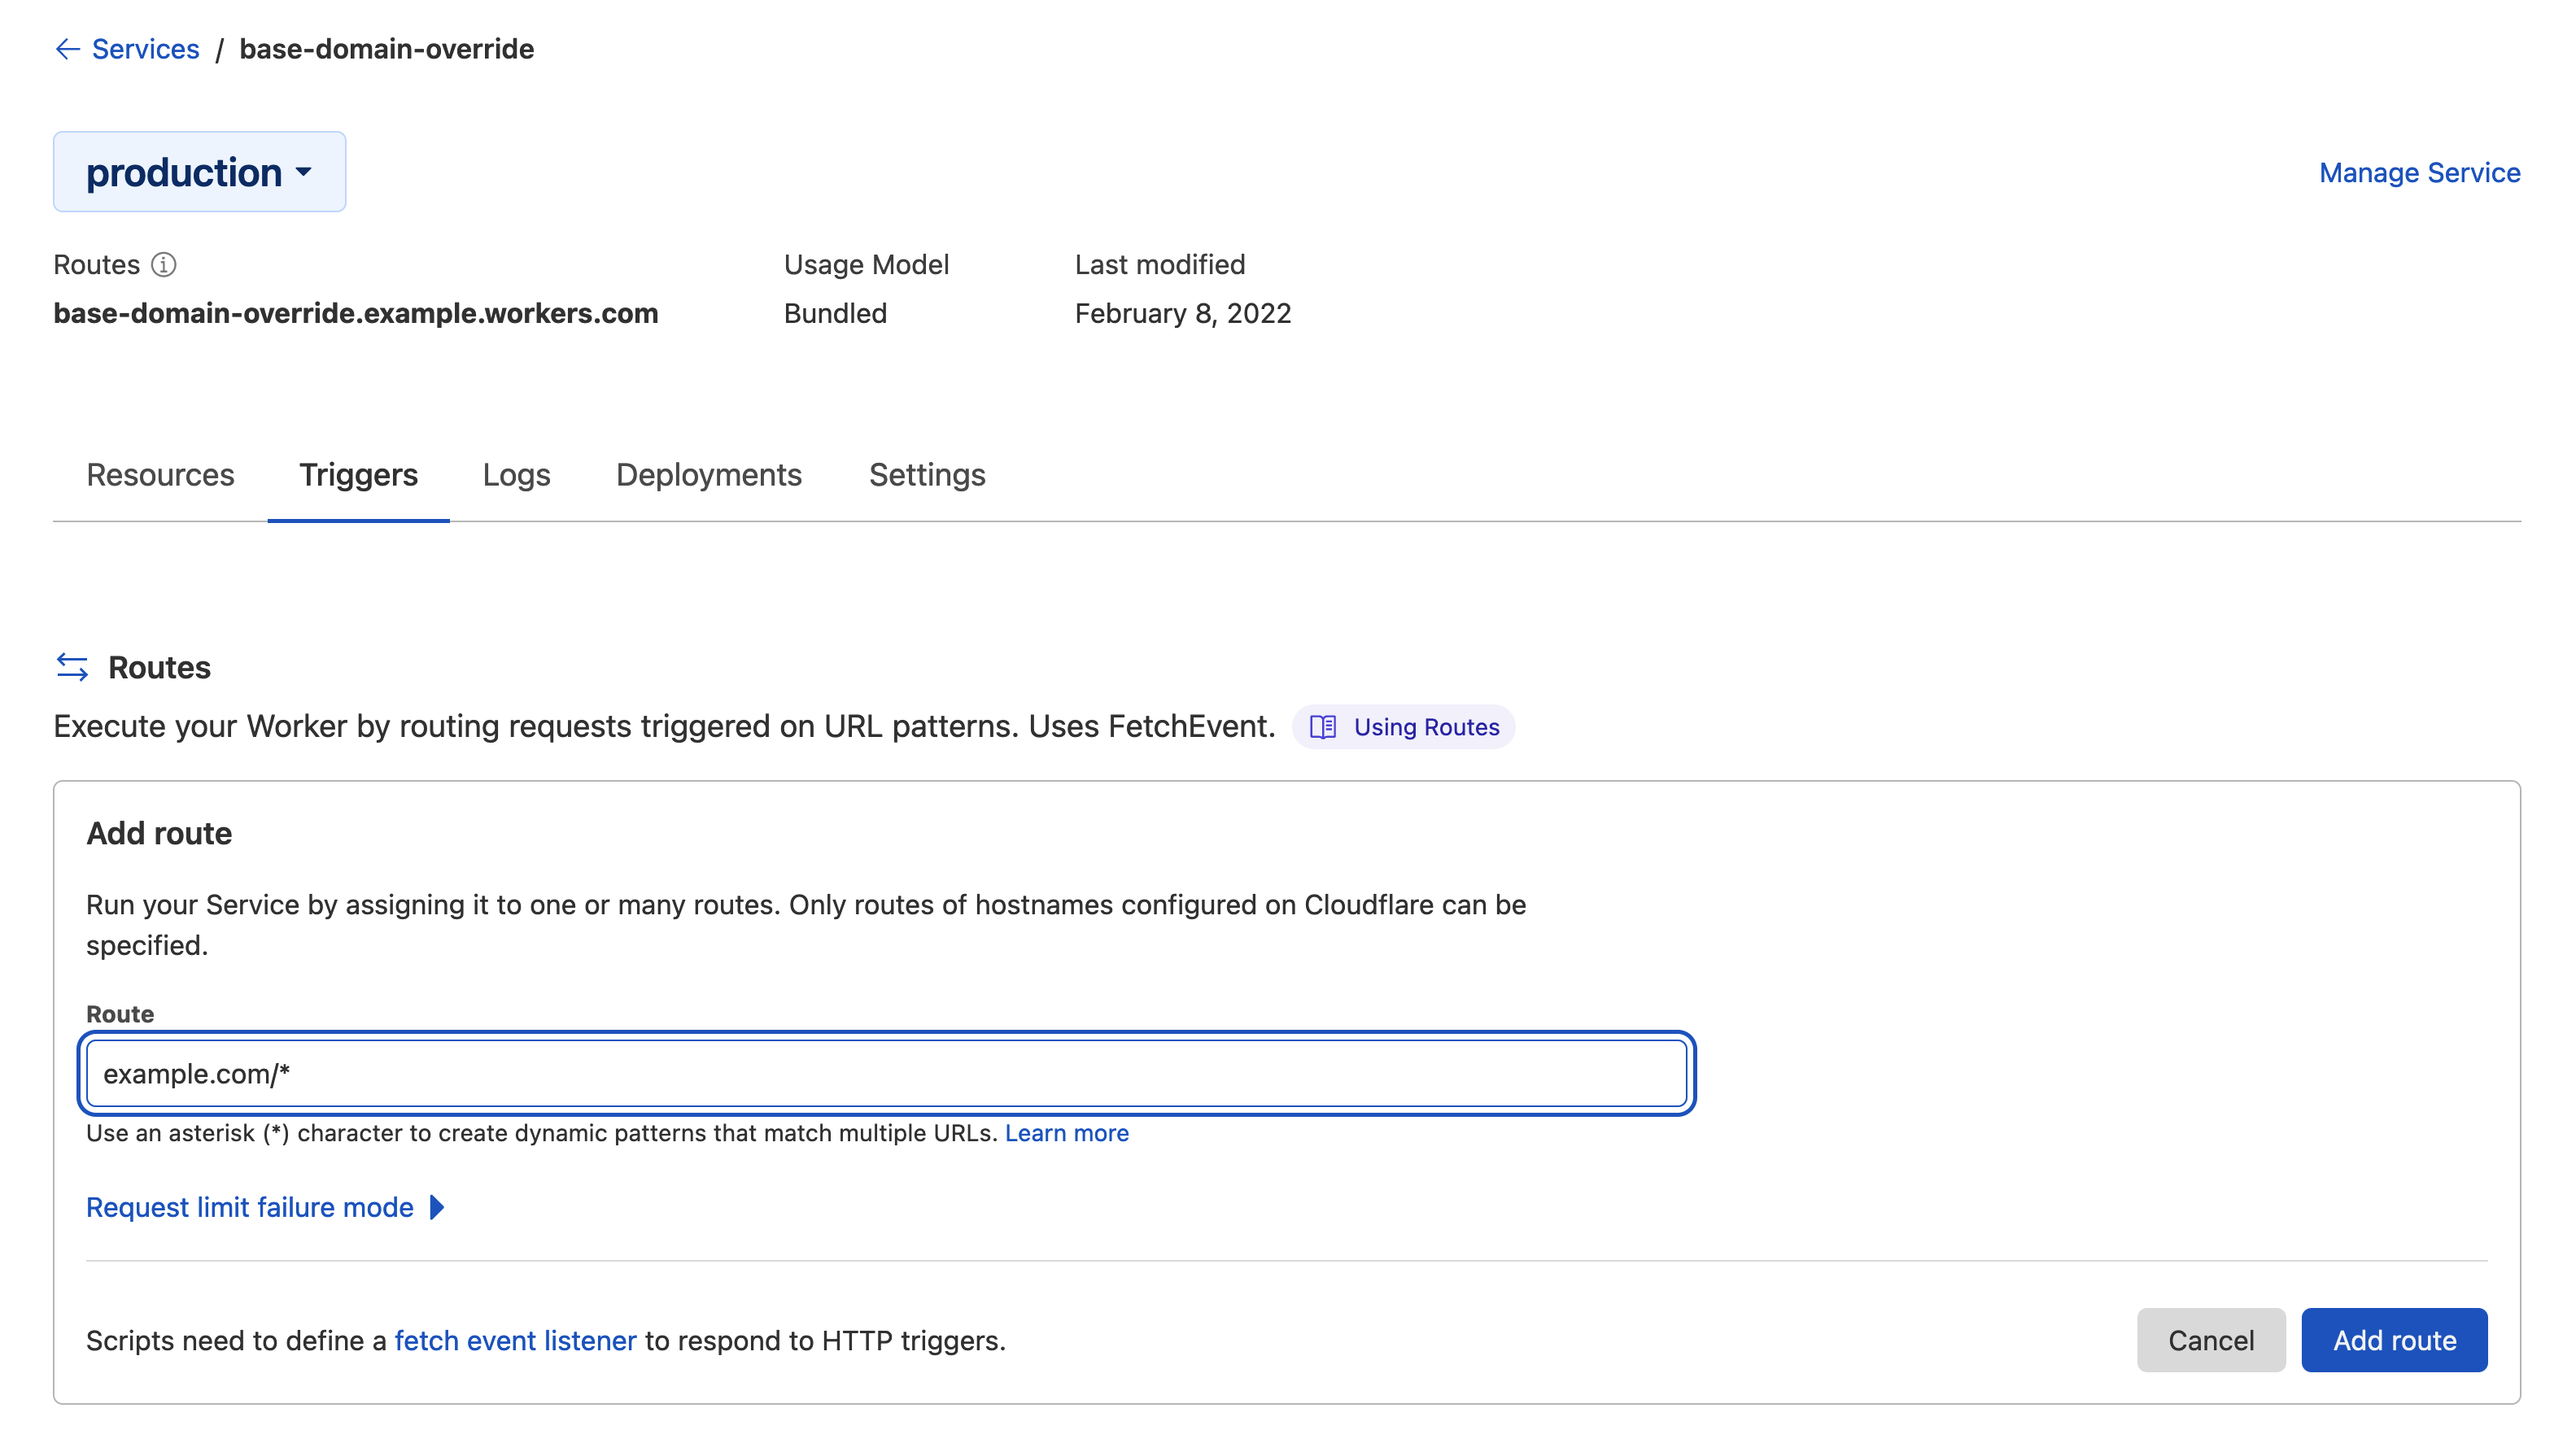
Click Save and Deploy -> Navigate back to the Worker overview page -> Click Triggers -> Add Route
-
Add a route matching your base domain and click Add Route:
-
Finally, add CNAME records for both your base domain and wildcard domain pointing to your onrender subdomain. Pointing your base domain to Render is required for an orange to orange setup. With this configuration, Cloudflare will send traffic to your zone first. The Worker that you just set up will match the route and trigger an origin override, so traffic for the base domain will not get sent to Render. If you do not do this, Cloudflare will send the traffic directly to Render's zone and the Worker you set up wil have no effect.


Your wildcard traffic should now be directed to Render and your base domain traffic directed to the origin you specified. If you have any questions, you can get in touch with us at support@render.com.