SAML Single Sign-On (SSO)
Manage access to your Render organization with your identity provider.
SAML SSO and SCIM require a Scale plan or higher.
For details, see the pricing page.
With a Scale or Enterprise plan, you can enable single sign-on (SSO) for your organization via a SAML 2.0-compatible identity provider (IdP), such as Okta or Microsoft Entra.
After setting up SSO, you can also manage provisioning and deprovisioning organization members via SCIM.
All steps described in this article must be completed by an org member with the Org Owner role. If you need help with any of these steps, please reach out to our support team in the Render Dashboard.
SSO setup
1. Verify domain ownership
Render needs to verify that you own any domains you're configuring for SSO. To enable this, you add a TXT record with a Render-provided value to each domain's DNS configuration.
-
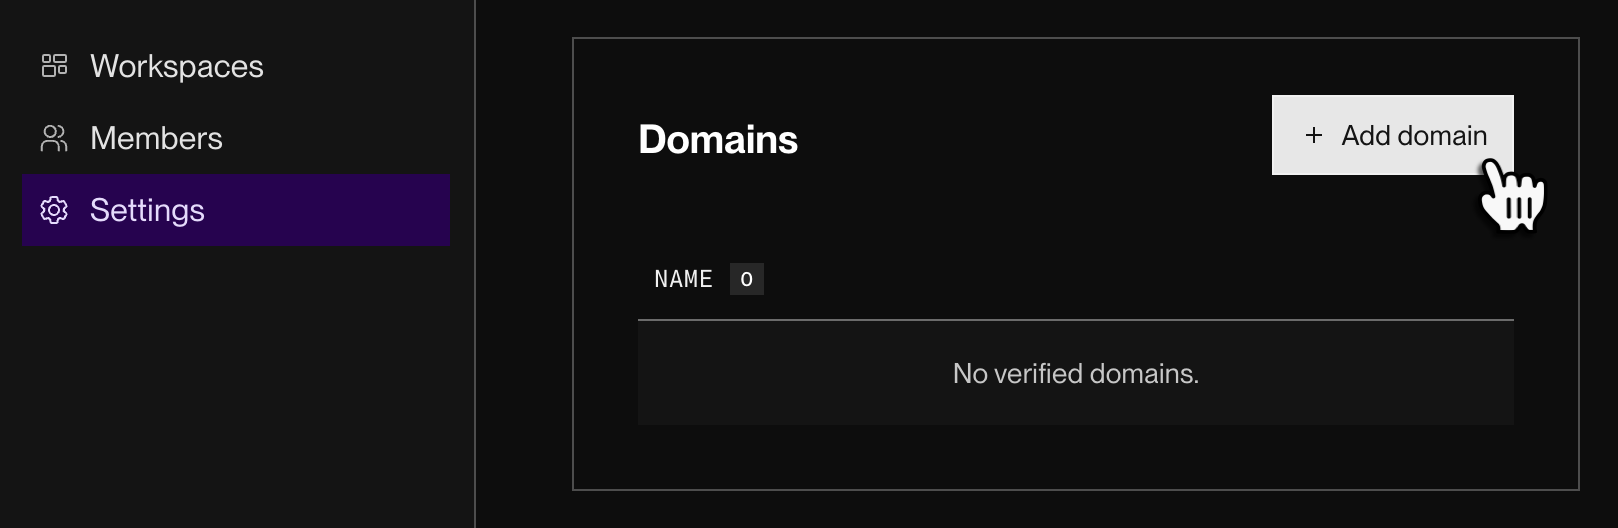
From your organization home in the Render Dashboard, open the org's Settings page.
-
Scroll down to the Domains section and click + Add domain:
-
Click + Configure connection.
The following dialog appears:
-
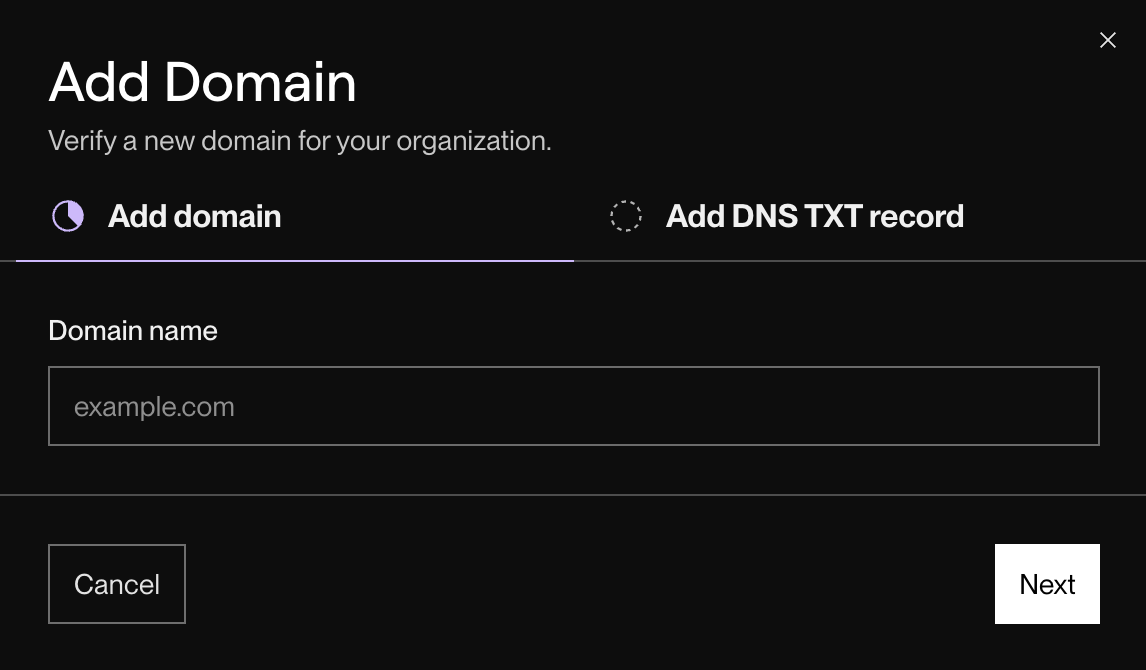
Enter the domain you want to verify and click Next.
-
The dialog displays the Hostname (
_render-domain-challenge) and Value for the TXT record you'll add to your domain's DNS configuration. -
In your DNS provider's admin console, add a new TXT record with the provided Hostname and Value.
- Consult your DNS provider's documentation for instructions on adding a TXT record.
Your DNS change might take up to 24 hours to propagate.
Render cannot verify your domain until the new TXT record is visible in your domain's DNS configuration.
-
After the DNS change has propagated, return to your org's Settings page and click the Retry verification button next to the domain you added:
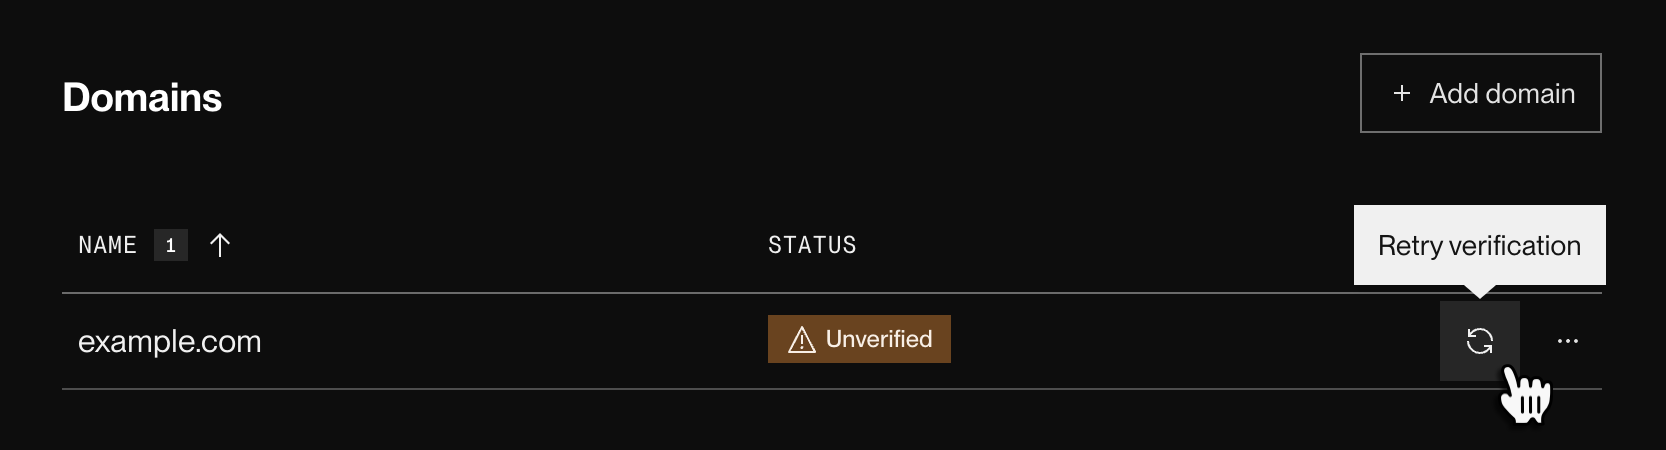
If the verification succeeds, the domain's status updates to Verified.


Repeat the steps above for each domain you want to configure for SSO.
2. Configure your IdP
-
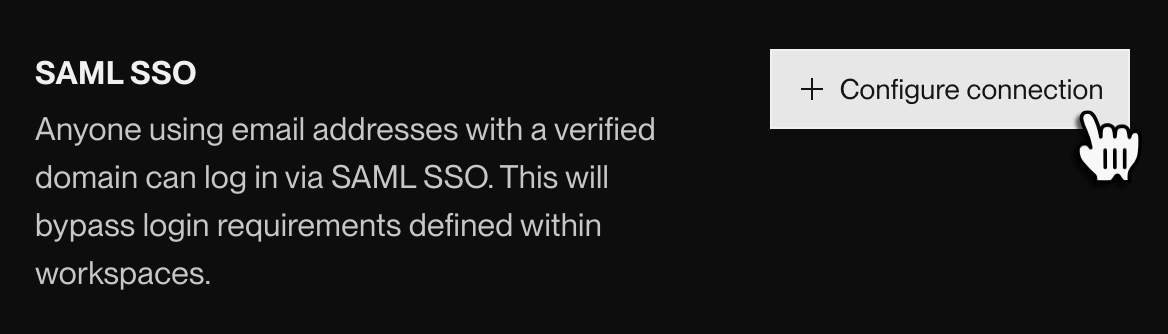
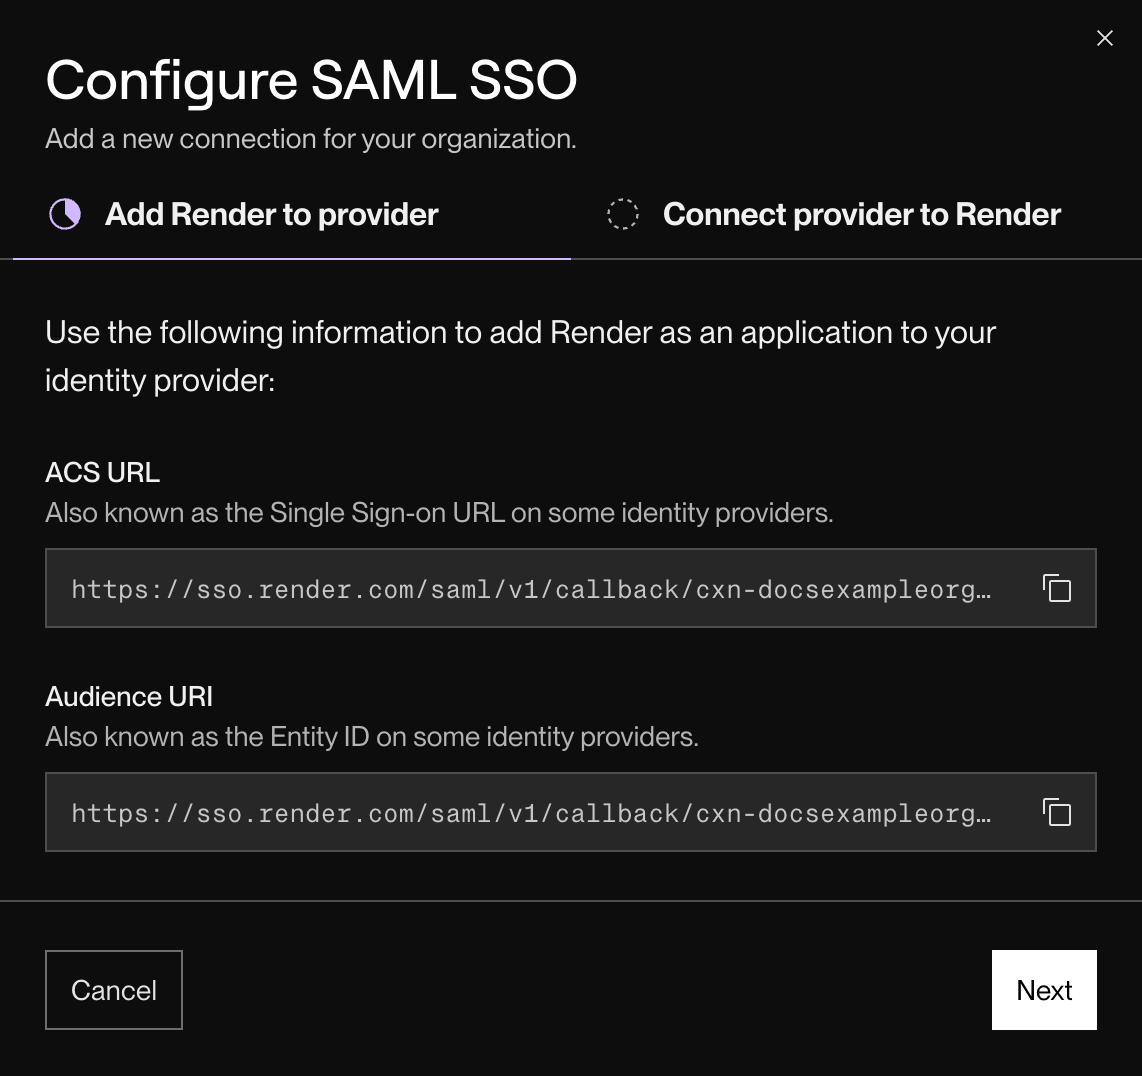
From your org's Settings page in the Render Dashboard, scroll down to SAML SSO and click + Configure connection:
The following dialog appears:
-
Copy the ACS URL and Audience URI values. You'll provide these to your IdP.
-
In your IdP's admin console, create a new SAML 2.0 application for Render.
- Consult your IdP's documentation for instructions on creating a new SAML application.
-
Provide your ACS URL and Audience URI values in your new SAML application's configuration.
- Some IdPs might refer to ACS URL as Single Sign-On URL.
- Some IdPs might refer to Audience URI as Entity ID.
-
After your application is created, obtain its metadata URL.
-
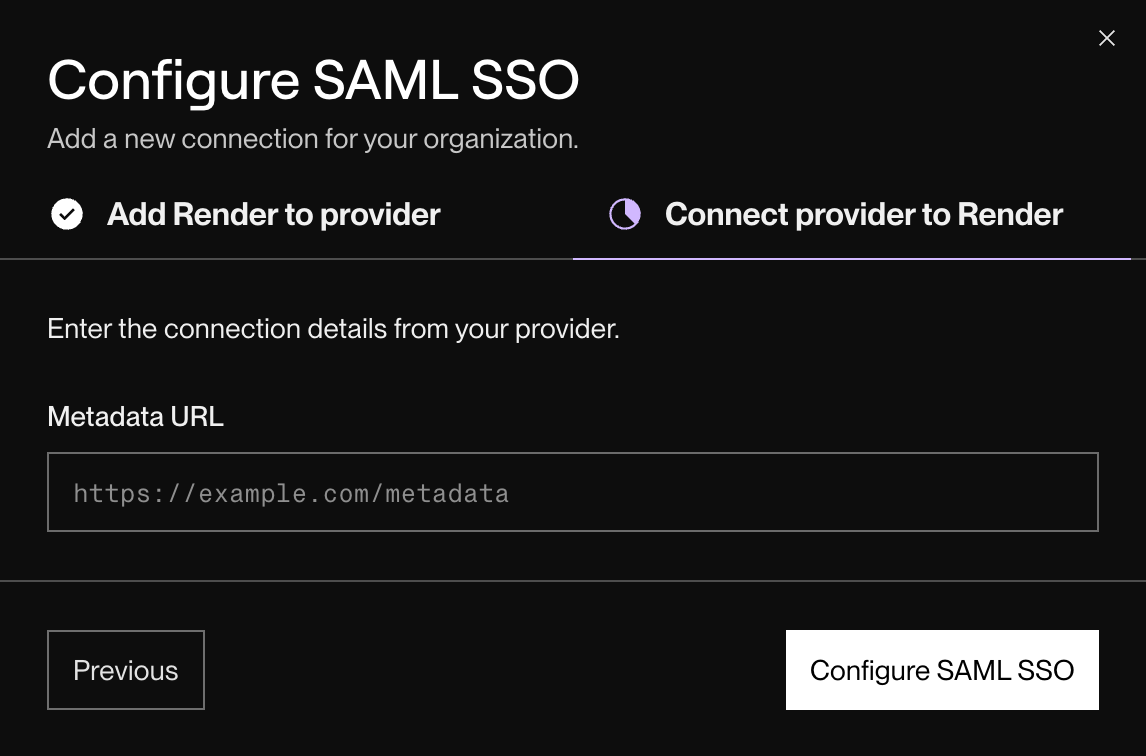
Back in the Render Dashboard, return to the SSO configuration dialog. Switch to the Connect provider to Render tab:
-
Paste your IdP's metadata URL and click Configure SAML SSO.


3. Add yourself to your SAML application
In your IdP's admin console, add yourself to the new SAML application you created for Render. Only the users you add to this application can log in to Render via SSO.
You can add other org members to the application after you confirm that SSO login works as expected.
4. Test SSO login
You should now be able to log in to Render via SSO with your IdP-managed email address. Your org doesn't yet require SSO login (you configure this later), so you can fall back to another login method if the flow fails.
-
Log out of the Render Dashboard.
-
Go to dashboard.render.com/login and click Sign in with SSO.
-
Provide your IdP-managed email address and complete your provider's login flow.
If you fail to log in, review your SSO configuration in the Render Dashboard and your IdP's admin console. If you need help, please contact our support team in the Render Dashboard.
5. Add other org members to your SAML application
After you confirm that the SSO login flow works as expected, you can add other org members to your SAML application in your IdP's admin console.
At this point, SSO is available as an optional login method for specified org members. Next, you can require SSO login for all org members.
Requiring SSO login
After you set up SSO for your org and confirm that it works as expected, you can then require all of your org members to log in via SSO.
Requiring SSO might lock out certain org members and/or invalidate certain API keys!
You can view a list of affected members and API keys before confirming the change. See details below.
-
From your organization home in the Render Dashboard, open your org's Settings page.
-
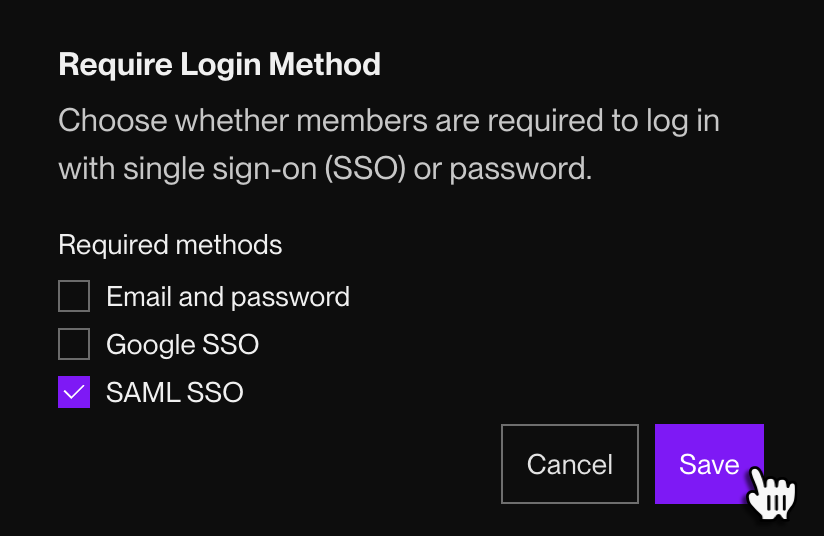
Under Security, find Require Login Method:
-
Click Edit, then select SAML SSO as a required login method.
-
Click Save. A confirmation dialog like this one appears:
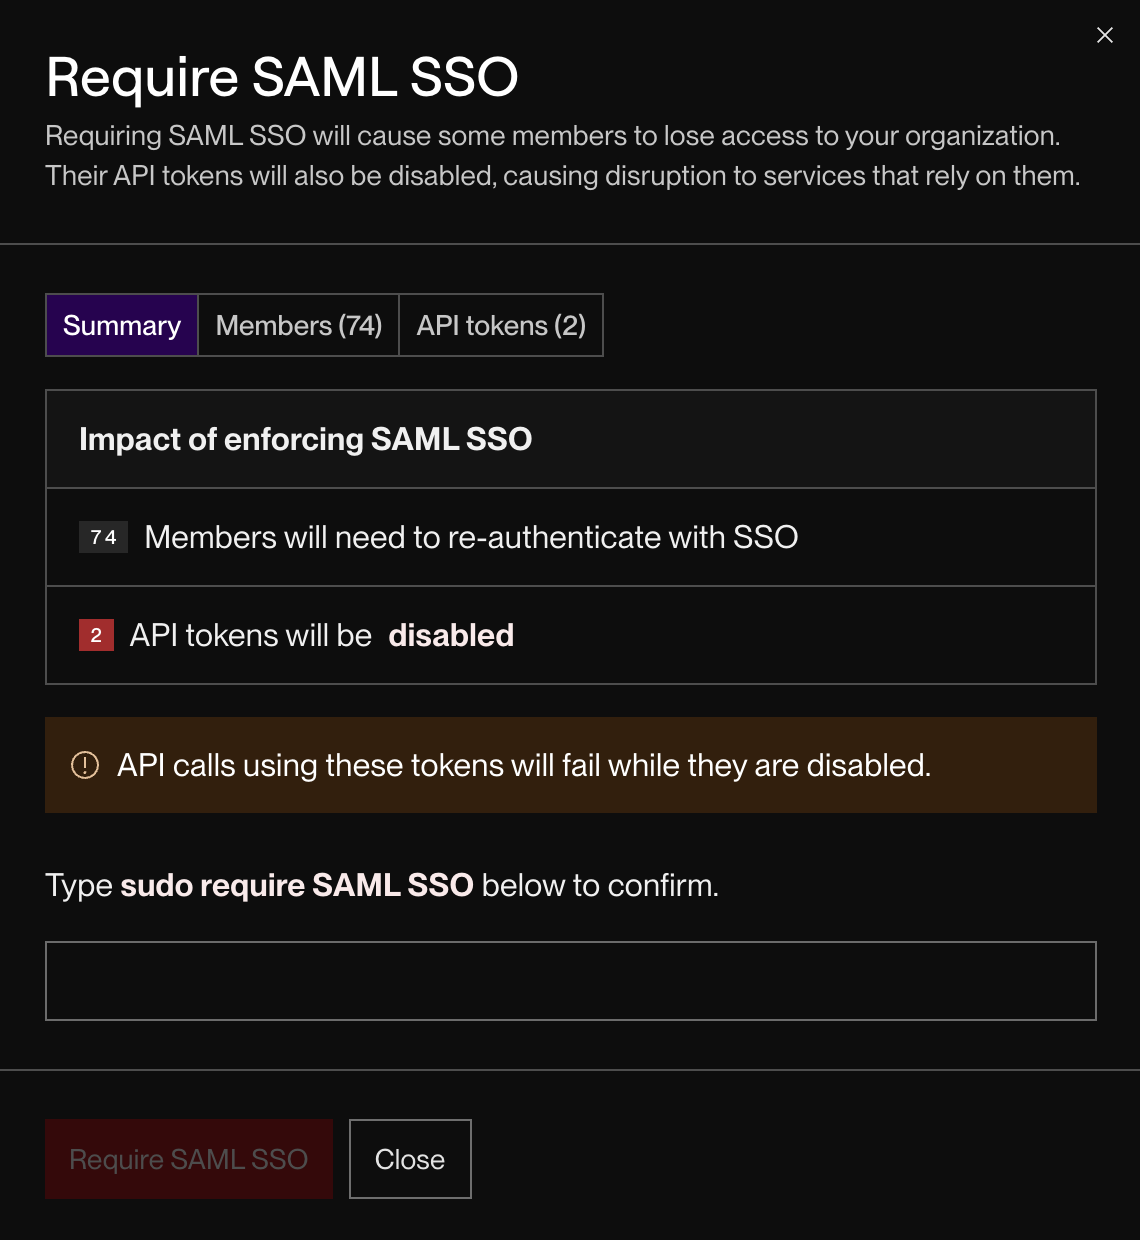
This dialog displays a report of your org members who have yet to log in via SSO, along with all API keys owned by those members.
Review this dialog carefully before proceeding!
If you enforce SSO:
- Each listed member will lose access to the org until they log in via SSO.
- Any member without an IdP-managed email address will permanently lose access to the org.
- Each listed API key will be invalidated until its owner logs in via SSO.
This will affect any integrations that rely on the invalidated API keys.
-
After reviewing the report, notify affected org members as needed. Direct them to log out, then log in via SSO.
- This ensures that the members and their API keys do not experience any interruption in service when you enforce SSO.
-
When you're ready, return to the confirmation dialog and click Require SAML SSO.


You're all set! With SSO enforced, all accounts managed by your IdP must use SSO to log in, even to view workspaces outside your org.
With SSO enforced, you can still invite guest members to individual workspaces in your org.
Because they can't log in via SSO, guests are restricted to the single workspace they're invited to. For details, see Member types. Guest invitations can only be accepted by a Render account with an email address that matches the address the invitation was sent to.
Member management setup (SCIM)
All SAML-enabled organizations support just-in-time (JIT) member provisioning. When a user logs in via SSO for the first time, Render adds them to your org as a member.
You can also optionally enable member management via SCIM. This enables you to provision and deprovision IdP-managed org members from your IdP's admin console.
1. Generate a SCIM token
-
From your organization home in the Render Dashboard, open the org's Settings page.
-
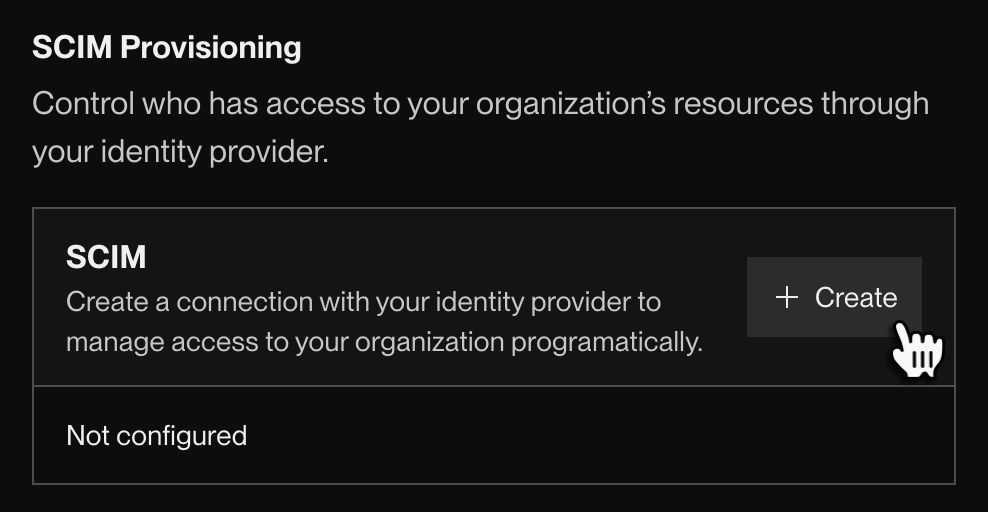
Under Security, find the SCIM Provisioning section and click + Create:
A SCIM Configuration dialog appears.
-
Copy the values of Base URL and Token in the dialog. You'll provide these to your IdP.

2. Configure SCIM in your IdP
-
In your IdP's admin console, navigate to the SAML application you created for Render.
-
Enable SCIM provisioning for the application.
- Consult your IdP's documentation for instructions on enabling SCIM provisioning.
-
Provide the following values for your application's SCIM configuration:
Field Value SCIM version 2.0 SCIM connector base URL https://sso.render.com/scim/v2/Unique identifier field for users emailAuthentication method HTTP Header Bearer token The Token value you copied during SCIM token generation
You're all set! Your IdP syncs with Render to enable managing org members from your IdP's admin console.
FAQ
Which plans support SSO?
SSO is available with a Scale or Enterprise plan. For details, see the pricing page.
Can I use SSO with multiple identity providers?
No. Each Render organization can connect only one IdP for SSO.
Does Render SSO support OIDC or other non-SAML protocols?
No. Currently, Render SSO only supports SAML 2.0.
If I enable SSO, can I add guests to my org from outside my company?
Yes. Workspace admins can add guests to individual workspaces in your org.
Guests can't log in via SSO and are restricted to the single workspace they're invited to. For details, see Member types.
What happens to resources created by a SCIM-deprovisioned org member?
- Deprovisioned members are immediately logged out of Render and cannot log back in.
- All API keys belonging to the deprovisioned member are immediately invalidated.
- Any services originally created by the member remain active and are not affected.