The Render Dashboard
Manage your Render services, workspaces, and billing.
The Render Dashboard is the web interface for managing everything in your Render workspace—services, team members, billing, and more:

Your dashboard's main page lists the services in your workspace, along with any projects you've organized them into. Click any service to view its details, logs, and settings.
Use the left panel to jump to views for your Blueprints and environment groups.
This article describes some common dashboard actions to get you up and running. Most dashboard actions are documented in the article for the corresponding feature.
You can also manage Render resources from your terminal with the Render CLI or programmatically with the Render API.
Create a new service
Create a new service by clicking the + New button in the top-right corner of the Render Dashboard:

Select a service type from the list and complete the creation flow to deploy your code.
Deploying for the first time? See Your First Render Deploy.
Create a workspace
See Workspaces, Members, and Roles.
Navigate the dashboard
Open workspace-wide search with ⌘+K / CTRL+K, then use the arrow keys to jump directly to any resource:

While viewing a resource, use the breadcrumbs at the top of the page to navigate to a different service, environment, or project:

Switch workspaces using the dropdown at the top of the left pane:

Manage billing
From your workspace's homepage in the Render Dashboard click Billing in the left pane:

From this page, you can:
- View and update your plan
- Update your payment method
- View accrued usage charges for the current billing month
- View invoices for past months
- View usage against your monthly included amounts of:
- Free instance hours
- Outbound bandwidth
- Build pipeline minutes
Customize appearance
Set your display theme
The Render Dashboard provides light and dark display themes, along with high-contrast variants of each.
You can also customize the log explorer's theme independently from your main dashboard theme.
To set your display theme:
-
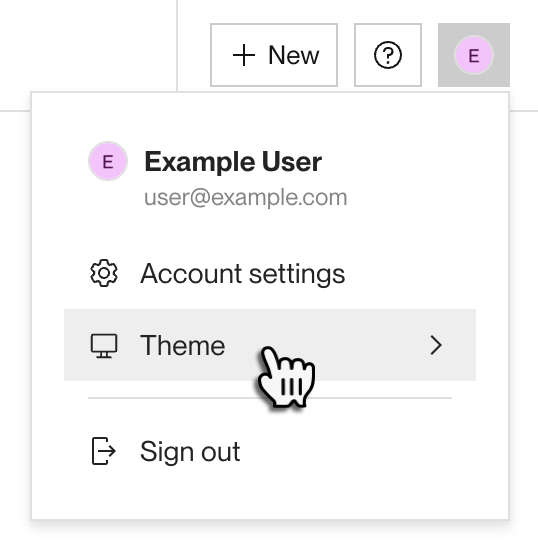
Open the account menu in the top-right corner of the Render Dashboard:
-
If you don't need to toggle high contrast, click Theme to set your display theme and you're all set!
If you do need to toggle high contrast, instead click Account settings.
-
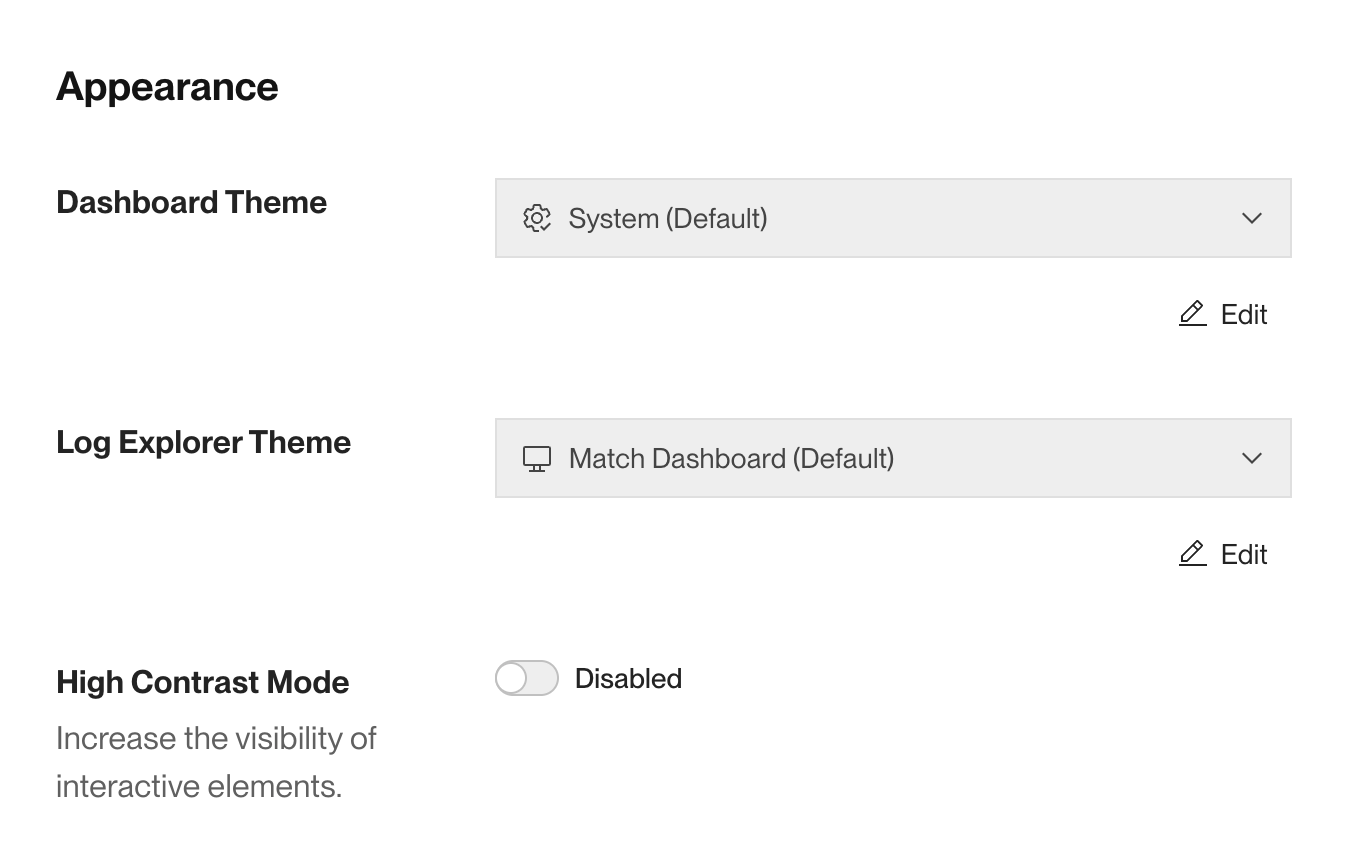
Scroll down to the Appearance section:
-
Click Edit to switch between Light, Dark, and System (which follows your operating system's theme).
-
Click Save changes.
-
Separately, you can also customize the following from this section:
- Toggle High Contrast Mode.
- Set the log explorer's theme independently from your dashboard theme.


Set your user avatar
From your Account Settings page, click Edit under the Avatar section:
![]()
You can upload a custom image or set a text monogram.
By default, Render uses the Gravatar image for your account's email address. If you don't have a Gravatar image, Render sets a text monogram using the first letter of your email address.
Set your workspace avatar
Only workspace admins can set the workspace image.
From your workspace's Settings page, click Edit under the Avatar section:
![]()
You can upload a custom image or set a text monogram.
By default, Render sets a text monogram using the first letter of your workspace's name.