Configuring Namecheap DNS
This guide assumes you've added your domains to the corresponding Render service. If you haven't done this yet, follow the steps to add custom domains to your service.
To configure Namecheap for custom domains, we need to create A records for root custom domains and CNAME records for non-root domains (www or any other subdomains). In this guide, we'll configure Namecheap for example.com and www.example.com.
Make sure to remove any existing AAAA records for your domains when you update your DNS settings. AAAA records map a domain to a corresponding IPv6 record, but Render does not support IPv6 addresses yet. As a result, AAAA records can interfere with Render hosting your custom domains.
-
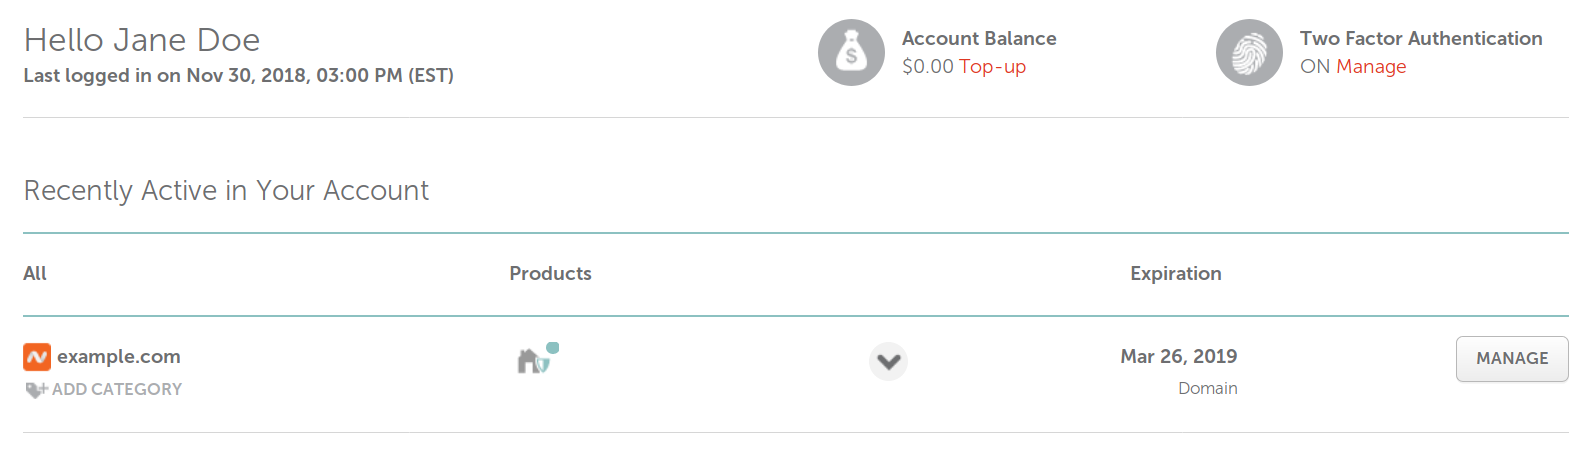
Log into Namecheap. You'll see your custom domain in the dashboard.
-
Click on the MANAGE button on the right and select the Advanced DNS tab.
-
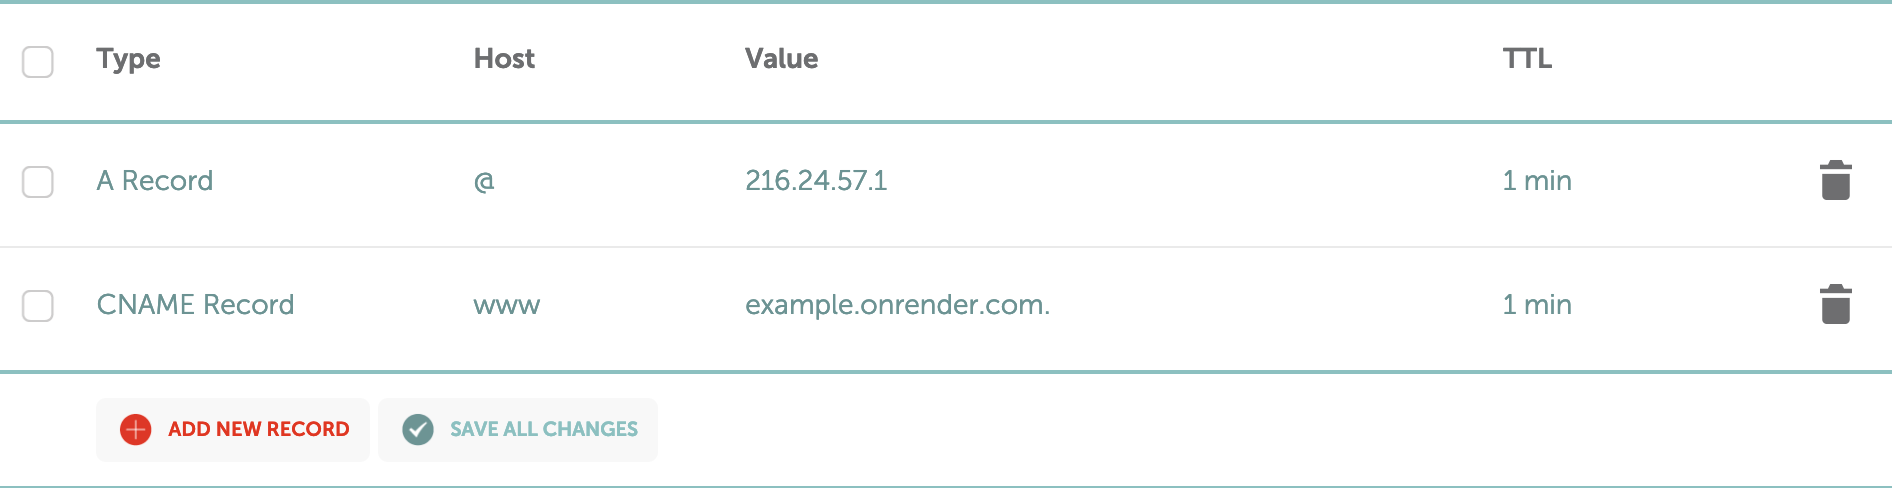
Remove any existing
Arecords for@and click onAdd New Record. Add anArecord for host@pointing to Render's load balancer IP216.24.57.1.We recommend setting the TTL to 1 minute so we can verify the domain faster.

-
Remove any existing
CNAMEor Redirect records forwwwand click onAdd New Record. Add aCNAMErecord for hostwwwpointing to your Render subdomain which looks likeexample.onrender.com.Again, set the TTL to 1 minute.

The final configuration should look something like this:


That's it! DNS changes can take a few minutes to propagate, but once they do you should be all set.