Deploy OpenClaw on Render
Run your personal agentic assistant on Render.
OpenClaw is a rapidly evolving project.
Before deploying, make sure you understand and are comfortable with the risks of integrating experimental agentic software with your other systems, and of providing secure credentials to this tool.
OpenClaw is a personal agentic assistant that integrates with a variety of messaging platforms, such as WhatsApp and Slack.
Note that some capabilities of OpenClaw expect a macOS environment, such as integrations with the macOS Notes and Reminders apps. These capabilities are not supported on Render.
What you'll deploy
Your OpenClaw deployment consists of a single Render web service that includes:
- OpenClaw gateway - The core AI assistant runtime
- Proxy server - A lightweight Go wrapper that provides token authentication and health checks.
- Persistent disk - Retains your configuration, sessions, and workspace files across deploys.
This template uses paid Render resources. It requires adding a payment method.
Render's Pro instance type is the smallest instance type that supports OpenClaw. A persistent disk is required to preserve data and configuration across deploys.
For details, see the pricing page.
1. Sign up for Render
Signing up is fast and free:
2. Copy the example template
Render provides a template that simplifies deploying OpenClaw using a Render Blueprint:
- Open the render-examples/openclaw-render template on GitHub.
- Click Use this template > Create a new repository in the top right.
- In the form that appears, set configuration options for your new repo, then click Create repository.
3. Create a Render Blueprint
Your newly created repo contains a render.yaml file that defines your OpenClaw web service:
The full file in your repo includes all required environment variables and configuration.
To deploy using Blueprints:
-
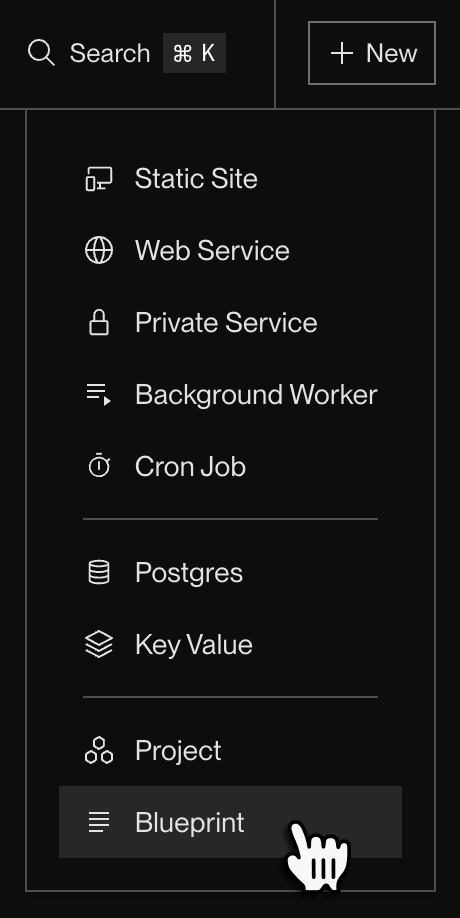
In the Render Dashboard, click New > Blueprint:
-
If you haven't yet, connect your GitHub account to Render. This enables Render to fetch the
render.yamlfile from your repo. -
Under Connect a repository, click the Connect button for the repo you created earlier.
This opens a Blueprint creation form.
-
Provide a Blueprint Name and confirm that you're pulling the Branch you expect from your repo.
-
You'll be prompted to enter values for environment variables for various AI providers:
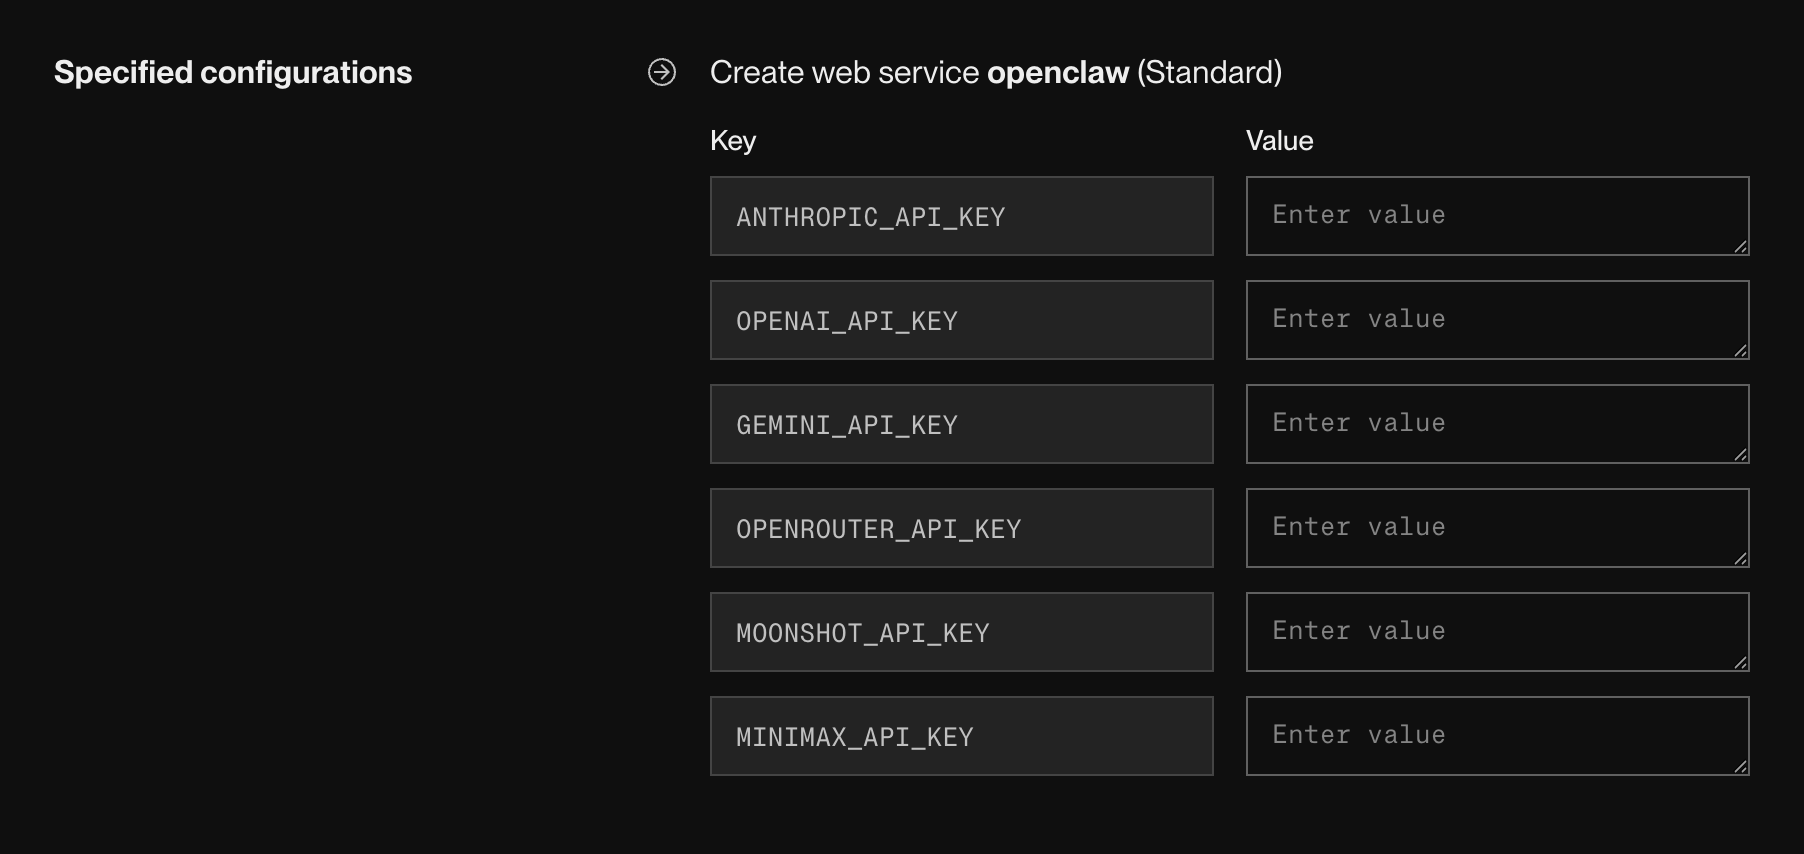
Provide API keys for each provider you intend to use.
-
Review the costs associated with your Blueprint, then click Deploy Blueprint. Render kicks off the initial sync, which creates your web service.


4. Access the Control UI
-
After your web service's deploy completes, navigate to your web service's page in the Render Dashboard. Its
onrender.comURL appears at the top: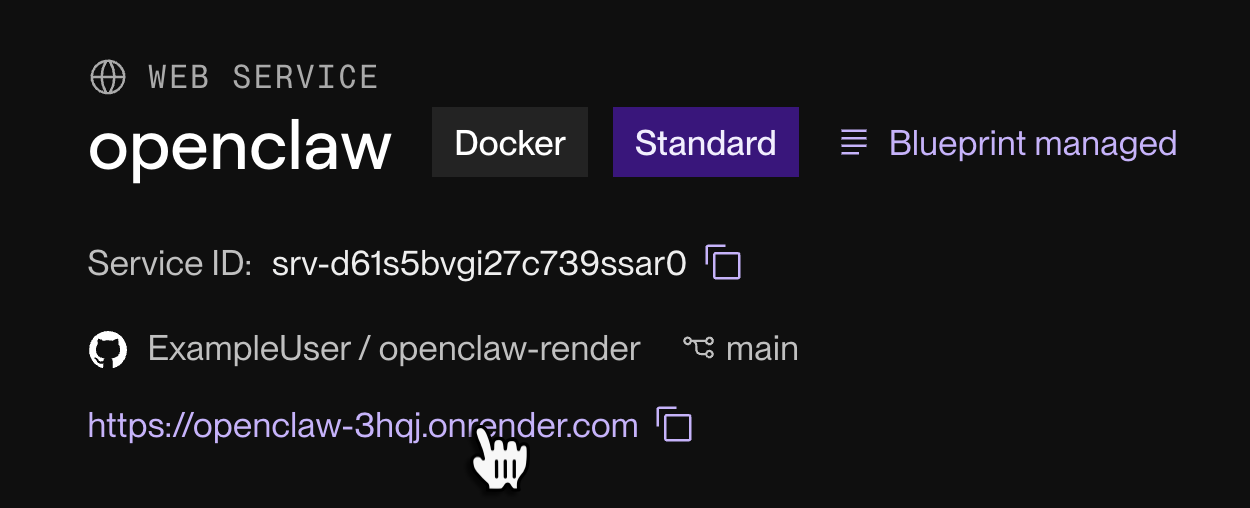
-
When you first visit this URL, the following dialog appears:

-
Obtain your service's
OPENCLAW_GATEWAY_TOKENfrom its Environment page in the Render Dashboard. This value was generated automatically as part of your Blueprint's first sync.Your gateway token is a secret credential!
Do not share this token with anyone. If you believe it's been compromised, replace its value from your service's Environment page.
-
Paste your token in the Gateway Token field and click Continue.


You're all set! Your browser redirects to the OpenClaw Control UI:

You're up and running with OpenClaw on Render! To start connecting messaging channels, customizing your assistant's behavior, and exploring available skills, see the official OpenClaw documentation.