Deploy n8n on Render
Automate a variety of AI-powered workflows.
This guide walks through deploying n8n on Render using the official n8n Docker image.
Use n8n to intelligently automate sequences of tasks across a wide variety of applications: post Slack messages, trigger CI/CD pipelines, create support tickets, and much more.
First, choose a storage method
Your n8n instance can use one of two methods to store workflow data on Render. The method you choose determines how you configure your deployment:
| Storage Method | Description |
|---|---|
|
Render Postgres (recommended) |
Store workflow data in a PostgreSQL database separate from your n8n instance. We recommend this strategy for the following reasons:
|
|
Store workflow data in SQLite on a disk attached to your n8n instance. This setup is more straightforward, because you don't need to connect your n8n instance to an external database. However, persistent disks require a paid service instance and prevent horizontal scaling. See above for more details on why we recommend using Render Postgres instead. |
After you choose a storage method, follow the corresponding setup instructions below.
Setup: Render Postgres
If you'll store workflow data in a Render Postgres database, your n8n deployment will consist of two Render resources:
- A web service that pulls and runs the n8n Docker image
- A Render Postgres database that stores your n8n workflow data
This setup uses free Render instance types.
Free web services spin down after 15 minutes of inactivity, and free Render Postgres databases expire after 30 days.
After you get up and running with n8n, you can upgrade your instances to remove these limitations and improve performance.
1. Sign up for Render
Signing up is fast and free:
2. Copy the example template
To simplify connecting your n8n instance to its database, we've created a template repo that enables you to deploy both resources together using a Render Blueprint.
- Open the render-examples/n8n template on GitHub.
- Click Use this template > Create a new repository in the top right.
- In the form that appears, set configuration options for your new repo, then click Create repository.
3. Create a Render Blueprint
Your newly created repo contains a render.yaml file that defines both your n8n web service and its database:
The full file in your repo includes helpful comments describing the purpose of included fields.
By defining our two resources this way, we can configure and deploy them together using Blueprints, Render's infrastructure-as-code model:
-
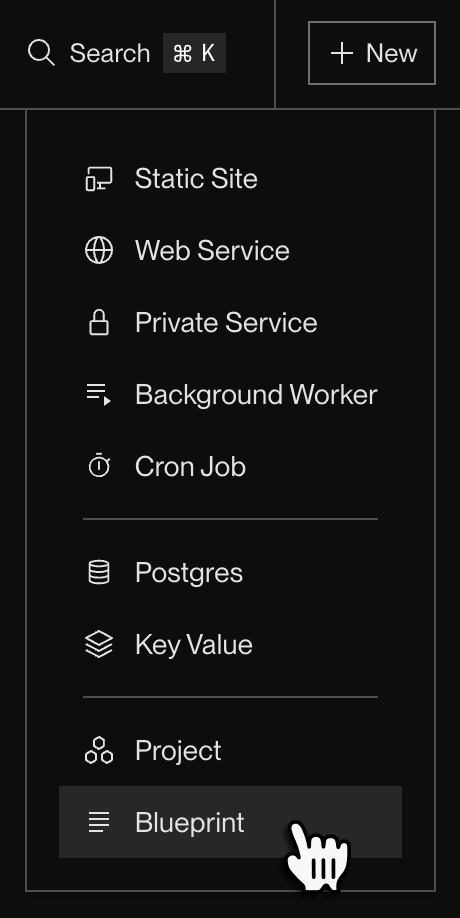
In the Render Dashboard, click New > Blueprint:
-
If you haven't yet, connect your GitHub account to Render. This enables Render to fetch the
render.yamlfile from your new repo. -
Under Connect a repository, click the Connect button for the repo you created earlier.
This opens a Blueprint creation form that lists the resources Render will create from your
render.yamlfile: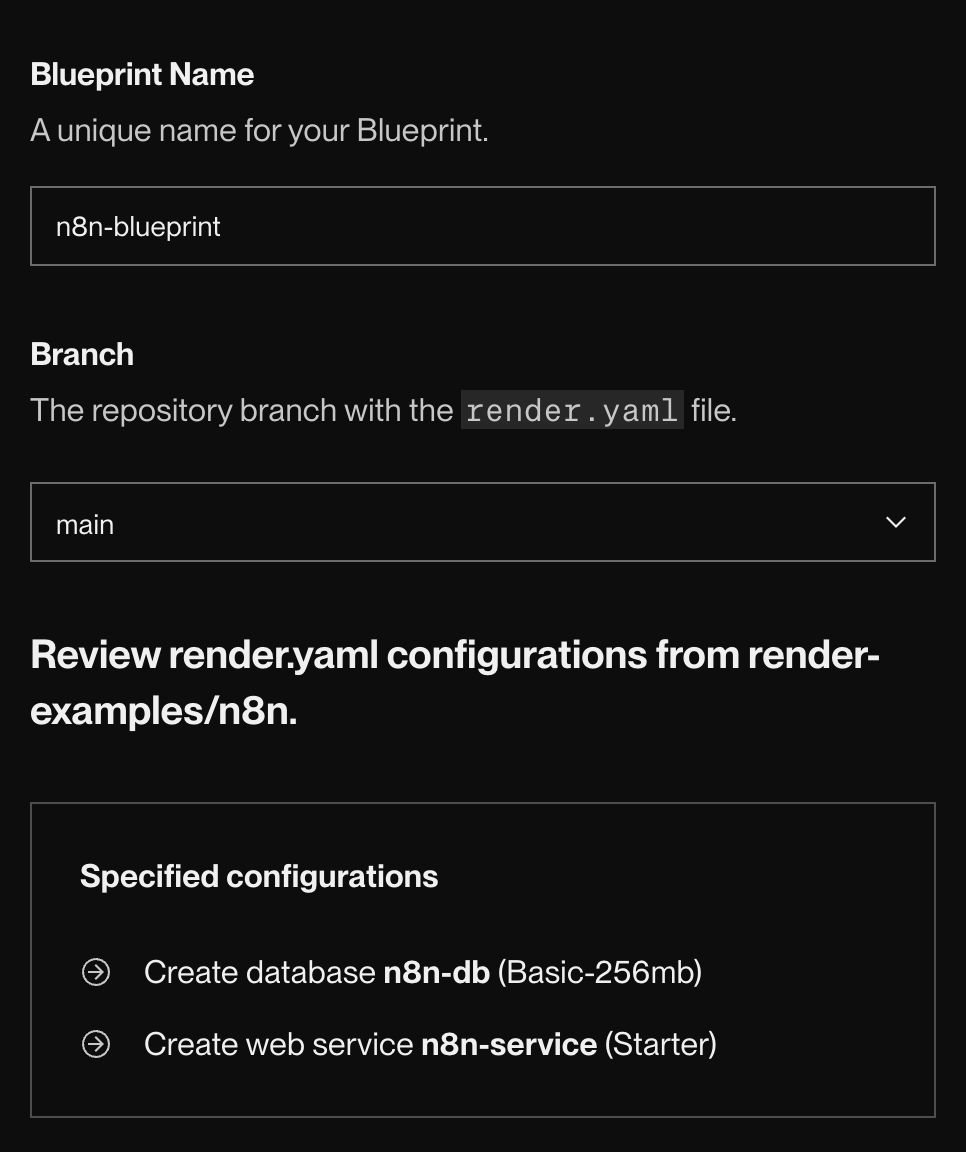
-
Provide a Blueprint Name and confirm that you're pulling the Branch you expect from your repo.
-
Click Deploy Blueprint.
Your Blueprint kicks off its first sync, which you can follow along with:
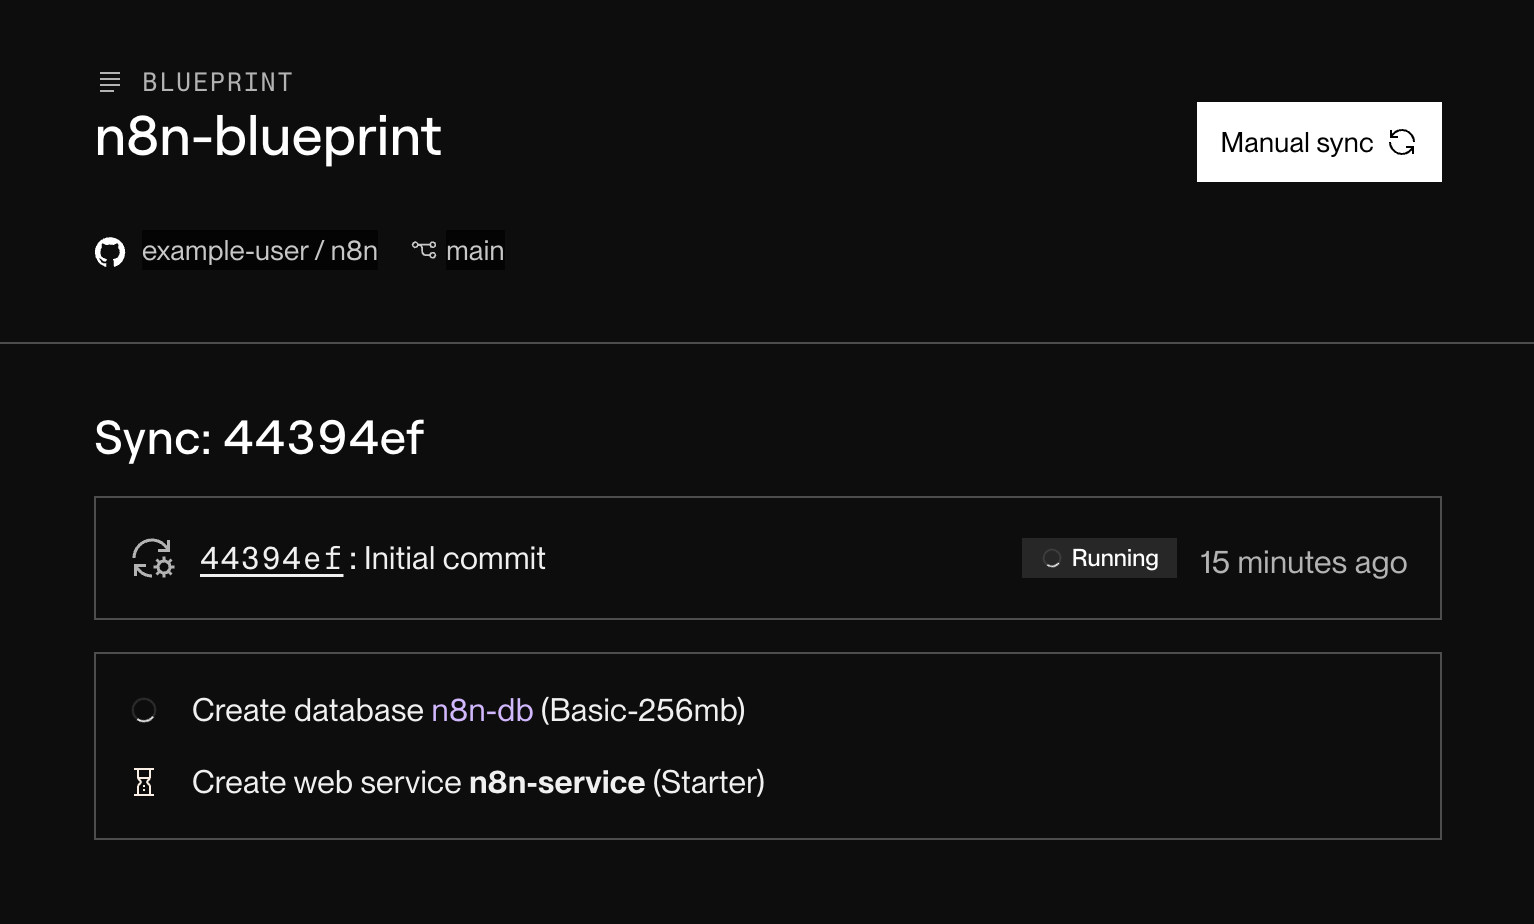
As each resource is created, a green checkmark appears next to it.
+ Database creation failed?
Your workspace might already have a free Render Postgres database (each workspace is limited to one). If so, do one of the following:
- Delete your existing free database in the Render Dashboard, then retry syncing the Blueprint.
- Update your
render.yamlfile to use a paid instance type for the database, then push the update to your repo to trigger a new sync.
-
After both resources become available, navigate to your new web service's page in the Render Dashboard. Its
onrender.comURL appears at the top: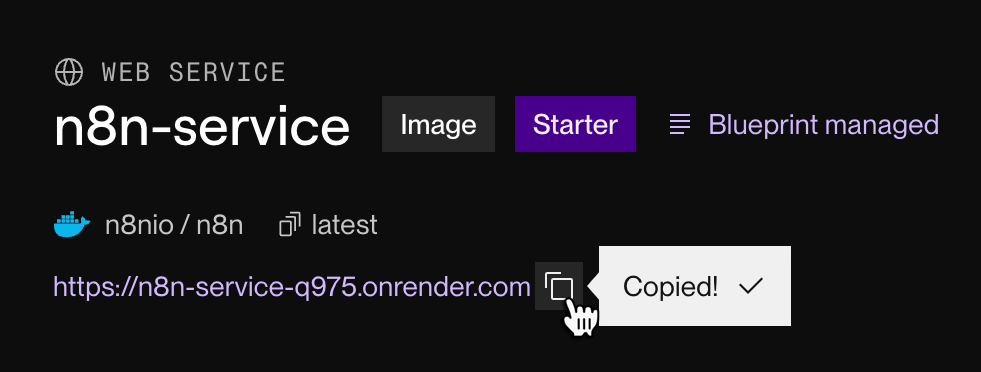
Visit this URL to access your n8n instance:


You're up and running with n8n on Render! Before you get started creating workflows, we recommend the following:
- Upgrade to paid instances before your free Render Postgres database expires.
- Review the additional configuration below.
4. Upgrade your instances
As specified by default in render.yaml, both your n8n web service and Render Postgres database use free instance types, which have important limitations. Most critically, your free database will expire after 30 days.
After you're up and running with n8n, you can upgrade these services to use paid instance types. Change the plan field for each service to the desired instance type, then push your changes:
- For n8n, we recommend running your web service on the
standardinstance type or larger.- Otherwise, n8n might encounter performance issues.
- The
basic-256mbis the smallest paid Render Postgres instance type and is usually sufficient for your n8n database.
See all supported plan values for web services and databases.
Setup: Persistent disk
If you'll store workflow data directly with your n8n instance, you create a Render web service and attach a persistent disk to it.
Note that persistent disks require a paid service instance. To get started for free, you can use Render Postgres instead.
Why attach a persistent disk?
By default, Render services have an ephemeral filesystem, which means that all changes to local files are lost whenever the instance is redeployed. A persistent disk enables you to retain filesystem changes across deploys.
1. Sign up for Render
Signing up is fast and free:
2. Create your n8n web service
-
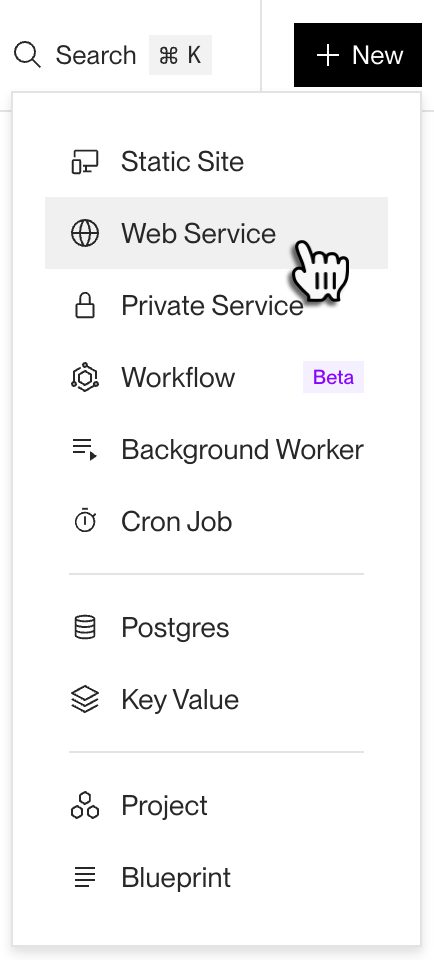
In the Render Dashboard, click New > Web Service:
-
Under Source Code, click Existing Image:
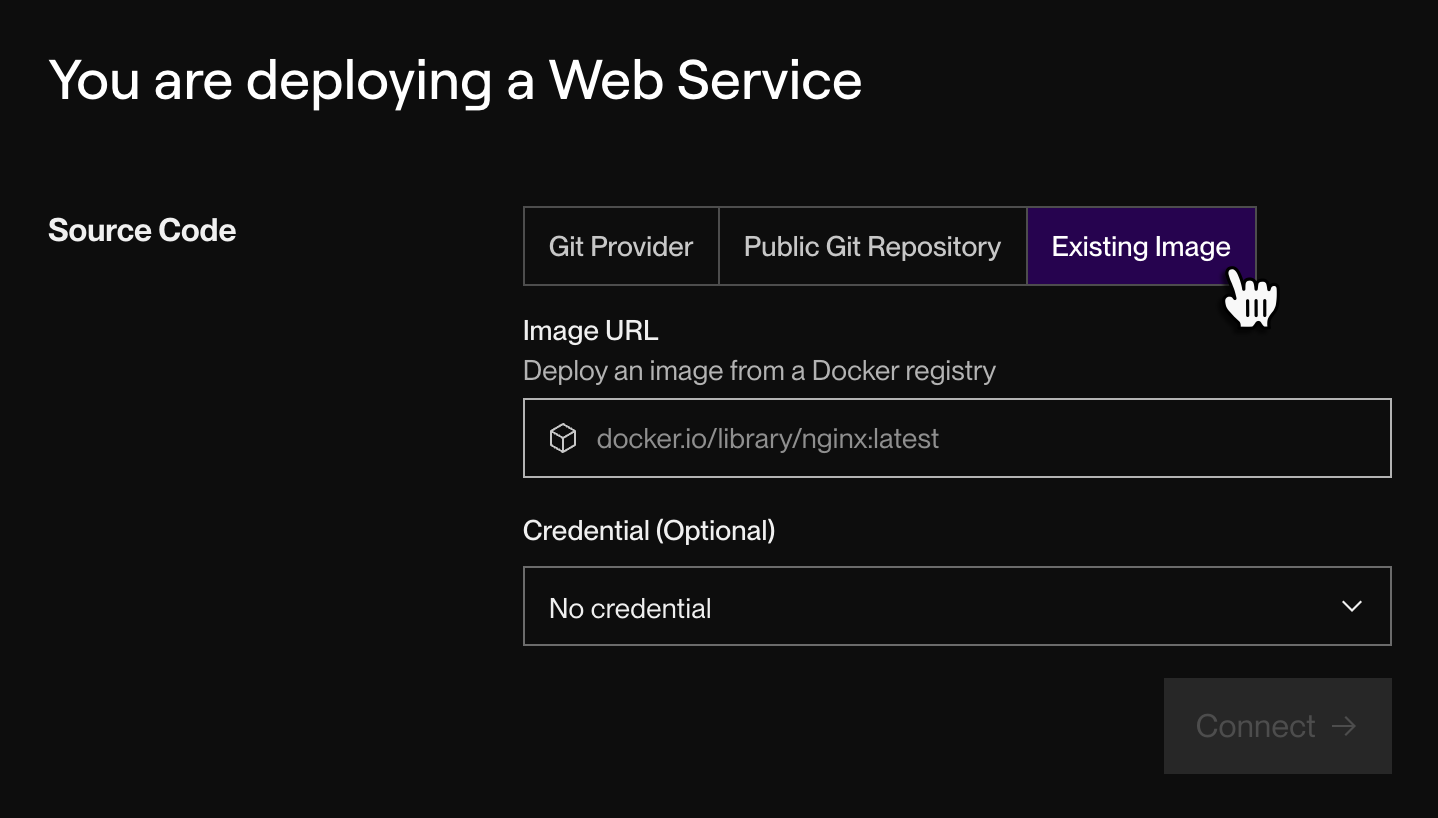
-
Provide the following Image URL and click Connect:
- You can specify a tag or digest besides
latestif you prefer. For details, see Pin to a specific n8n version.
- You can specify a tag or digest besides
-
Provide a Name for your web service and specify which Region you'll deploy it to.
-
Select an Instance Type for your web service. You can select any instance type besides Free (which doesn't support persistent disks).
-
Under Environment Variables, add a
PORTvariable with a value of5678. This is the default port that n8n listens on.- This step isn't strictly necessary (Render can detect your service's HTTP port automatically), but it speeds up your first deploy.
-
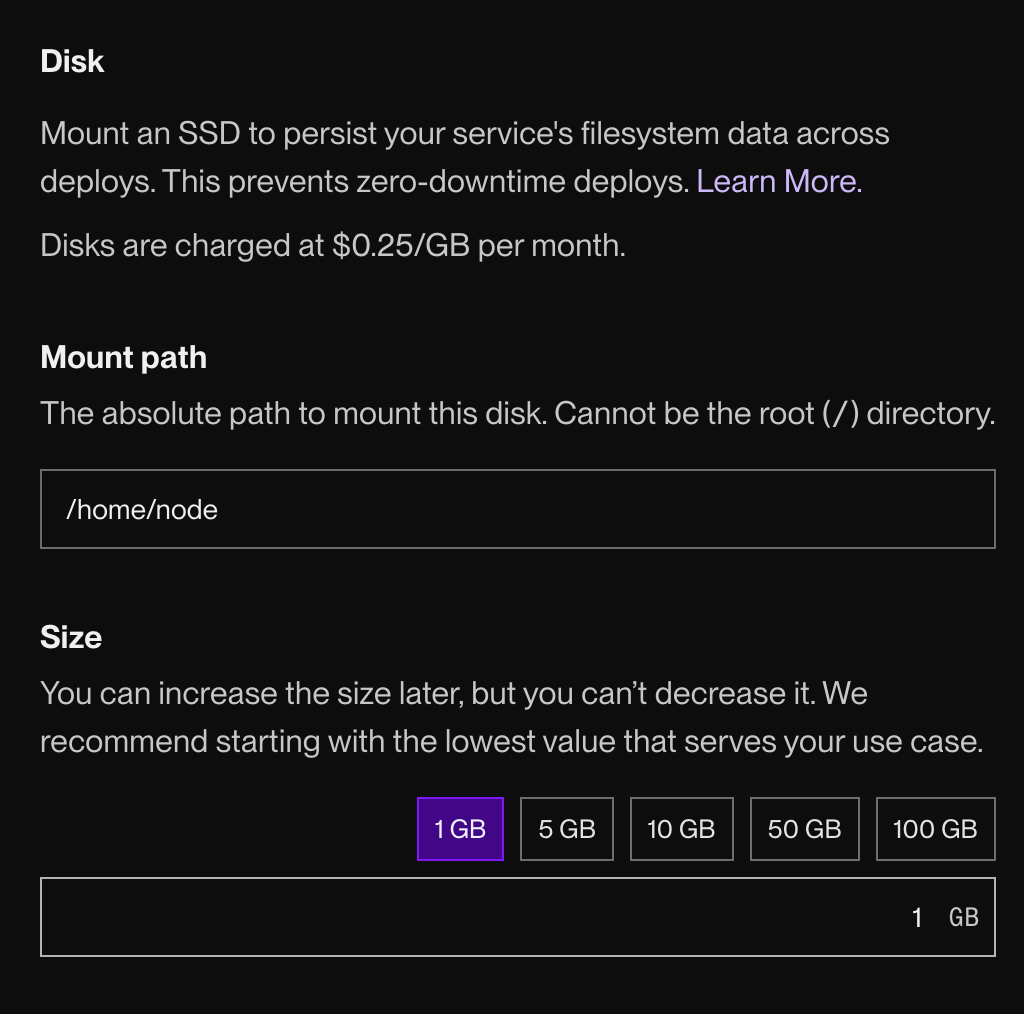
Expand the Advanced dropdown at the bottom of the form and find the Disk section.
-
Click Add disk. The following fields appear:
-
Set your disk's Mount path to
/home/node. By default, n8n will store its data in a.n8ndirectory under this path.- Only data under the mount path is persisted across deploys! Changes to other parts of the filesystem are lost when the service is redeployed.
- You can store n8n data in a different directory by setting the
N8N_USER_FOLDERenvironment variable. If you do, modify your disk's mount path to match.
-
Set the disk's Size to 1 GB for now. You can increase this size later as needed.
-
Click Deploy Web Service.
-
After the deploy completes, navigate to your new web service's page in the Render Dashboard. Its
onrender.comURL appears at the top:Visit this URL to access your n8n instance:


You're up and running with n8n on Render! Before you get started creating workflows, we recommend reviewing the additional configuration below.
Additional configuration
Complete the following steps as needed after you complete the initial setup of your n8n instance.
Set your webhook URL
If any of your n8n workflows will listen for incoming webhook notifications, you need to set the root URL for all webhook endpoints by adding an environment variable to your web service:
-
From your n8n web service's page in the Render Dashboard, click Environment in the left pane.
- If you're using Render Postgres, here you'll see all of the existing environment variables that were added as part of the Blueprint deployment (
DB_POSTGRESDB_DATABASE,DB_POSTGRESDB_PASSWORD, and so on).
- If you're using Render Postgres, here you'll see all of the existing environment variables that were added as part of the Blueprint deployment (
-
Under Environment Variables, click Edit, then Add > New variable.
-
Set the new variable's Key to
WEBHOOK_URL. -
Set the variable's Value to the service's
onrender.comURL (e.g.,https://n8n-service-q975.onrender.com/). -
Click Save and deploy.
After the deploy completes, your onrender.com URL will be reflected in any webhook nodes you add to your workflows:

Pin to a specific n8n version
In both setup methods above, you deploy the version of n8n associated with the latest tag. This version changes over time, which might introduce breaking changes to your workflows.
You can instead pin your n8n version to a specific version. Select your setup method to view instructions for pinning your n8n version:
In your repo's render.yaml file, specify an n8n version by providing its tag in the image.url field, like so:
You can also pin to a specific digest, which ensures that your service always uses the exact same image:
After you make this change, push it to your repo. Your Blueprint will automatically sync and deploy the newly specified n8n version.
-
In the Render Dashboard, open your n8n web service's Settings page.
-
Scroll down to the Image section and click Edit.
The following dialog appears:
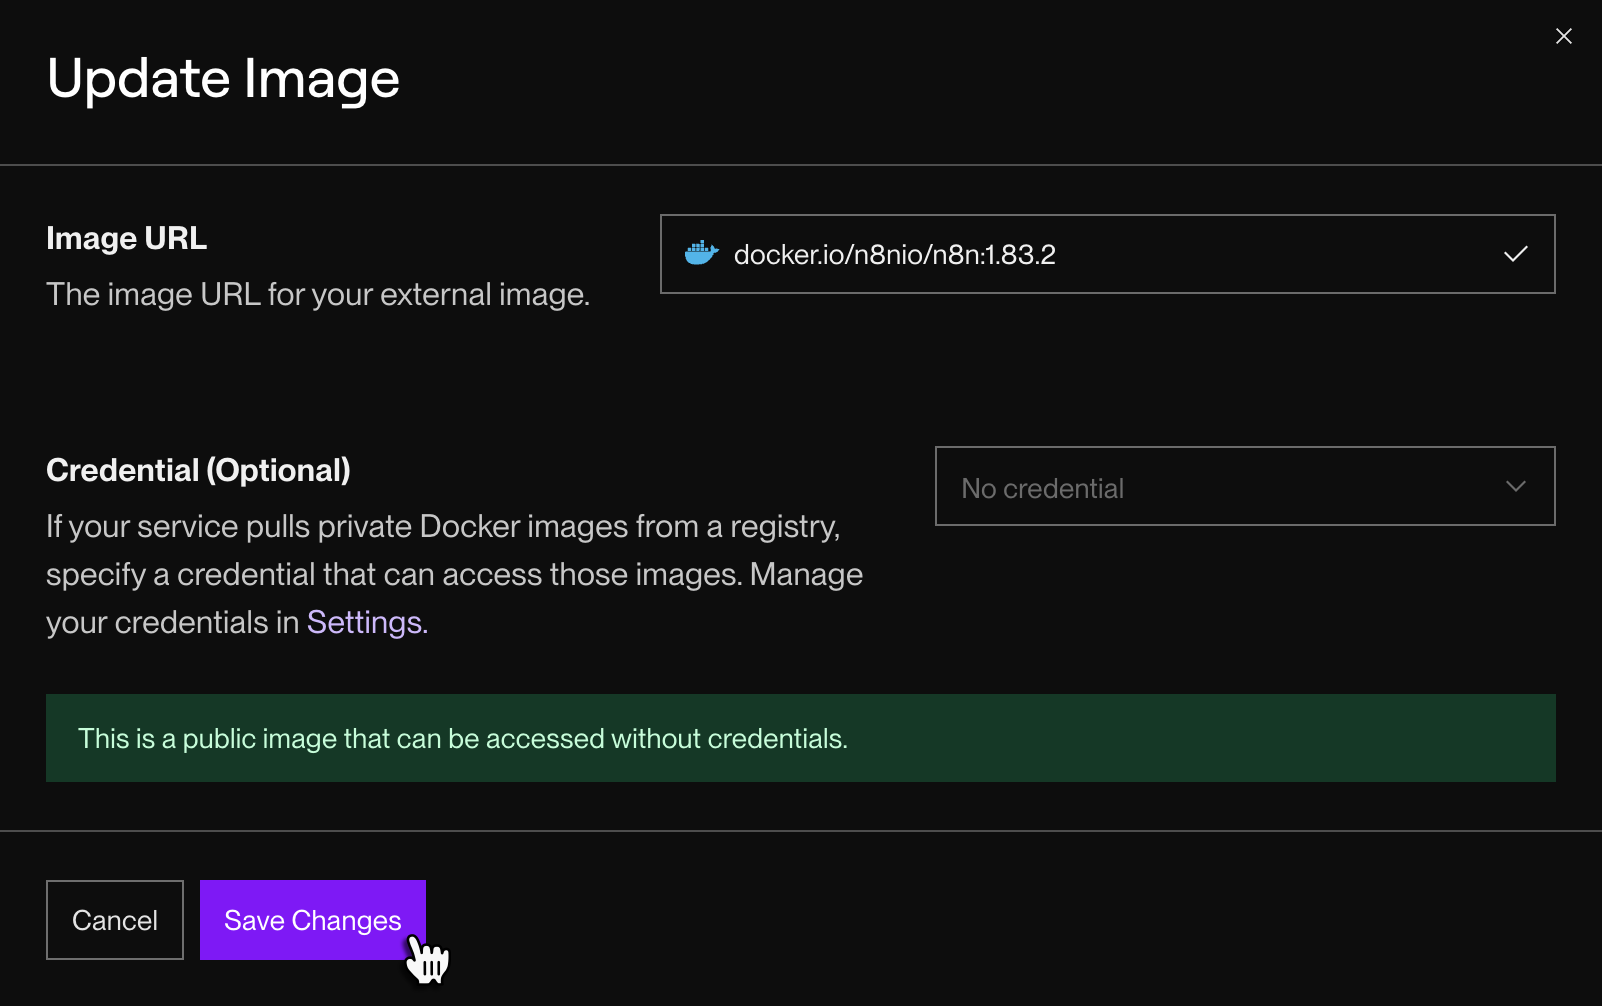
-
In the Image URL field, specify the n8n tag or digest you want to use, like so:
- You can also pin to a specific digest, which ensures that your service always uses the exact same image:
-
Click Save Changes. Your service will redeploy with the newly specified n8n version.
