Back Up Render Postgres to Amazon S3
In this guide we'll show you how to back up your Render Postgres instance to Amazon S3.
Render continually backs up all paid Render Postgres instances to provide point-in-time recovery. For additional control, you can create a cron job that periodically backs up your data to Amazon S3.
You will need a Render Postgres database and an Amazon Web Services (AWS) account for this guide.
By following this guide, you'll be able to:
- Create AWS credentials that will enable working with Amazon S3.
- Configure and create a backup Cron Job for your database.
- Validate that the backup is working.
Create AWS Credentials
We will create credentials with AWS IAM to enable working with Amazon S3.
-
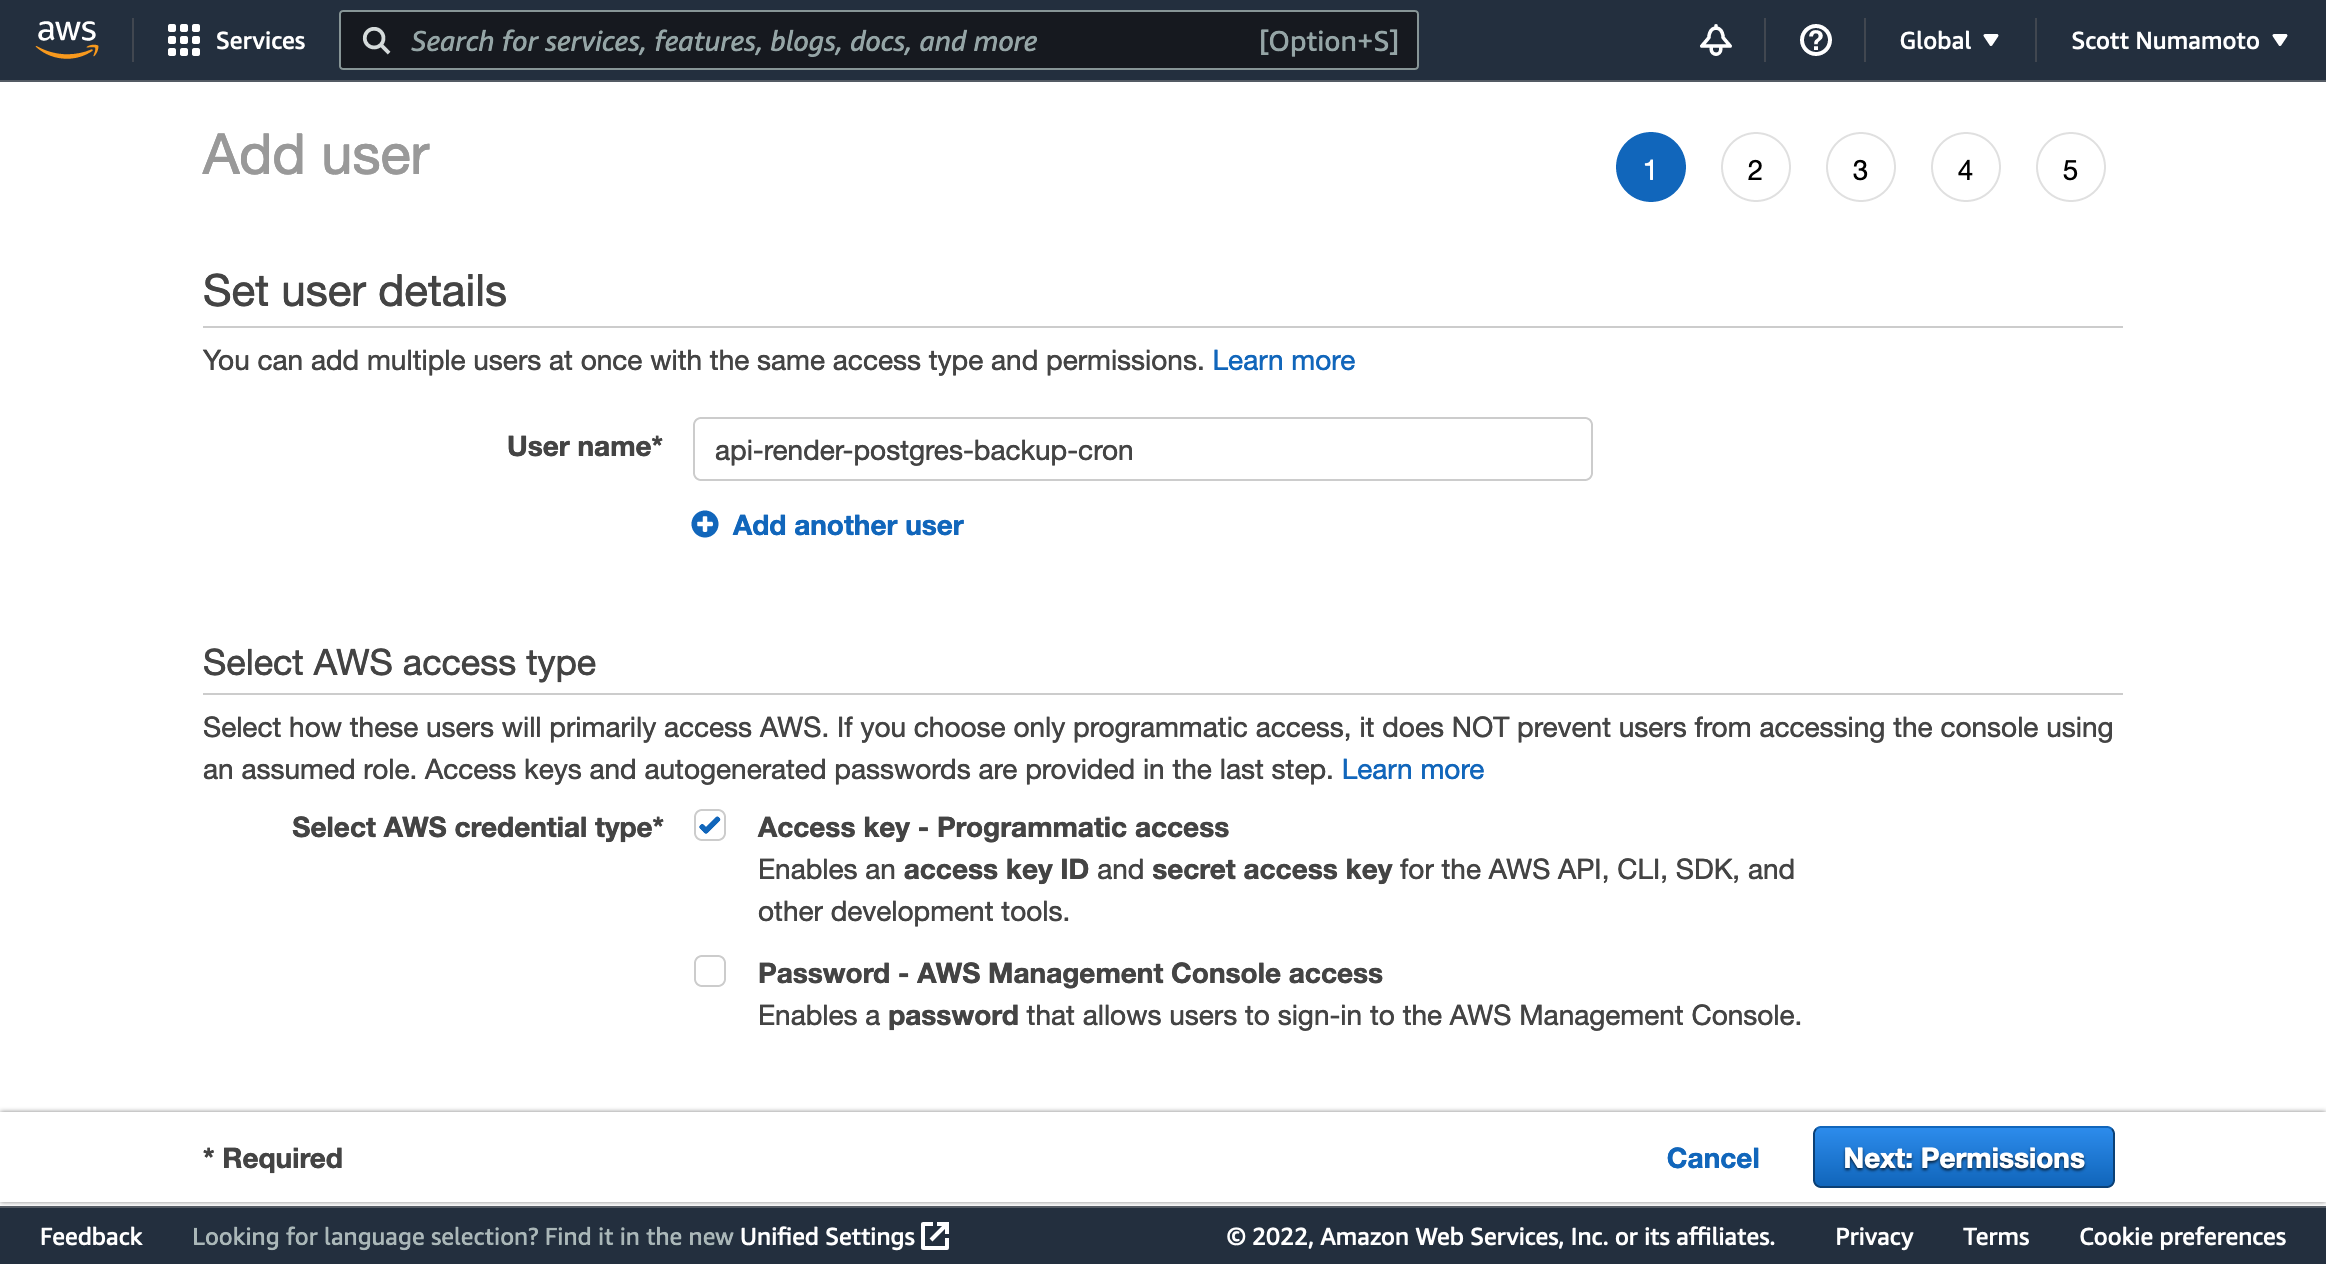
Open the AWS console and navigate to the IAM service. Open the Users view and select the
Add Usersbutton.
-
Enter a descriptive username, such as
<database name>-render-postgres-backup-cron. -
For
Select AWS credential type*selectAccess key - Programmatic access. -
Select the
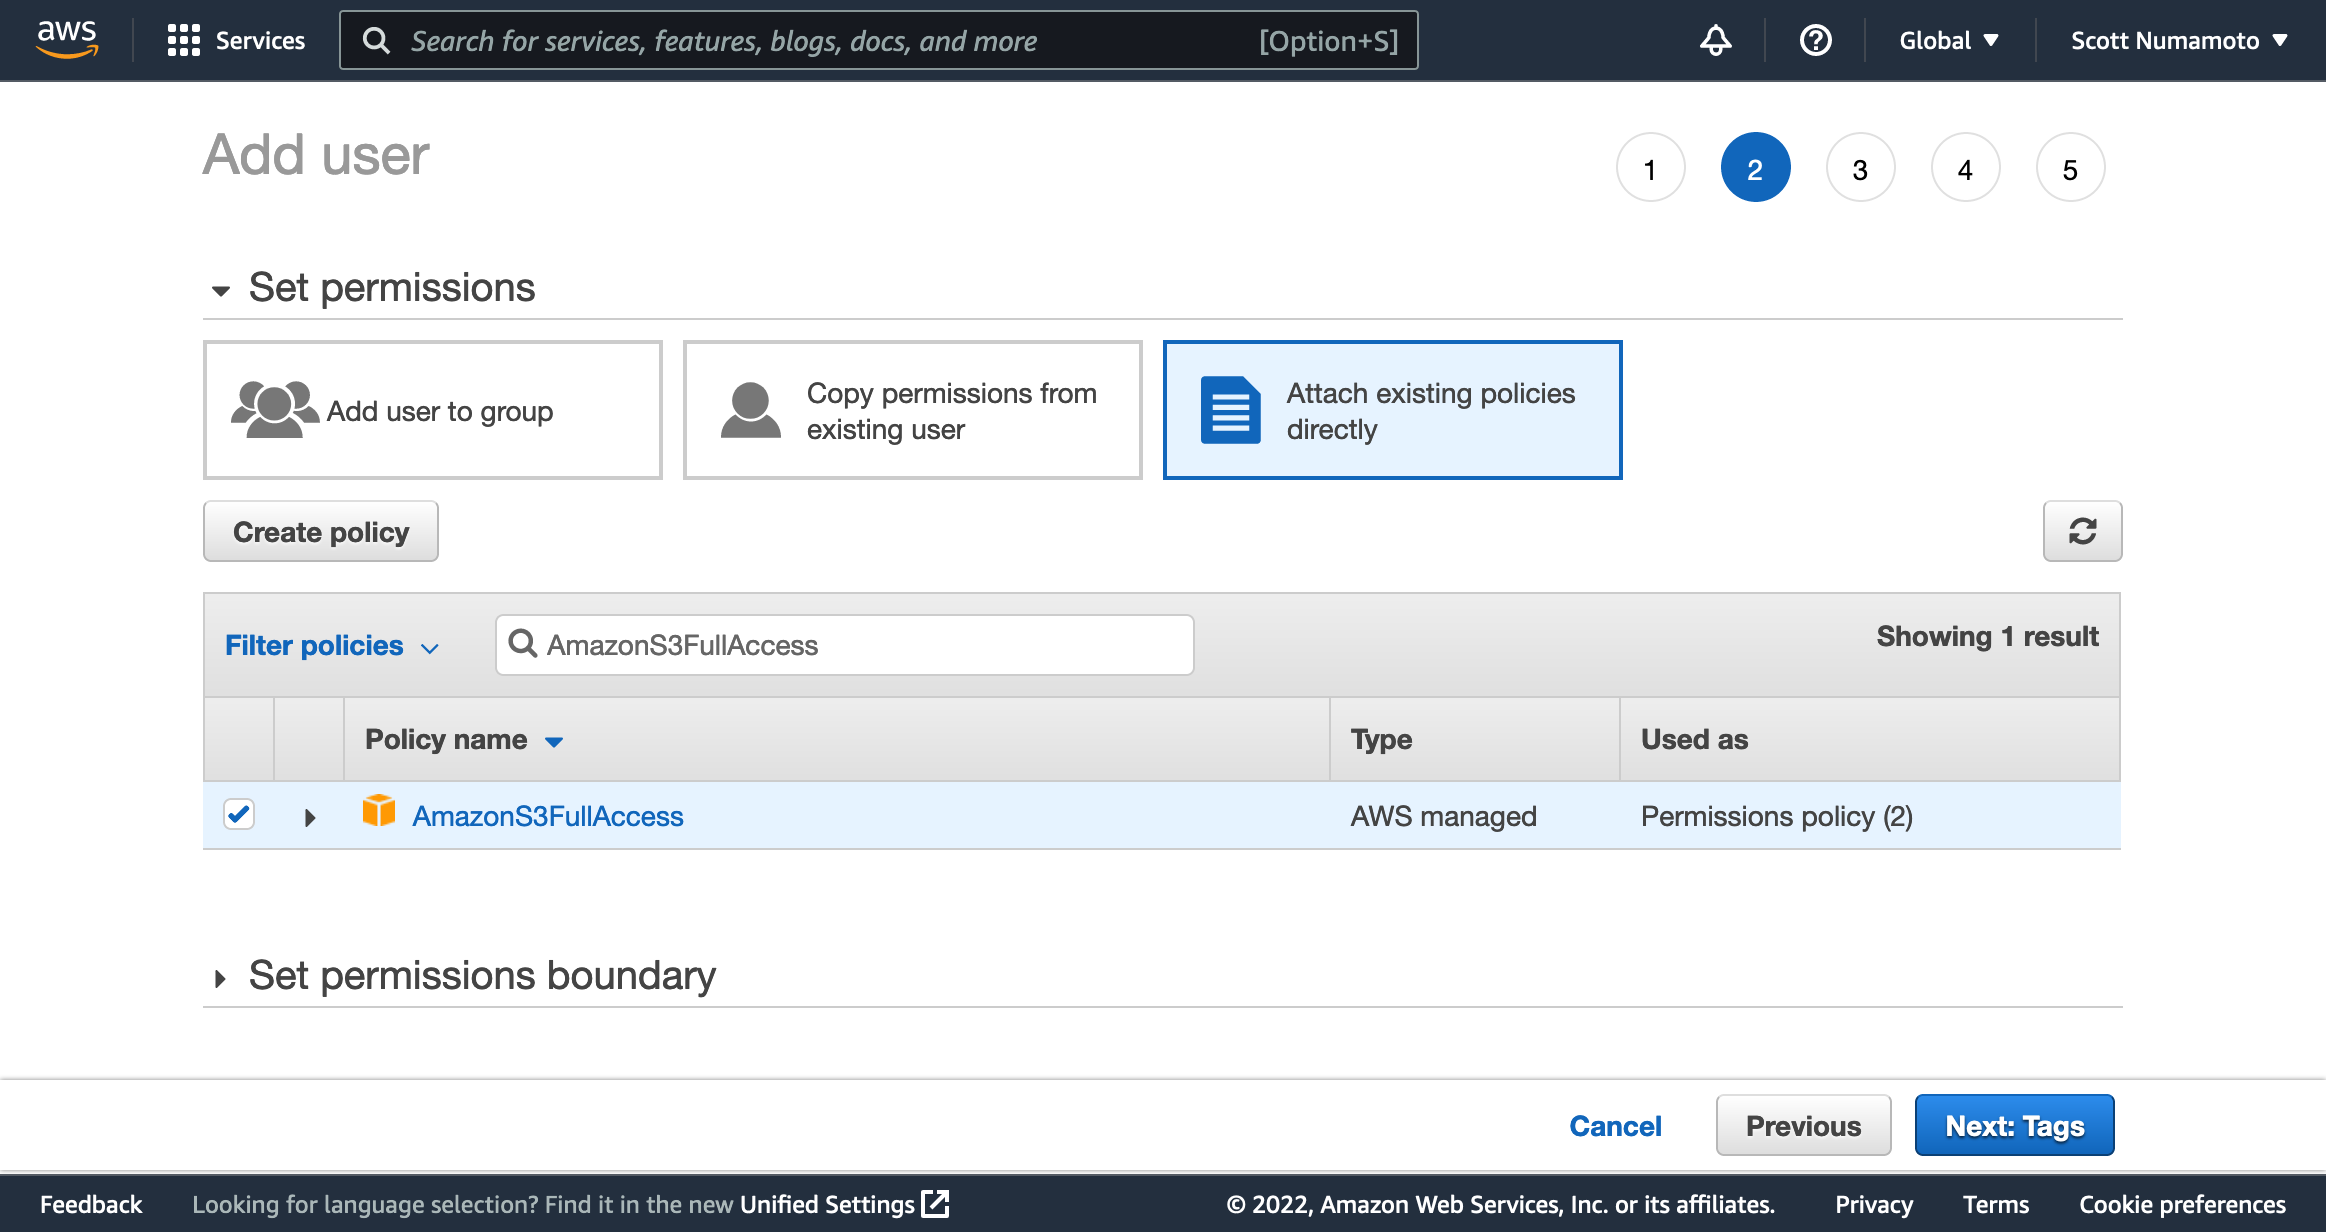
Next: Permissionsbutton to move to theSet Permissionsview.
-
In the
Set Permissionsview, selectAttach existing policies directlyand search forAmazonS3FullAccess. Check the box to selectAmazonS3FullAccess.
-
Skip through the next two views with the
Nextbuttons to move to theReviewview. Confirm the details of your user. -
Select the
Create Userbutton. -
Record the access key ID (
AKIAXXXXXXXXXXXXXXXX) and the secret access key.
Configure and Create the Backup Cron Job
-
In the
render.yamlfile, edit thefromDatabasename in the Cron Job'sDATABASE_URLenvironment variable to be the name of your Render Postgres instance.Do not use PGBouncer as your
DATABASE_URLwhen performing a backup. For details, see this GitHub issue. -
In the
render.yamlfile, edit the Cron Job'sregionto match the region of your database. -
By default, the Cron Job will run the backup daily at 3 a.m. UTC. You can change the time and frequency by modifying the Cron Job's
schedulein therender.yamlfile. -
Commit and push your changes.
-
On the Render Dashboard, go to Blueprints and click the
New Blueprint Instancebutton. Select your repository (after giving Render permission to access it, if you haven’t already). Alternatively, you can click the Deploy To Render button in the Readme of the forked repo.
-
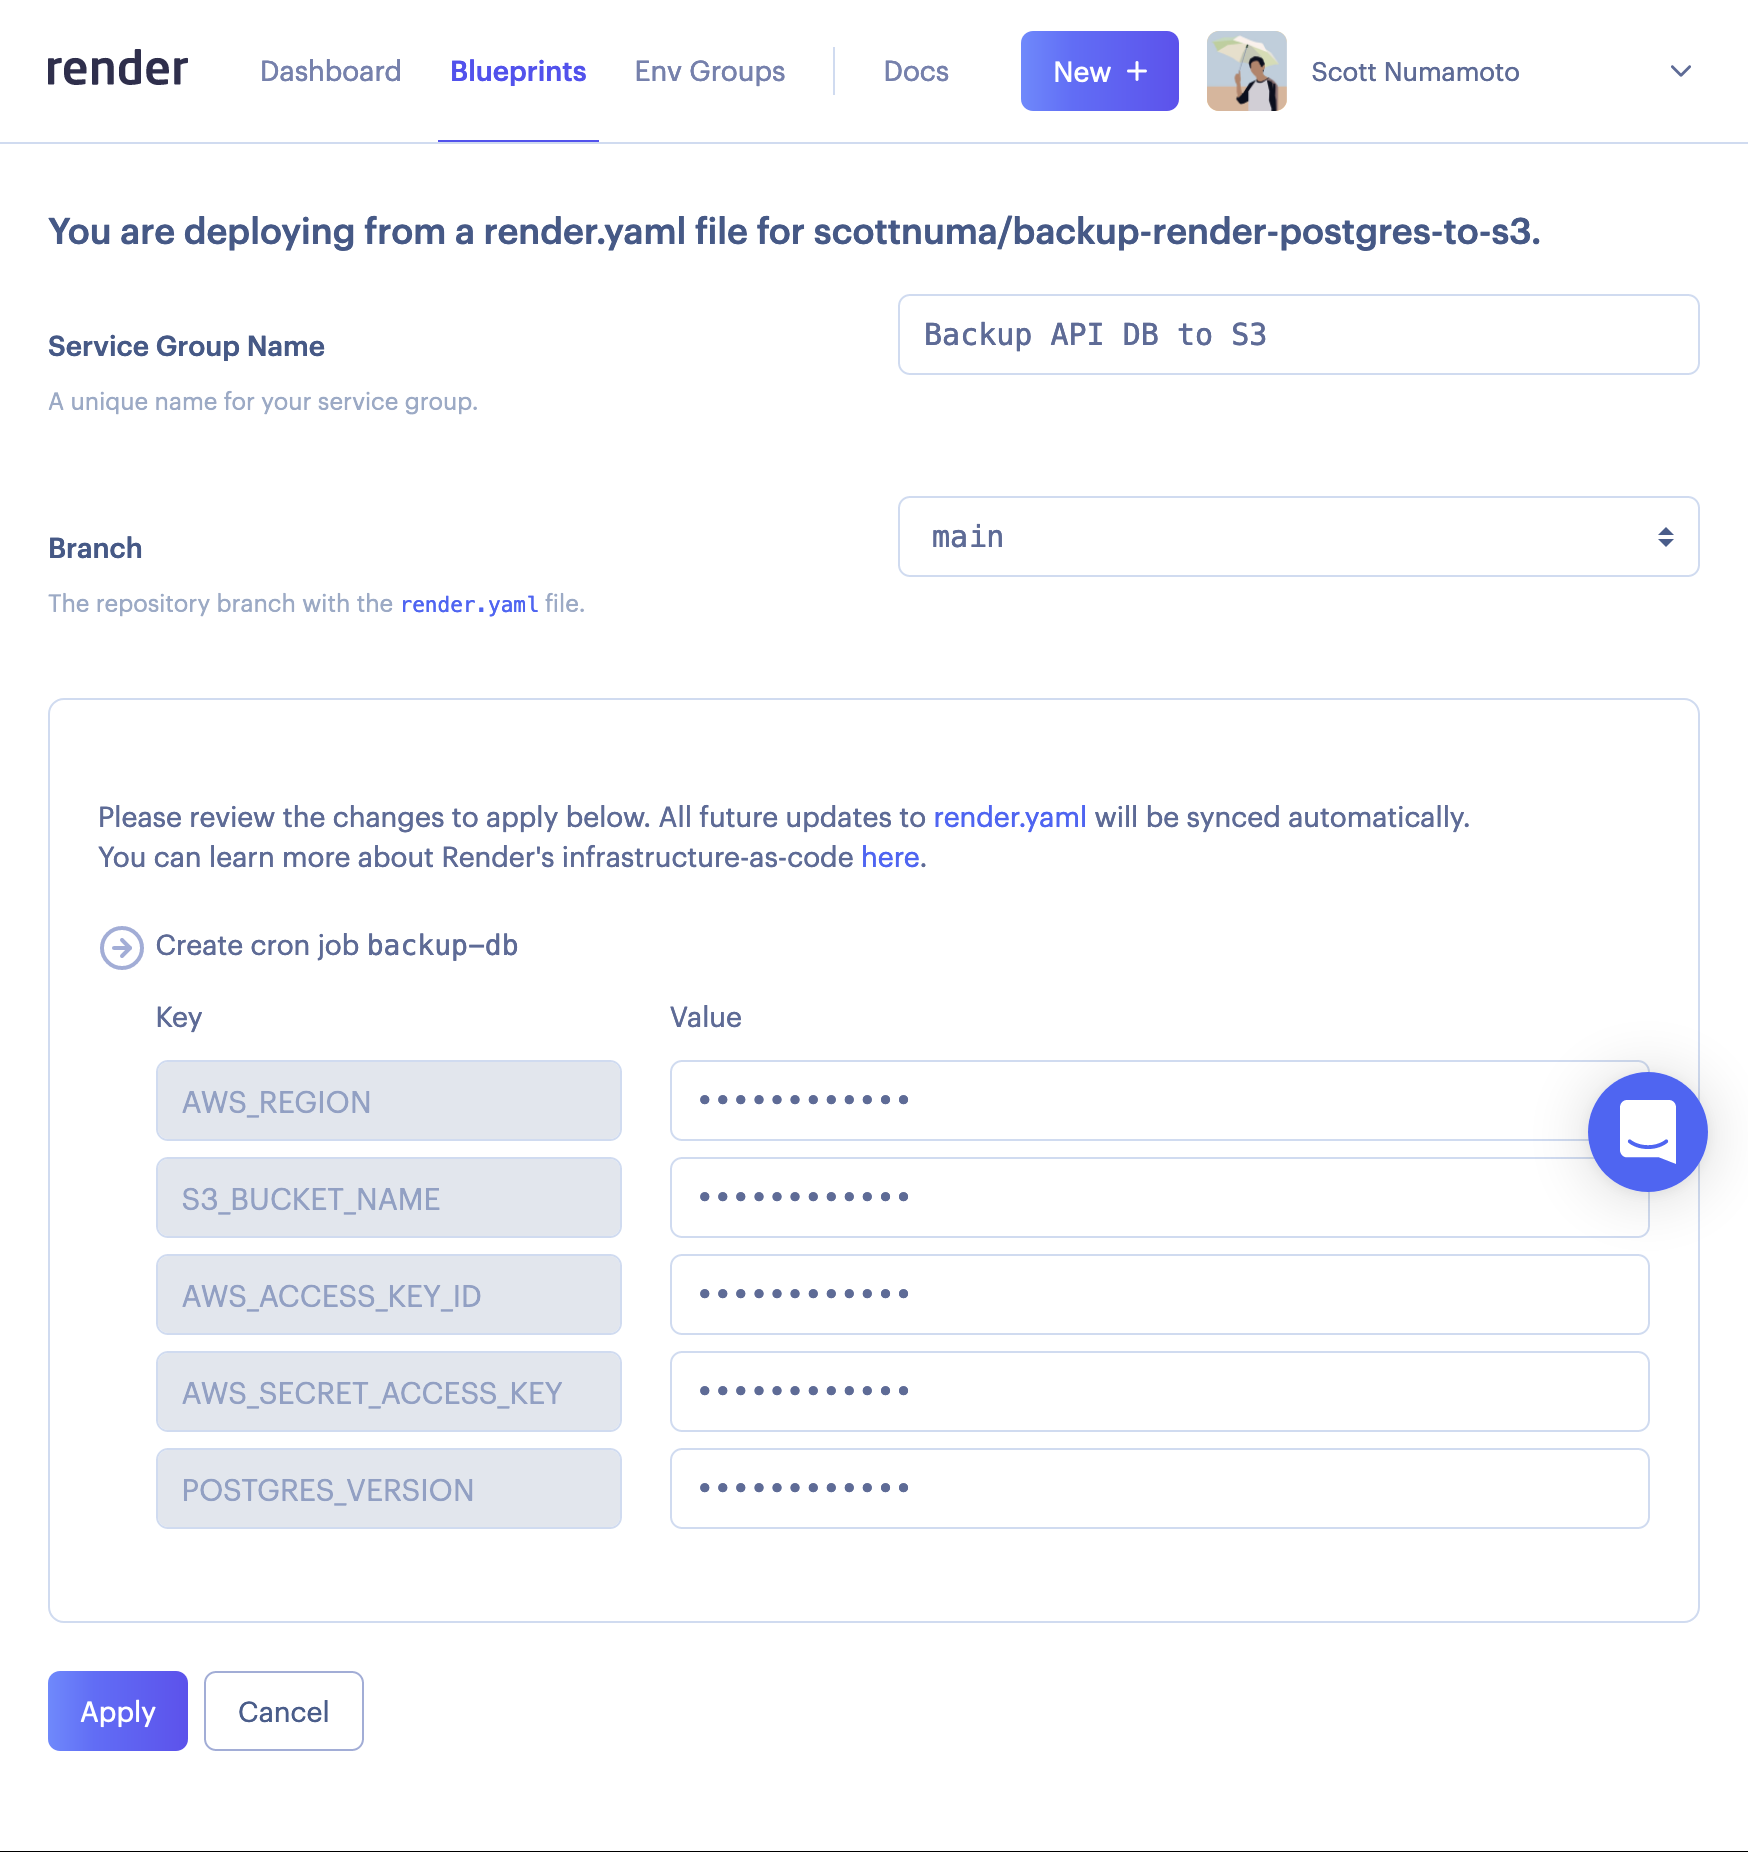
Enter a descriptive
Service Group Namesuch asBackup <database name> to S3. -
Fill in the environment variables:
Environment Variable Value AWS_REGION Choose the AWS region closest to the region of your database. For example, a Render Postgres instance in the Oregon region would use us-west-2for the AWS Region US West (Oregon).S3_BUCKET_NAME Choose a globally unique name for your bucket. For example <your-username>-<database name>-render-postgres-backups. The name must follow Bucket naming rules.AWS_ACCESS_KEY_ID Copy the Access key ID(AKIAXXXXXXXXXXXXXXXX) we saved when creating the User.AWS_SECRET_ACCESS_KEY Copy the secret access key we saved when creating the User. POSTGRES_VERSION Enter your database's PostgreSQL version. You can see the version when viewing your instance in the Render Dashboard. For example, 14. -
Select
Applyto create the Cron Job.
Validate the Cron Job
-
View the newly created Cron Job and wait for the first build to finish.
-
Select the
Trigger Runbutton and wait for the job to finish with aCron job succeededevent. -
Verify the backup by inspecting the contents of your S3 bucket.
That's it! Your Cron Job will now periodically back up your Render Postgres instance to Amazon S3.
Troubleshooting
Large Databases
The aws CLI tool requires additional configuration when uploading large files to S3. If your compressed backup file exceeds 50 GB, add an --expected-size flag in the the upload_to_bucket function in backup.sh.
Credential Errors
You may have an error with your IAM user if your Cron Job fails and you see an error message similar to:
Check over the Create AWS Credentials instructions.