Did you miss our StrapiConf 2022 Workshop about deploying Strapi and Remix together on Render? The workshop attendees created their own Productivity Tips app that they can use to collect and share their team's favorite productivity tips. This post will walk you through everything you missed!
What are Strapi and Remix?
Strapi is "the leading open-source headless CMS. It's 100% JavaScript, fully customizable, and developer-first." Think of it as an admin GUI to manage your content. That content could be blog posts or product images or videos. And Strapi automatically generates both REST and GraphQL APIs for the content. Render has been an especially popular place to deploy Strapi because it provides one of the quickest paths to get Strapi running in a production environment.
Remix is "a full stack web framework that lets you focus on the user interface...to deliver a fast, slick, and resilient user experience." It comes from some well-known developers from the React ecosystem and has been getting more and more attention since its open source debut at the end of 2021.
Why Strapi and Remix Together?
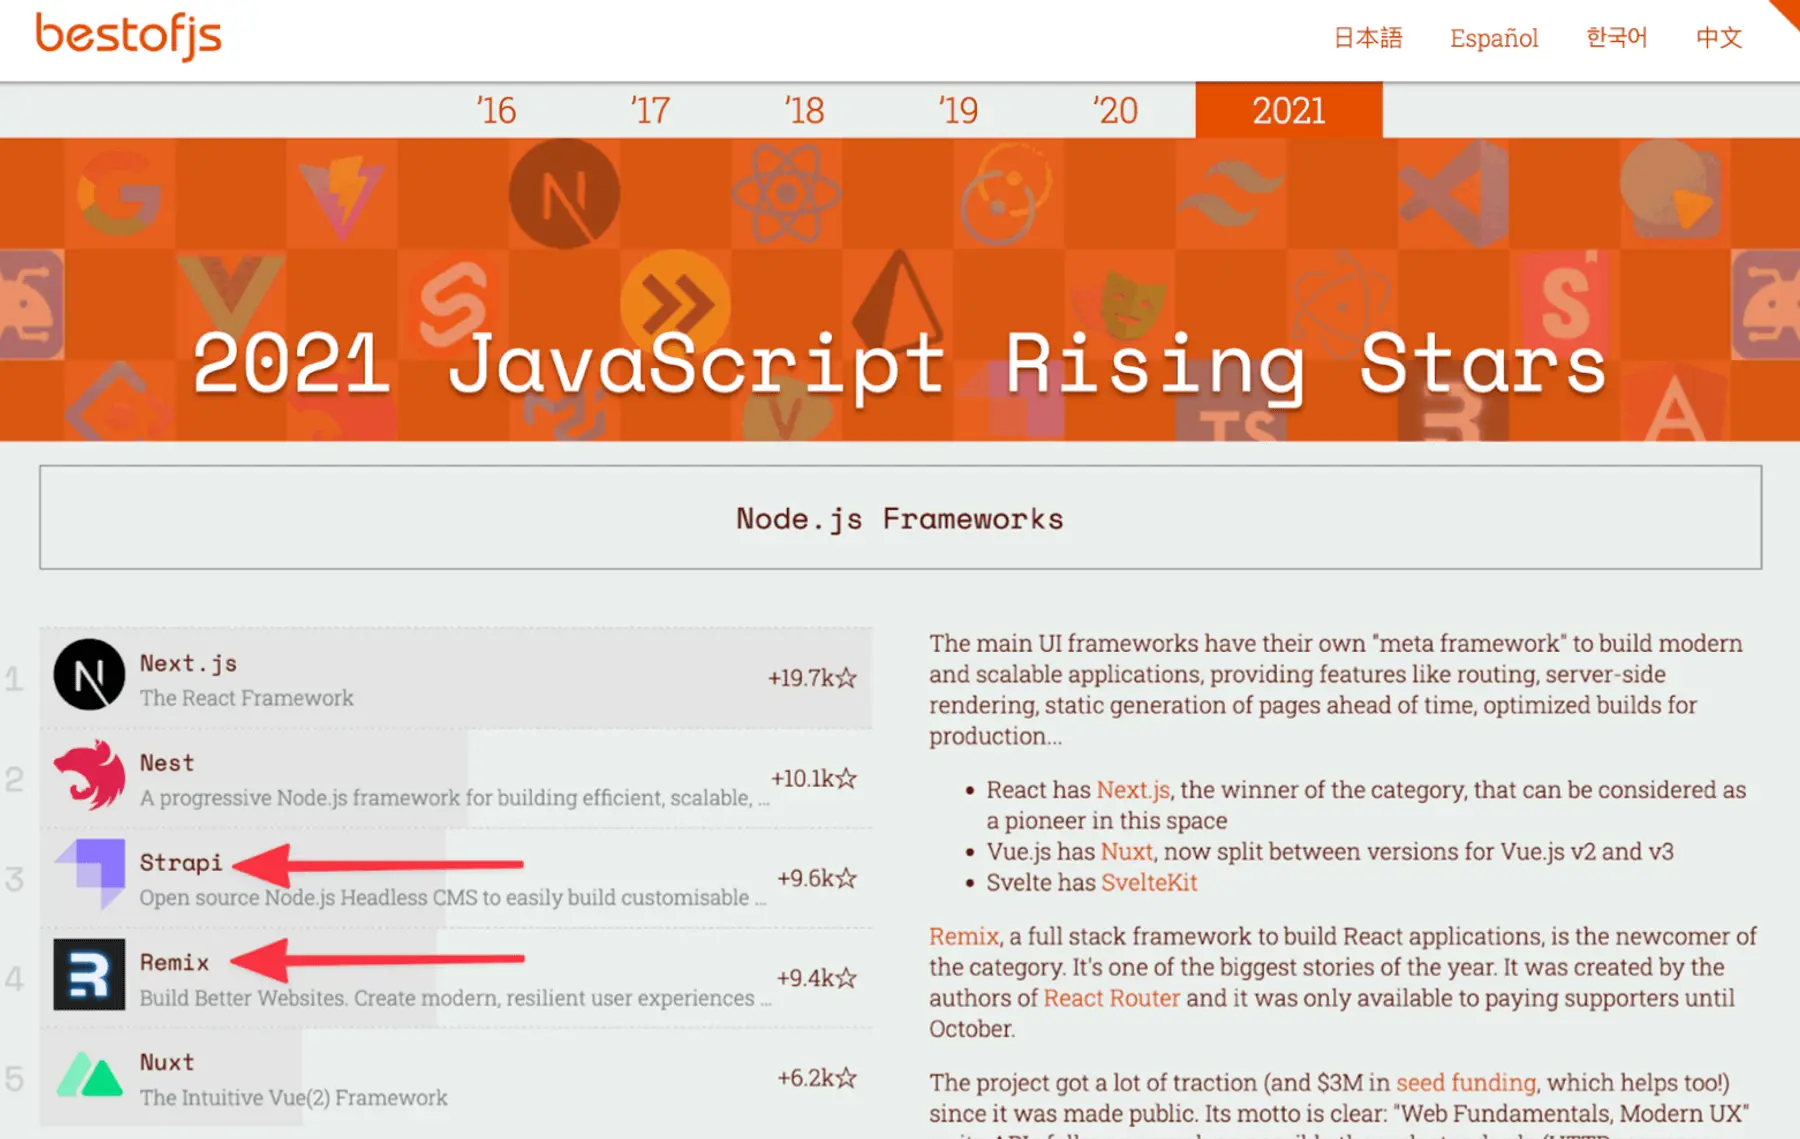
Strapi and Remix are both popular and growing open source JavaScript projects. In fact, they topped the list of Node.js Framework Rising Stars in 2021.
But more importantly, these two tools complement each other well. Strapi serves as an ideal back end for a Remix front-end. Strapi gives us many things we, as developers, would otherwise have to build ourselves: a clean abstraction on top of a database, a data admin GUI, and an API for the front-end to use. Remix builds upon the vast React ecosystem, letting you quickly create a front-end and scale it up as needed. It addresses a lot of the time-consuming complexity that has become a regular part of a React developer’s work.
A Productivity Tips App
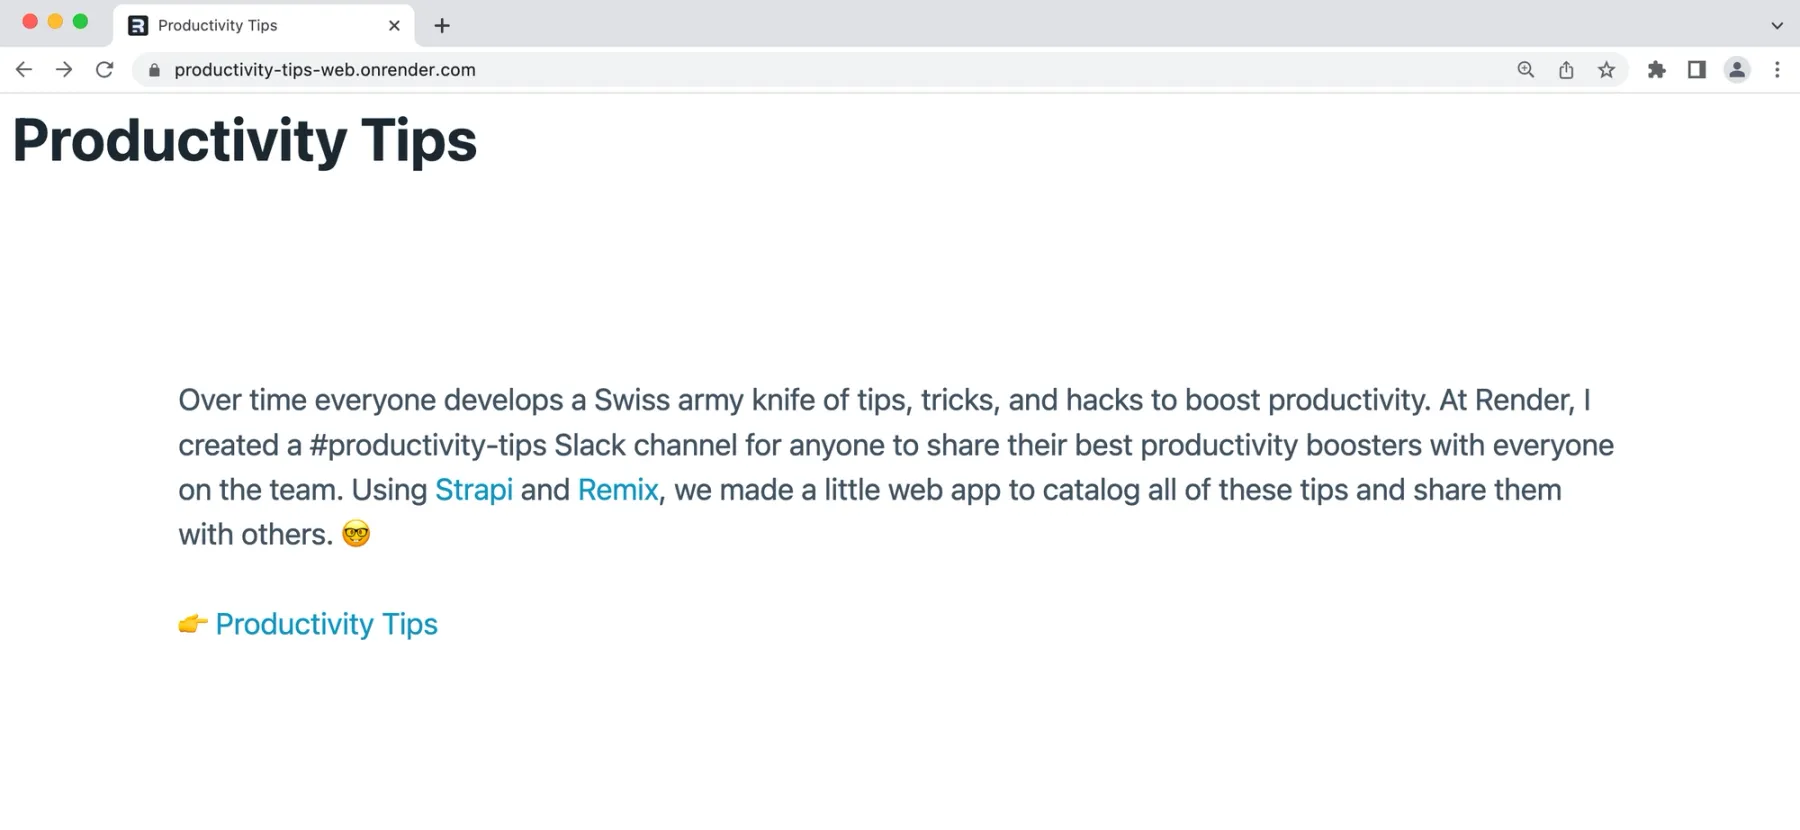
The inspiration for this app came from Render Engineer Shantanu Joshi: "Over time, everyone develops a Swiss army knife of tips, tricks, and hacks to boost productivity. At Render, we created a #productivity-tips Slack channel for anyone to share their best productivity boosters with everyone on the team."
But Slack doesn't provide a great way to discover tips that others have shared in the channel. You can scroll back through the conversation history, but wouldn't it be nice if there was a web page with a simple list? Using Strapi and Remix, we're going to make a web app to catalog all of these tips and share them with others.
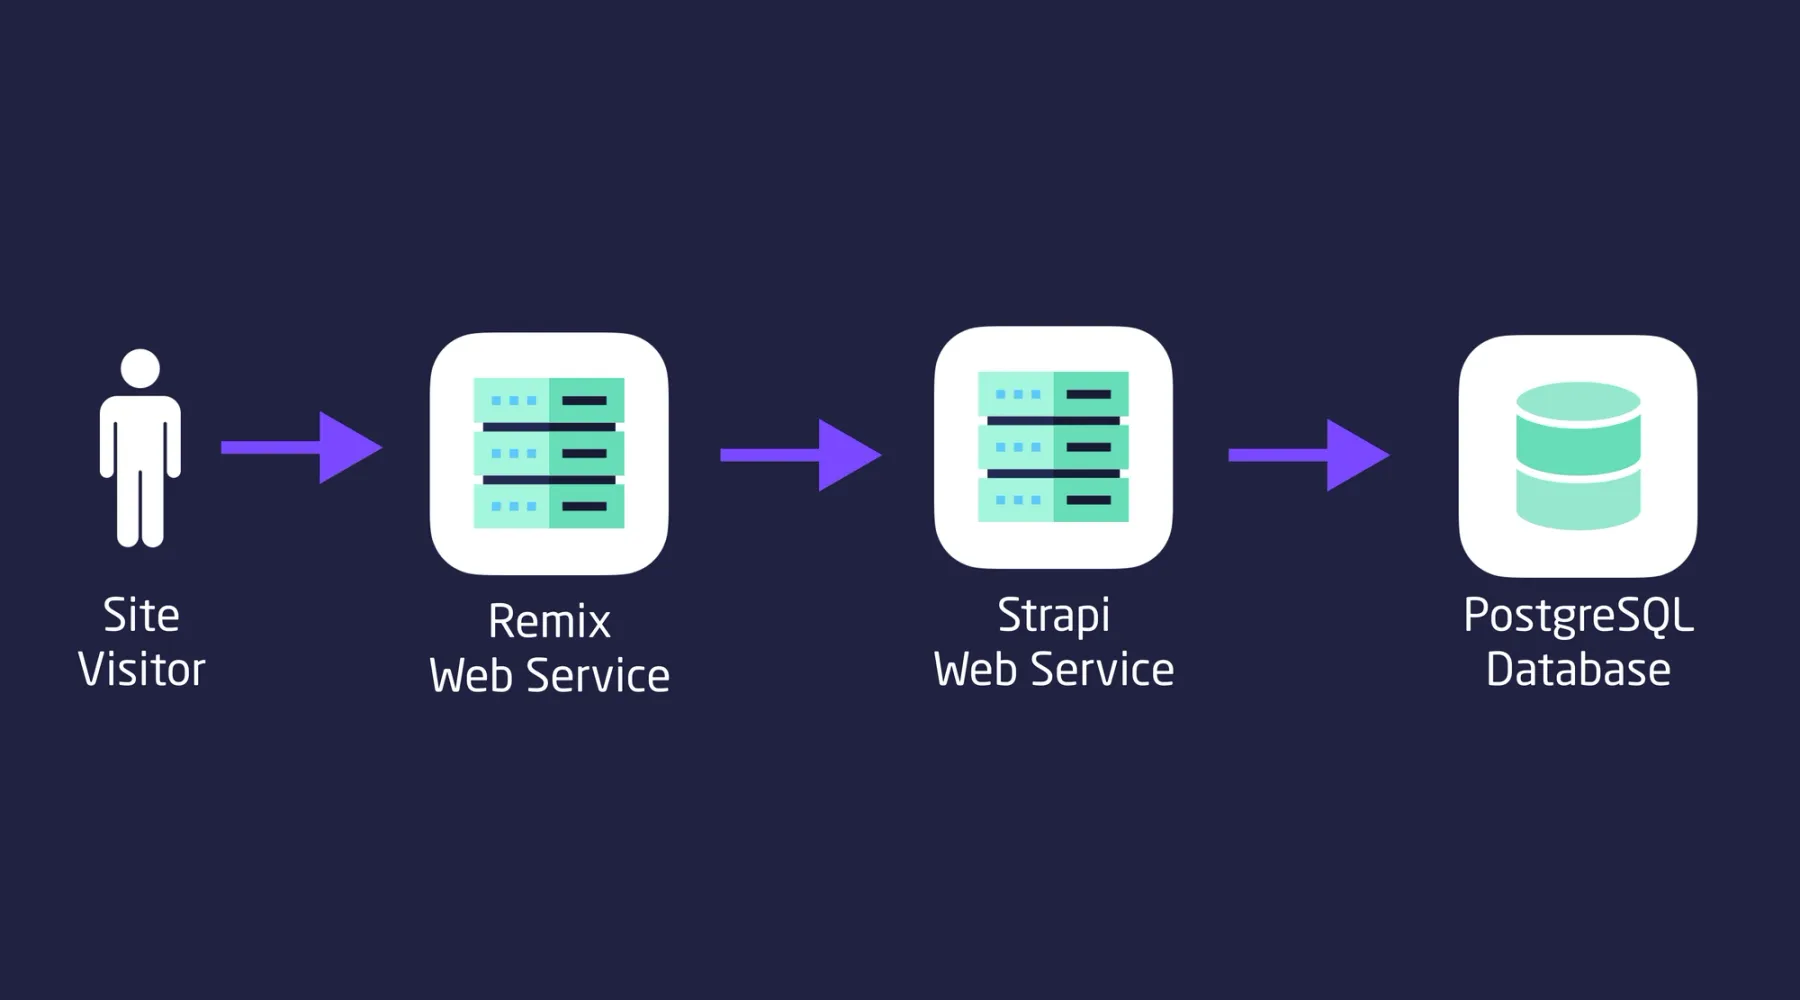
Here's a visual overview of what we'll build.
And here are the steps we’ll take to get there:
- Set up your development machine
- Configure and get familiar with Strapi
- Build the front-end with Remix
- Deploy everything to Render
Set Up Your Development Machine
You’ll need Node.js, Yarn, git, a Render account, and a Cloudinary account. If you don't have them already, install the tools and create the accounts linked above (everything's free).
Configure and Get Familiar with Strapi
We'll start with an example repository that contains only a few changes from the default Strapi project scaffolding. Following the instructions in the Set up Strapi section of the example repository's README, run Strapi locally to get comfortable with Strapi and understand the minor code changes below.
Here are the changes I made to the Strapi scaffolding. The links will take you to the code for each change.
- Use PostgreSQL in production and SQLite for local development.
- Use Cloudinary for media storage, resizing, and serving in production, and use the filesystem during local development. No code changes were necessary to use the local filesystem because that is the default built into Strapi.
- Tell Strapi what its public URL is when deployed in production.
- Create the Tip content type.
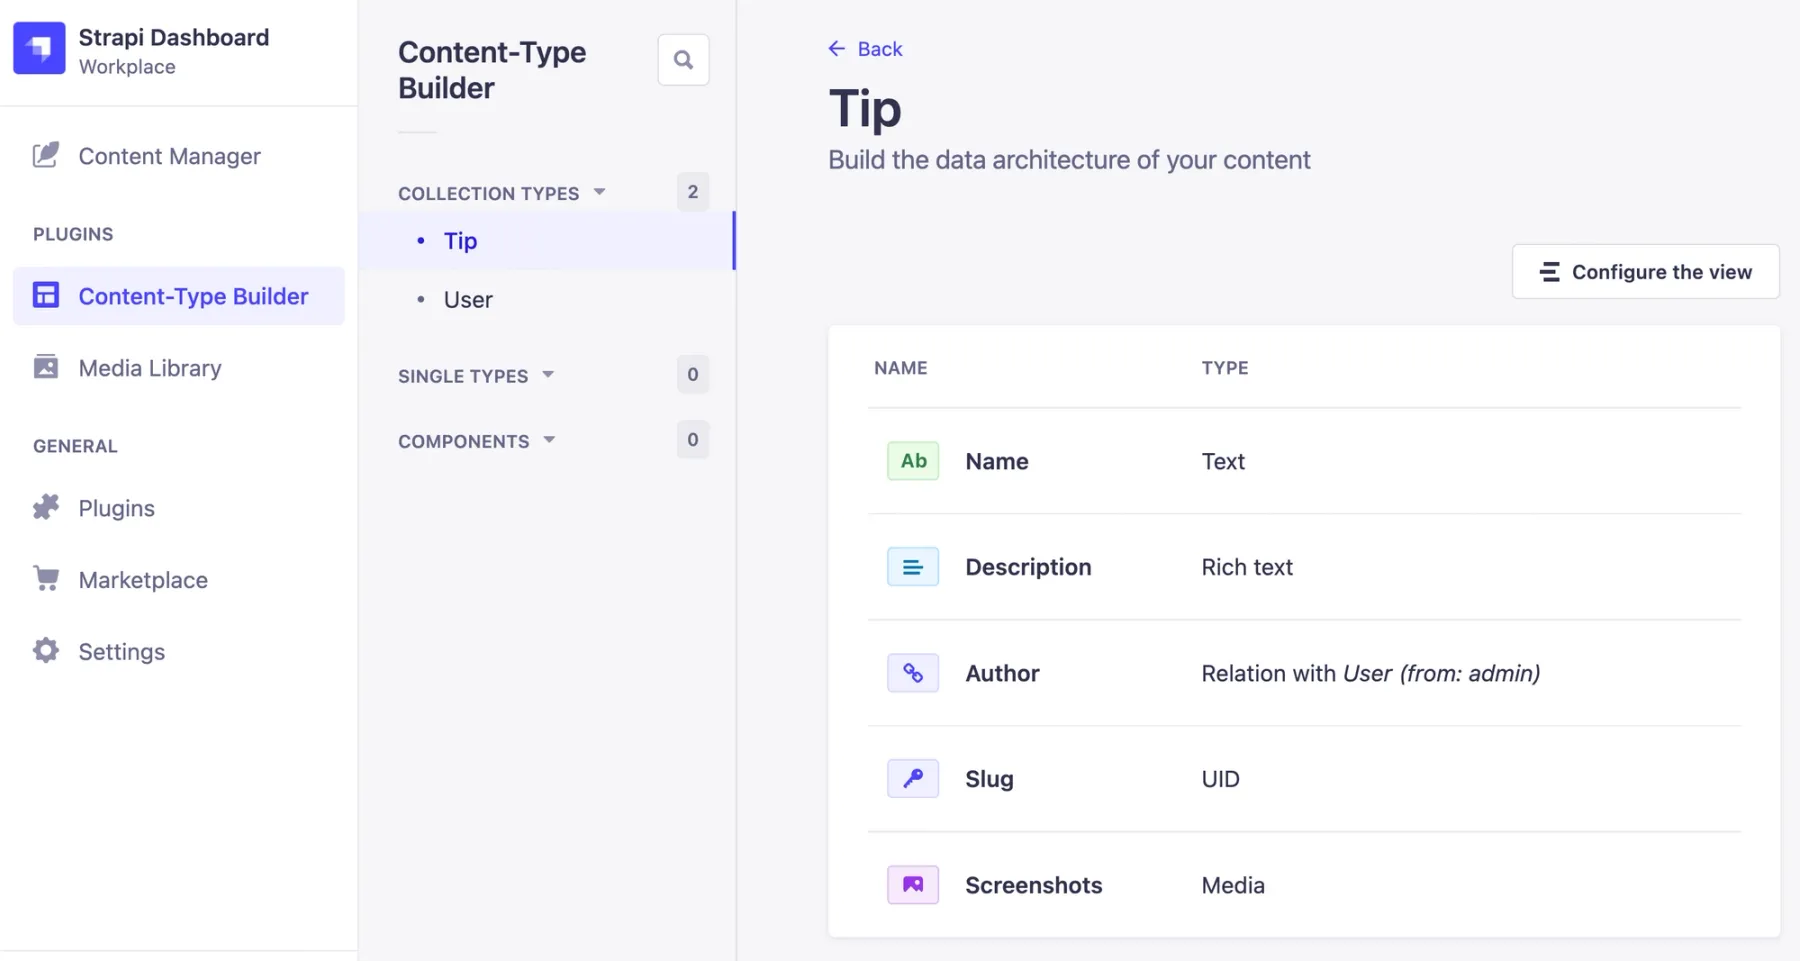
In our example, we've created a Tip Content Type in development, and we will deploy that to production. However, any content we create in development won't be deployed to production, and any content we create in production won't be available in development.
Once you've completed the instructions to set up Strapi, including adding some sample Tip content in the Strapi Admin GUI, we'll move on to building the Remix service.
Build the Front-End with Remix
Strapi is mostly plug-and-play, requiring you to write code only when you want to customize its default functionality. On the other hand, building a Remix app requires us to write more code. We can start with a Remix scaffolding, but we still need to create the web page views and API requests to to show our productivity tip data. I've broken the process into five steps to guide you through this code. Each step is a separate git branch in the example repository, and the README for each branch explains the changes in that branch.
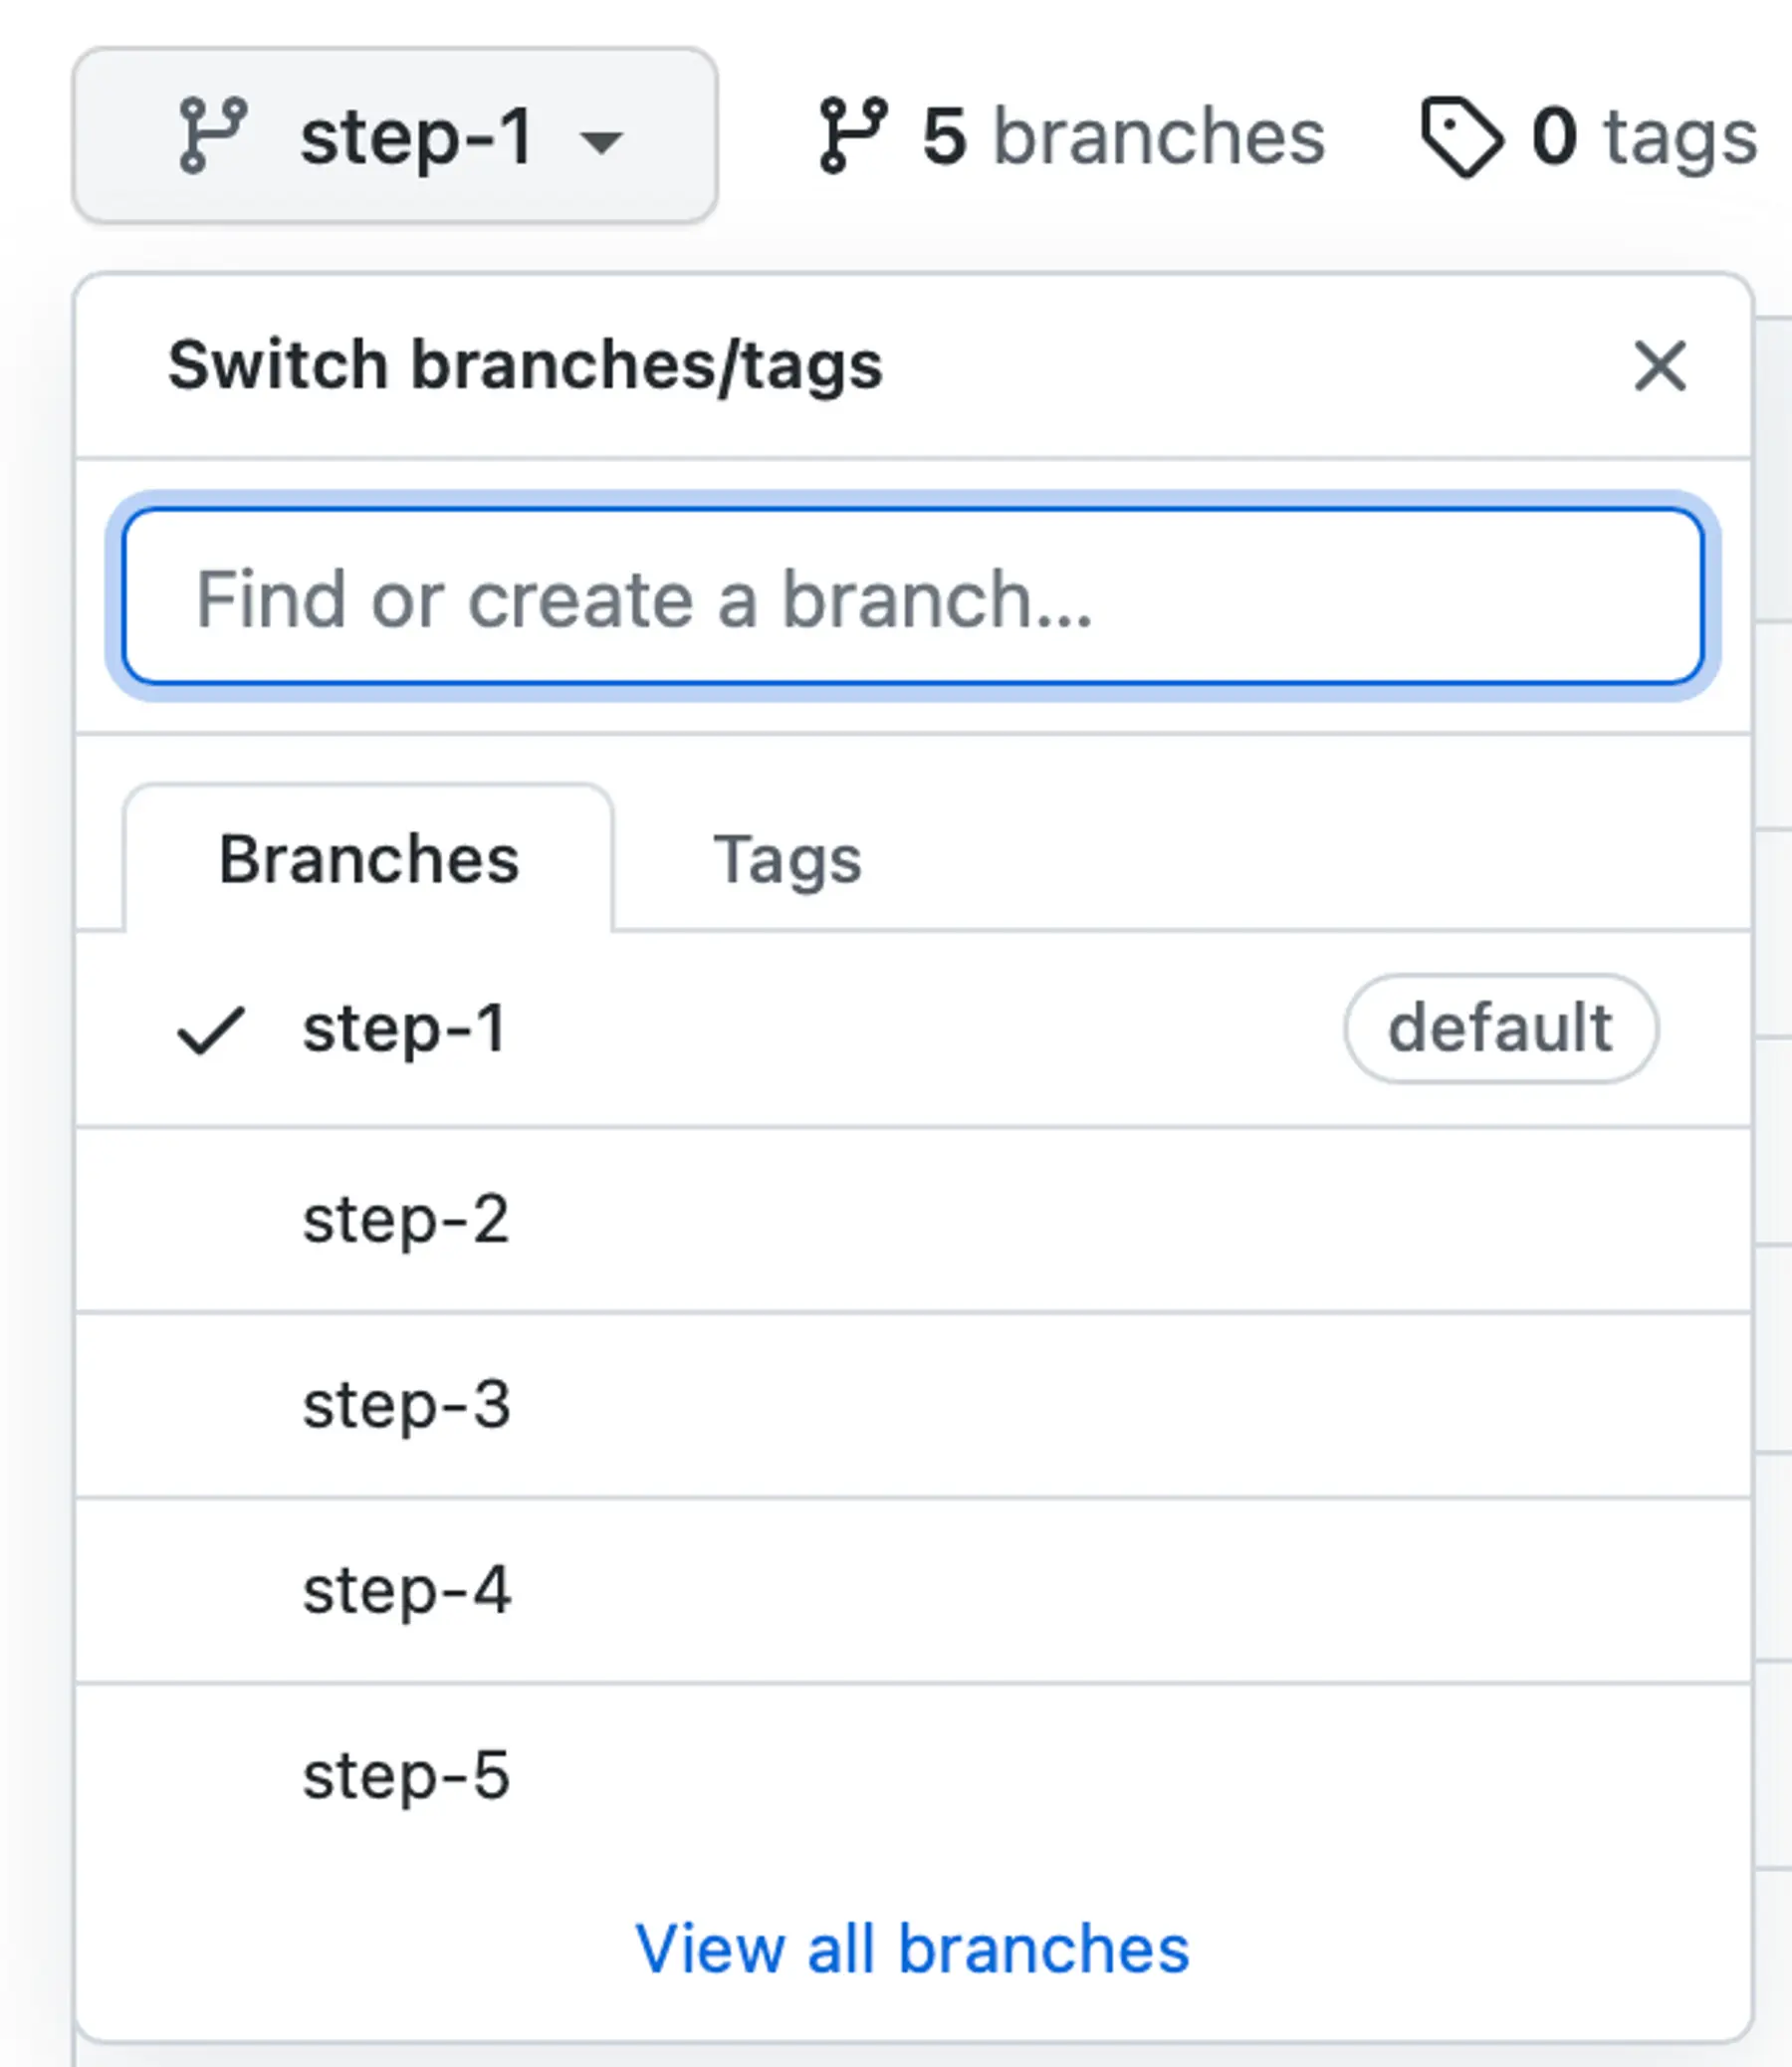
You can either start with the step-1 branch and work your way through the changes in each branch or skip to step-5, which contains the final example code that we'll deploy to Render. To start at step-1 and work through the branches, follow the README instructions in each branch.
To skip to step-5, fork the example repository, git clone it, switch to the step-5 branch with git checkout step-5, and then install the necessary dependencies with npm install. Now we can connect the Remix app to Strapi's REST API. To do that,
- Copy the
.env.examplefile to.env. This file provides our Remix app with two variables it needs to access the Strapi API:STRAPI_URL_BASEandSTRAPI_API_TOKEN. - We need to ask Strapi to generate an API token for use in development. In the Strapi Admin GUI, go to Settings --> API Tokens --> Create new API Token. Name it something like
Remix Devand leave it asRead-only. - Copy the token and paste it into
.envas the value forSTRAPI_API_TOKEN. - Start or restart the Remix dev server by running
npm run devin the Remix app directory, and also make sure the Strapi server is running by runningyarn developin the Strapi app directory. - If you open http://localhost:3000 in a browser, you should see your Productivity Tips app containing any Tip data you've created in the Strapi Admin GUI!
Nice job! Local development is done! Time to deploy our code to Render.
Deploy Everything to Render
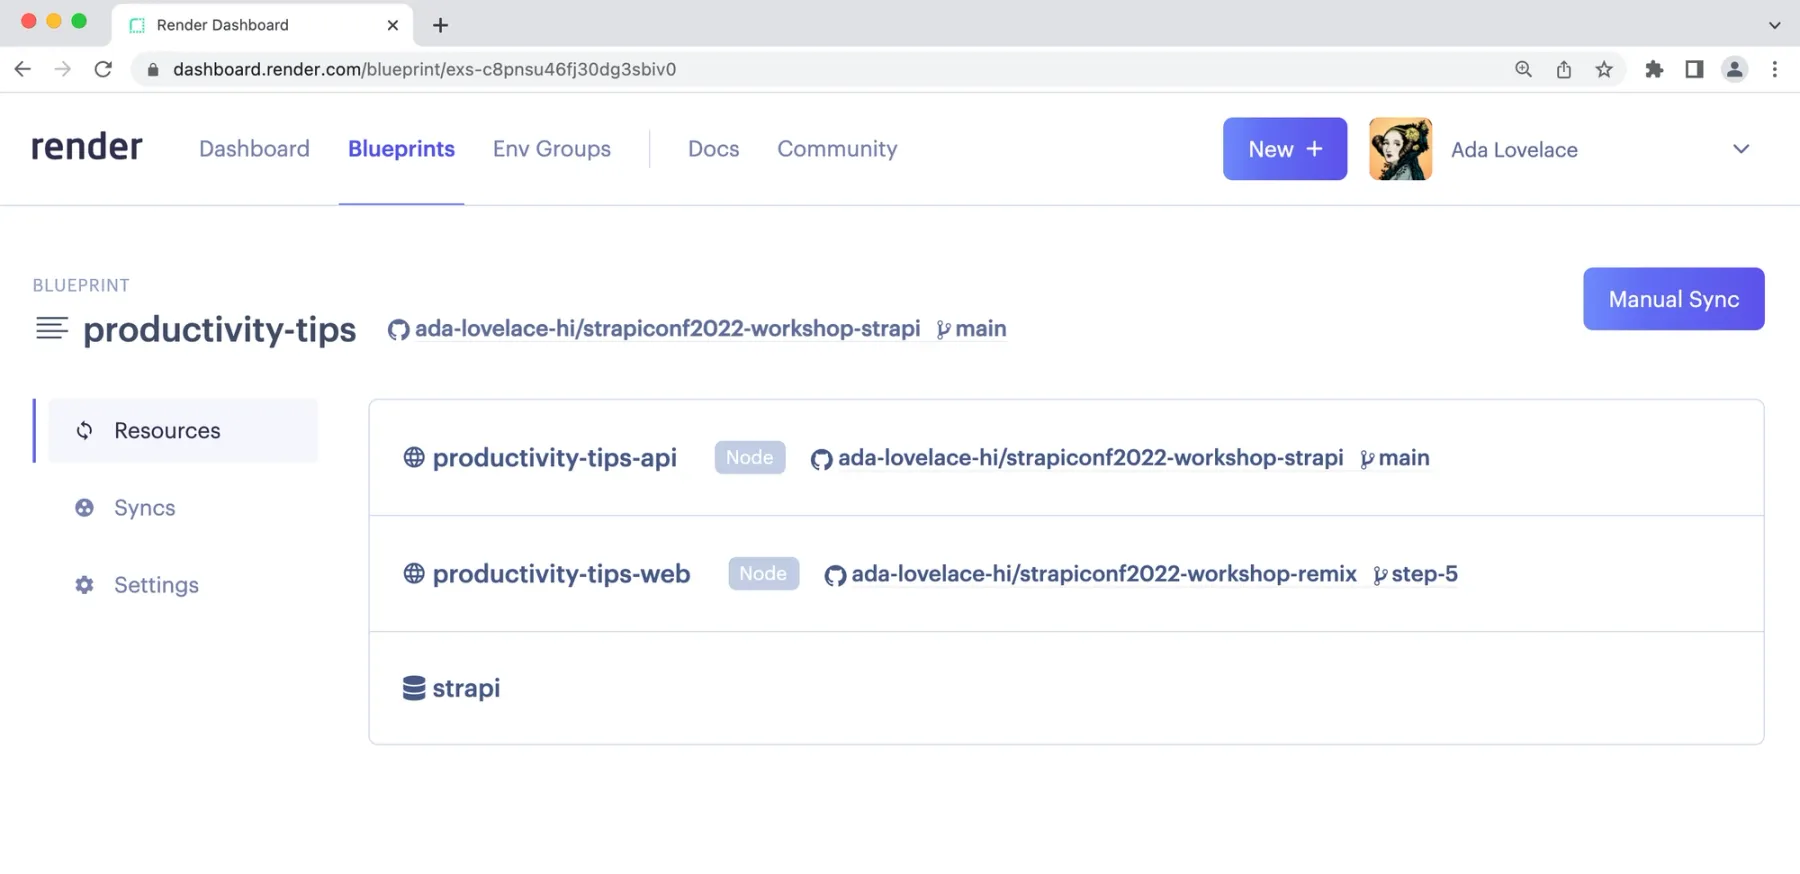
We will use Render Blueprints to make deploying and connecting these two services faster and less error-prone. A Render Blueprint is defined using a single render.yaml file. That file lives in the Strapi repository for these two applications.
Follow the instructions in the Deploy to Production on Render section of the Strapi repository's README. You'll make minor changes to the render.yaml file to make sure it deploys the code from your copies of the example repositories. Then you’ll perform the initial deploy, generate a production Strapi API token, and update the deployed production Remix service with that API token.
Now you have your very own Productivity Tips app with which you and your coworkers can collect and share all your best productivity tips! Start adding tips using the Strapi Admin GUI, and then share the Remix service's URL with your team.
Customize
I encourage you to extend the Remix and Strapi applications to customize them for your needs! Here are some ideas for inspiration.
- Add a search bar so your coworkers can search for tips about a specific topic or tool. Algolia’s React InstantSearch library might be useful for this.
- Add a login page to restrict use of the Remix app to only approved users. Use OAuth with Google or GitHub login so you don’t have to write code to manage user accounts and password resets. Okta has guides for adding Google, GitHub, and many other login providers to a web application. If you don’t want to use a 3rd party login provider, you could store and manage users directly in Strapi.
- Make the screenshot thumbnails for each productivity tip clickable and zoomable. Strapi’s Cloudinary plugin that we're using automatically creates small, medium, and large versions of images you attach to a Tip, but I didn’t have time to add more than the thumbnail view to the Remix app.
- Replace Pico.css with a different minimal CSS theme, or even add your own styling to match your company or team’s brand colors.
Let me know if you implement any of these! If they would be useful to others, I’ll consider merging them into the example repositories!