Picture this: you run a hefty Django app, an online store for your company. It’s a collection of services – an API, a shiny frontend, a database, an in-memory datastore, worker nodes, a GUI for admins, a bunch of scheduled jobs…the whole shebang – all tuned to perform quickly for your customers. You’re ready to kick into high gear as the busy season approaches and the team preps new product launches.
Then suddenly, your cloud provider is struggling with operational challenges. You can’t deploy updates. You’re channeling #HugOps, but your apps must continue to #JustWork.
While our migration guide explains the process for moving any kind of app over, I often like to have detailed example to follow. As a Python developer and a former Drupal and Magento admin for a retail chain, I wanted to share a migration post that could help someone in a time of need like the one described above. With this guide, I will help you move your Django app to Render so that it's production-ready : ) If you’re looking to start fresh instead, check out our guide for quickly deploying a new Django app.
One Django/Postgres app running ~39 websites. One Node app hitting a Mongo DB. One Elixir background service. Bunch of cron jobs, etc.
This post will walk through a practical example of migrating an application from Heroku to Render using Saleor, a popular open-source e-commerce system. Based on Django and Python, Saleor has served high-volume companies in retail sectors like publishing and apparel since 2012 and is still growing rapidly. The latest major update introduces a modular front end powered by a GraphQL API and written with React and TypeScript.
Why Saleor, Why Render?
Lots of Render users may encounter real-world use cases in which they need to deploy a full-featured storefront, and Saleor provides a flexible API-first solution. The framework appeals to us at Render because it’s developer-first, actively maintained, and receptive to community feedback and contribution.
You may wonder why you would want to migrate your Django app from Heroku to Render. Our comparison page explains all the benefits you'll get – like private networking, HTTP/3, and DDoS protection, among many other things. Running a production-grade instance of Saleor on Heroku gets complicated really quickly. This guide explains how we addressed much of that complexity in the Render environment.
There is one more reason we chose the Saleor project for this guide. We often hear questions about Docker Compose from our users interested in taking advantage of Render’s implementation of IaC (infrastructure-as-code). Within on of its repositories, the Saleor project maintains code and documentation for deploying all components of Saleor using Docker Compose. This guide will also discuss how we translated that docker-compose.yml into a Render Blueprint.
Before embarking on a migration, it helps to understand how some high-level concepts map from Heroku to Render. Check out the helpful concept mapping my coworker Chris put together.
Deploy Saleor on Render
In the first part of this post, we’ll migrate a demo instance of Saleor from Heroku to Render. In the second half, we’ll productionalize Saleor on Render. If you want to follow along on our journey interactively, fork the saleor repository.
We’ll start by creating a render.yaml file at the root of our repository. If our deployment is a Bob Ross creation, this is our blank canvas – the Blueprint that defines and integrates all the components of the working production application. You can certainly use the Render Dashboard to deploy services and databases individually, but we’ll codify the architecture in a render.yaml so we can:
- Reduce the chance of human error
- Reduce repetitive point-and-click configuration
- Define a source of truth for the architecture with version control and git blame
Saleor’s README invitation to deploy their demo on a Heroku instance acts as our entry point for this post. We’ll first walk through each stage of migrating the demo to Render, and then illustrate steps for making the Django app production-ready. Saleor consists of three components: the Saleor Core backend server, the Saleor Dashboard GUI, and the Saleor React Storefront. Here's a preview of the architecture we'll deploy:

We’ll paint each happy little tree at a time 🌳, but you can peek at the final creation on GitHub.
Part One: Migrate a Django App from Heroku to Render
- Create a Web Service for the API
- Add a Database
- Add Redis
- Add Build Steps
- Add a Frontend React App
- Add a Static Dashboard
Part Two: Productionalize a Django App on Render
- Add a Secret File
- Add a Background Worker
- Add a Cron Job
- Update Build Steps
- Add Runtime Steps
- Add a Message Broker
- DRY It Up
- Help! (a Helper File for Derived Variables)
- Next Steps
A note on using other application manifests to generate Blueprints:
If your application has been deployed on Heroku or with an infrastructure provisioning tool, you likely have other infrastructure-as-code files, like a Procfile or docker-compose.yml, to refer to while setting up a deployment to Render. These files can act as useful tools for creating Blueprints. This post will reference several alternative application manifests to demonstrate how they were used.
The saleor and saleor-dashboard repositories both contain app.json files for Heroku deployment. The Saleor project also includes the saleor-platform repository, which combines the Saleor API, saleor-dashboard, and the react-storefront. Both saleor-platform and the Heroku deployments are intended for local development and demo purposes and do not reflect productionalized Saleor environments. Still, we’ll use app.json and Docker Compose files as guides for getting started with a Blueprint that describes the Saleor services and their attributes. These resources are particularly helpful in pointing us to the environment variables and commands necessary to build and run an app.
Migrate a Django App from Heroku to Render
To begin, we will deploy the Saloer Core API server using Render’s native Python environment. We maintain native environments to make deploying to production similar in complexity to running code locally. Like Buildpacks in Heroku, they provide common language runtimes and minimize the need to provision utilities used to build and deploy; native environments aim to provide more control and customization capability while requiring fewer steps to use and understand than Buildpacks. Let’s jump in to creating a render.yaml to set up our demo Django app!
Create a Web Service
We’ll begin by defining a Web Service for the Django app’s GraphQL API in a brand new render.yaml. This service is described in an app.json file and corresponds to the api service in the saleor-platform docker-compose.yml.
Let’s make sure each line is clear.
nameis a name for our service to make it easy to find on the Render Dashboard. It’s interchangeable with thenameinapp.jsonand is also used to generate an .onrender.com URL.typetells Render that we’d like to create a Web Service. When we’re deploying an API, the type may be eitherweborpserv(Private Service), depending on the use case.envspecifies that we’d like to use Render’s native Python environment. This environment includes OS packages that common Python libraries need in addition to Python 3 specific environment variables.repospecifies which repository we'll deploy from; update this if you're deploying your own fork of Saleor Core.buildCommandtells Render which commands or files to run to build the Django app. Read more aboutrender-build.shbelow. Heroku buildpacks often handle build elements behind the scenes, but Render encourages being more transparent and provides more control. Use theRUNcommands from builds described in Dockerfiles as a guide for build commands to include in a blueprint.startCommandtells Render which commands or files to run to start the Django app. This command is specified in theProcfilefor a Heroku build. We'll prepend the command with theALLOWED_HOSTSenvironment variable. Referencing the standardRENDER_EXTERNAL_HOSTNAMEvariable will add our API's hostname to the list of allowed hosts.DJANGO_SETTINGS_MODULEis an environment variable that Django requires to determine which settings to use.DEBUGis an environment variable that Django requires, and should never be set toTRUEin production deployments. We’ll useDEBUG=Truefor our first demo deployment.DEFAULT_FROM_EMAILis an environment variable that Saleor uses to set a default email address for outgoing email.ENABLE_ACCOUNT_CONFIRMATION_BY_EMAILis an environment variable that Saleor uses to control whether new account registration should require email confirmation.SECRET_KEYis an environment variable that Django requires to provide cryptographic signing.PYTHON_VERSIONis an environment variable used to customize the Python version for a project on Render if a version other than Render’s current default of 3.7 is required.
Add a Database
Now we need a PostgreSQL database for the app. Let's add that to our render.yaml.
That was simple, but how do we connect this database to the Web Service?
The highlighted lines create an environment variable whose value is the connection string for the database.
Add Redis
This Django app uses Redis for caching, so let's add Redis.
And similar to the database, we now need to tell the API how to access the Redis instance.
The highlighted lines create an environment variable whose value is the connection string for the Redis instance.
Add Build Steps
When Django apps are built and deployed, a few extra commands are commonly run to install dependencies and perform database migrations. Let’s create a render-build.sh file in the root directory of our project. You can use this type of file to run any build steps your Django app requires.
The value of buildCommand in the render.yaml should be the path to the render-build.sh file. With a build script in place, we can deploy the API, database, and Redis instance to ensure everything works as expected so far. Deploy the repository containing your render.yaml as a Blueprint on Render. When it's done, go to the /graphql/ path of your API's .onrender.com URL to see the GraphQL API Playground.
Add a Dashboard
With the API for our Django app scaffolded, we’re ready to define a frontend service to consume it. The Saleor platform deployed on Heroku includes the saleor-dashboard, so we’ll define this in our Blueprint next. It is a single-page Node.js dashboard app, defined in an app.json file for Heroku deployment, and uses Heroku’s static buildpack.
When we migrate saleor-dashboard to Render, we’ll use Render’s static environment. This component of our infrastructure will run for free, since Static Sites are always free on Render, and Render will serve it over a global CDN with fully managed TLS certificates. Let’s add to our render.yaml.
We’ve added the commands for installing dependencies and building the app to add to our buildCommand. The dashboard requires the API_URI environment variable to build successfully. To avoid hard-coding, we'll derive a temporary environment variable from our API service using the fromService attribute, and build our final API_URI as part of our buildCommand.
The Dockerfile provides insight into the staticPublishPath required for this project; we see a COPY of the static contents to the /build/ directory, relative to the working directory. We also see the environment variables required to run the app in the Dockerfile, including the URI for our Saleor API and the URL where the dashboard should be mounted and served.
To translate the configuration found in static.json and the NGINX configuration file to Render, we add a rewrite to route / requests to /dashboard/index.html. When we push these render.yaml changes, Render will automatically create the new Static Site.
Add a React Storefront
If I’m comparing this project to a painting, it's time we added something pretty. The final frontend piece of the Saleor platform, the storefront, is deployed to Heroku as part of the Saleor demo in its original version of the storefront. This storefront is now deprecated because in 2021, the Saleor project added a new storefront service built with Next.js, TypeScript, and Tailwind CSS. The original saleor-storefront can be migrated from Heroku similarly to the API and Dashboard projects, but Heroku deployment hasn’t been added to the new react-storefront repository. The more modern react-storefront contains a base Dockerfile that provides clues to deployment requirements. In this guide, we’ll deploy the react-storefront as the final component of our demo Saleor instance.
Note that we can deploy the react-storefront on Render as-is using the Dockerfile. However, since Render provides an HTTP proxy for all Web Services, using nginx as defined in the Dockerfile is redundant. Instead, we can define our service more simply and use Render’s native NodeJS environment. We’ll use docker-compose.yml, the Dockerfile, and the package.json file as starting points. Let’s add a storefront to our render.yaml.
The build command is defined in the Dockerfile. The docker-compose.yml and the Dockerfile only define RUN commands for a development instance, but we’ll run the build, start, and postbuild scripts defined in the package.json using pnpm run commands.
The environment: clause of the docker-compose.yml provides clues to the minimum environment variables required for react-storefront to run. NEXT_PUBLIC_API_URI is required to define the location of the GraphQL API, and we’ve set this to our Saleor API instance’s public URI with /graphql/ added per react-storefront docs. In our testing, the only other environment variable required for successful deployment was NEXT_PUBLIC_IMAGE_CONVERSION_FORMATS.
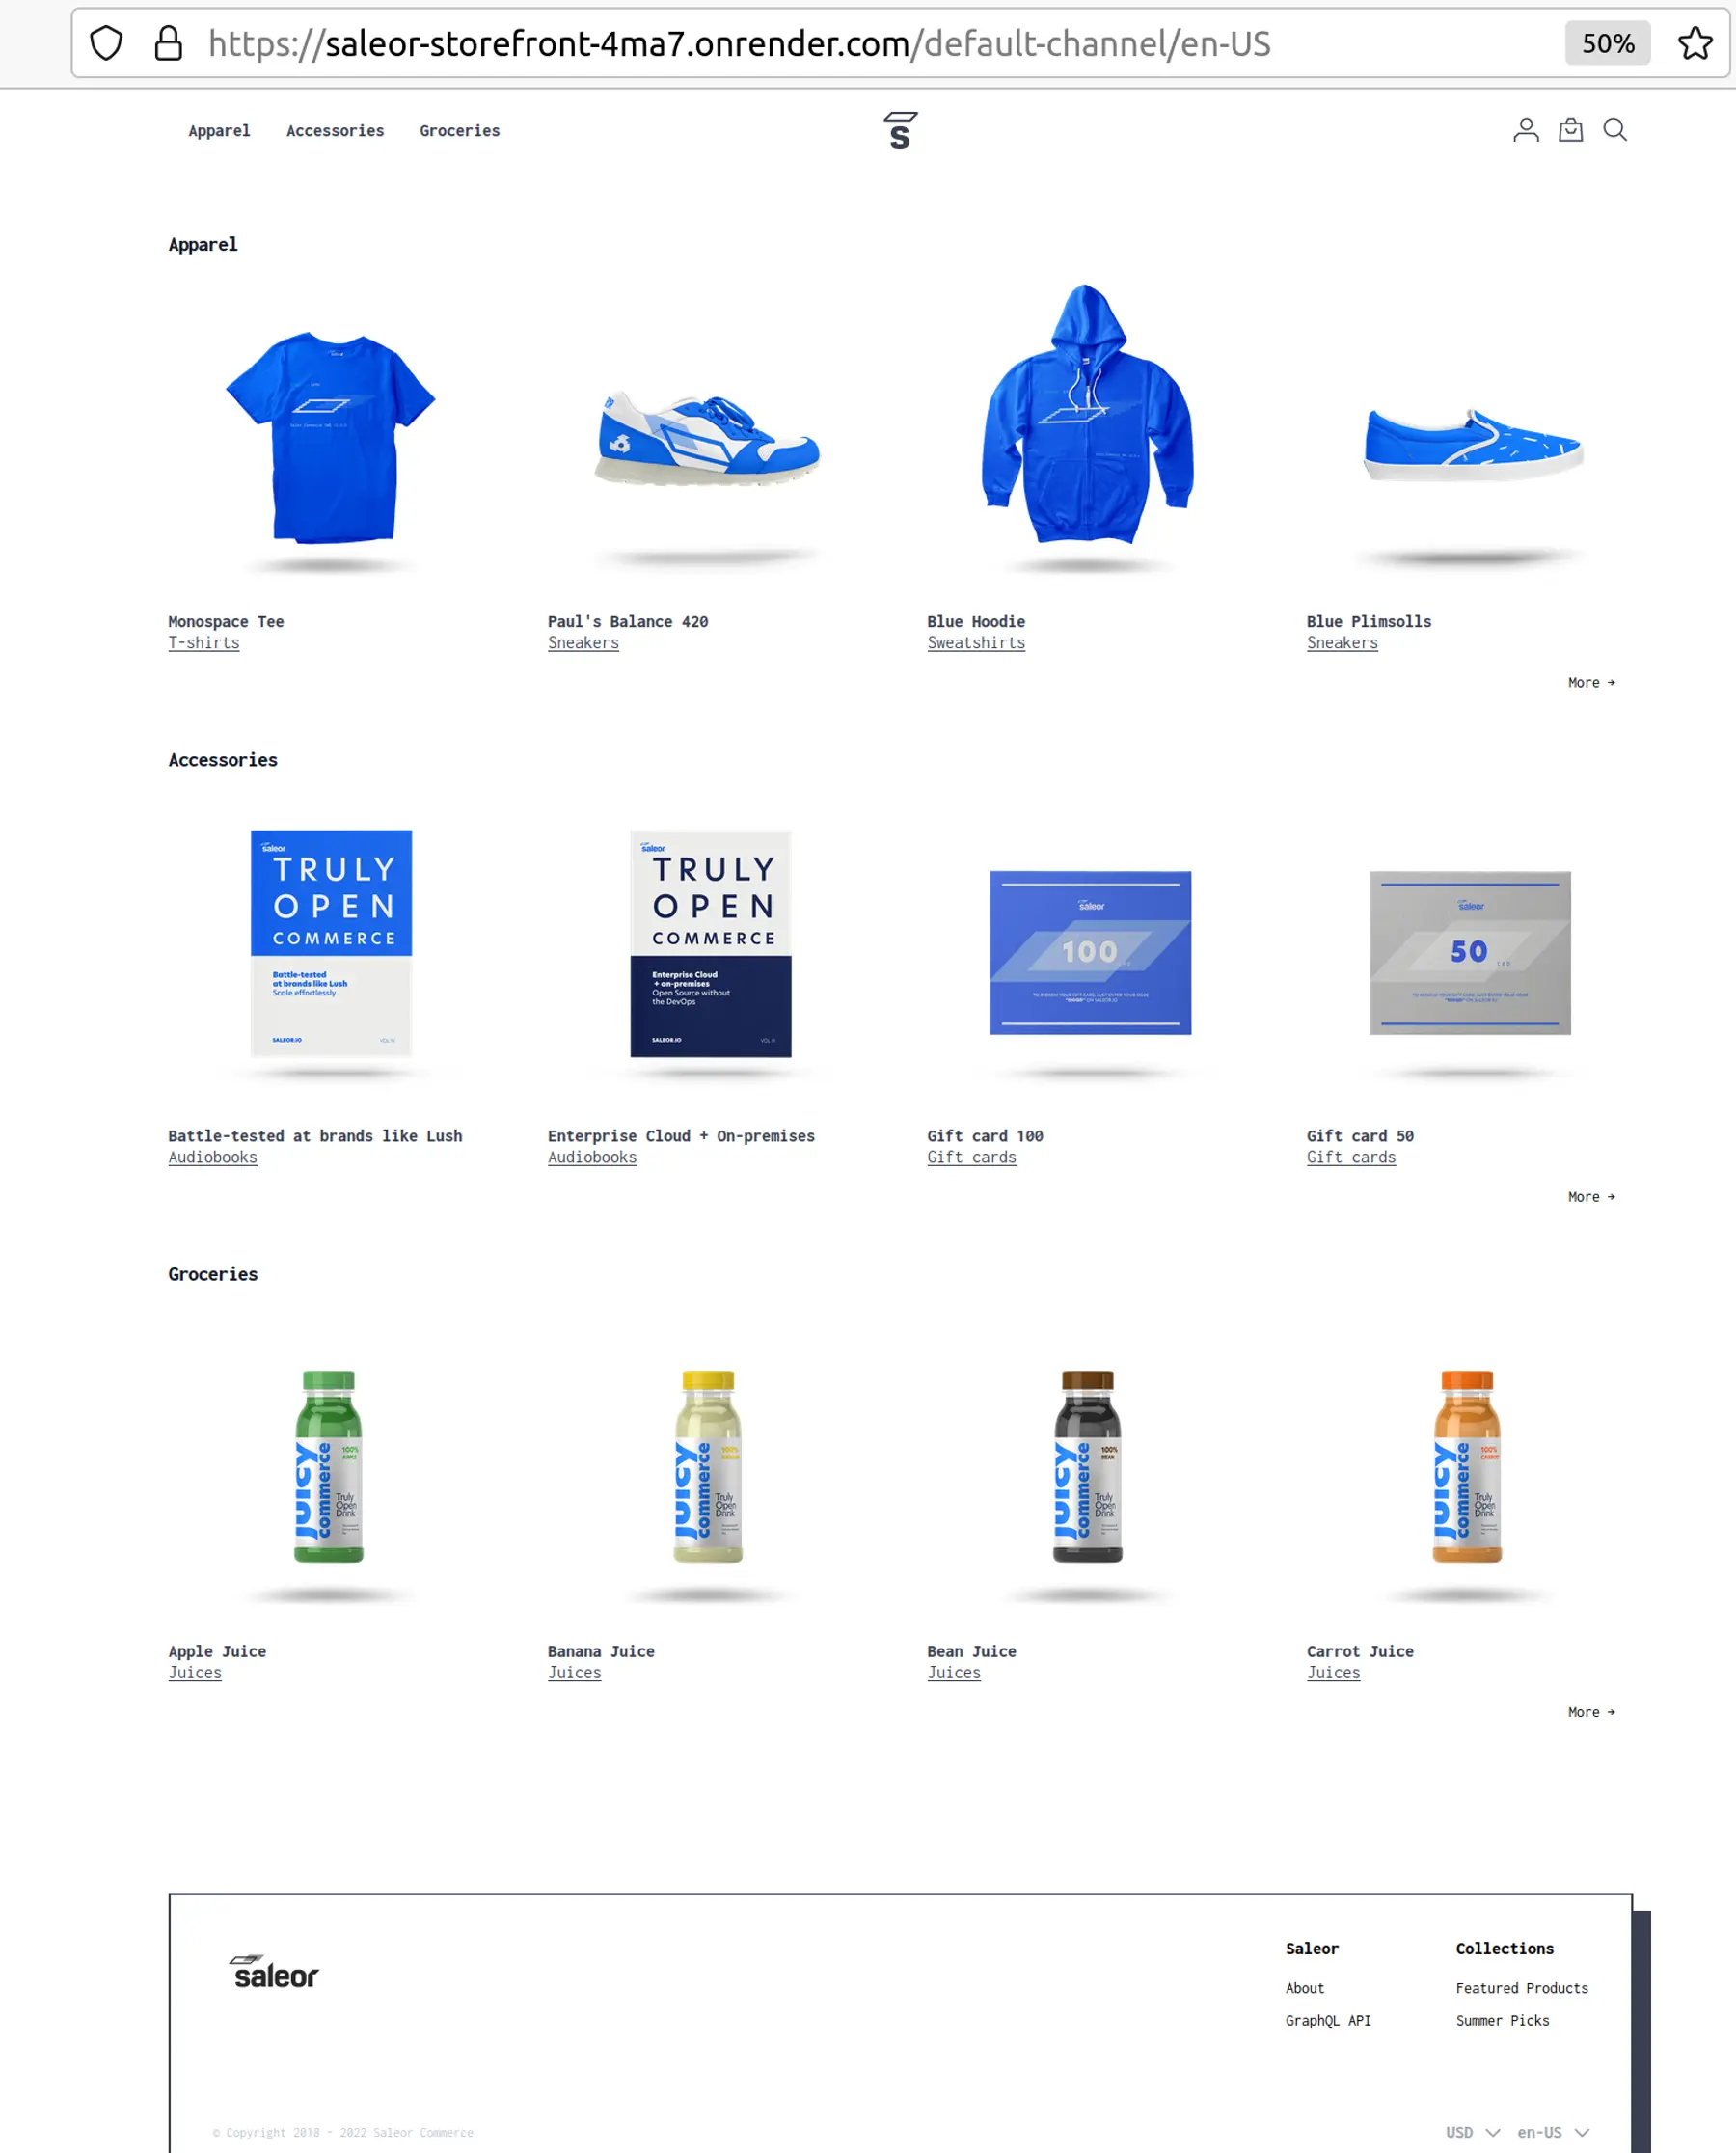
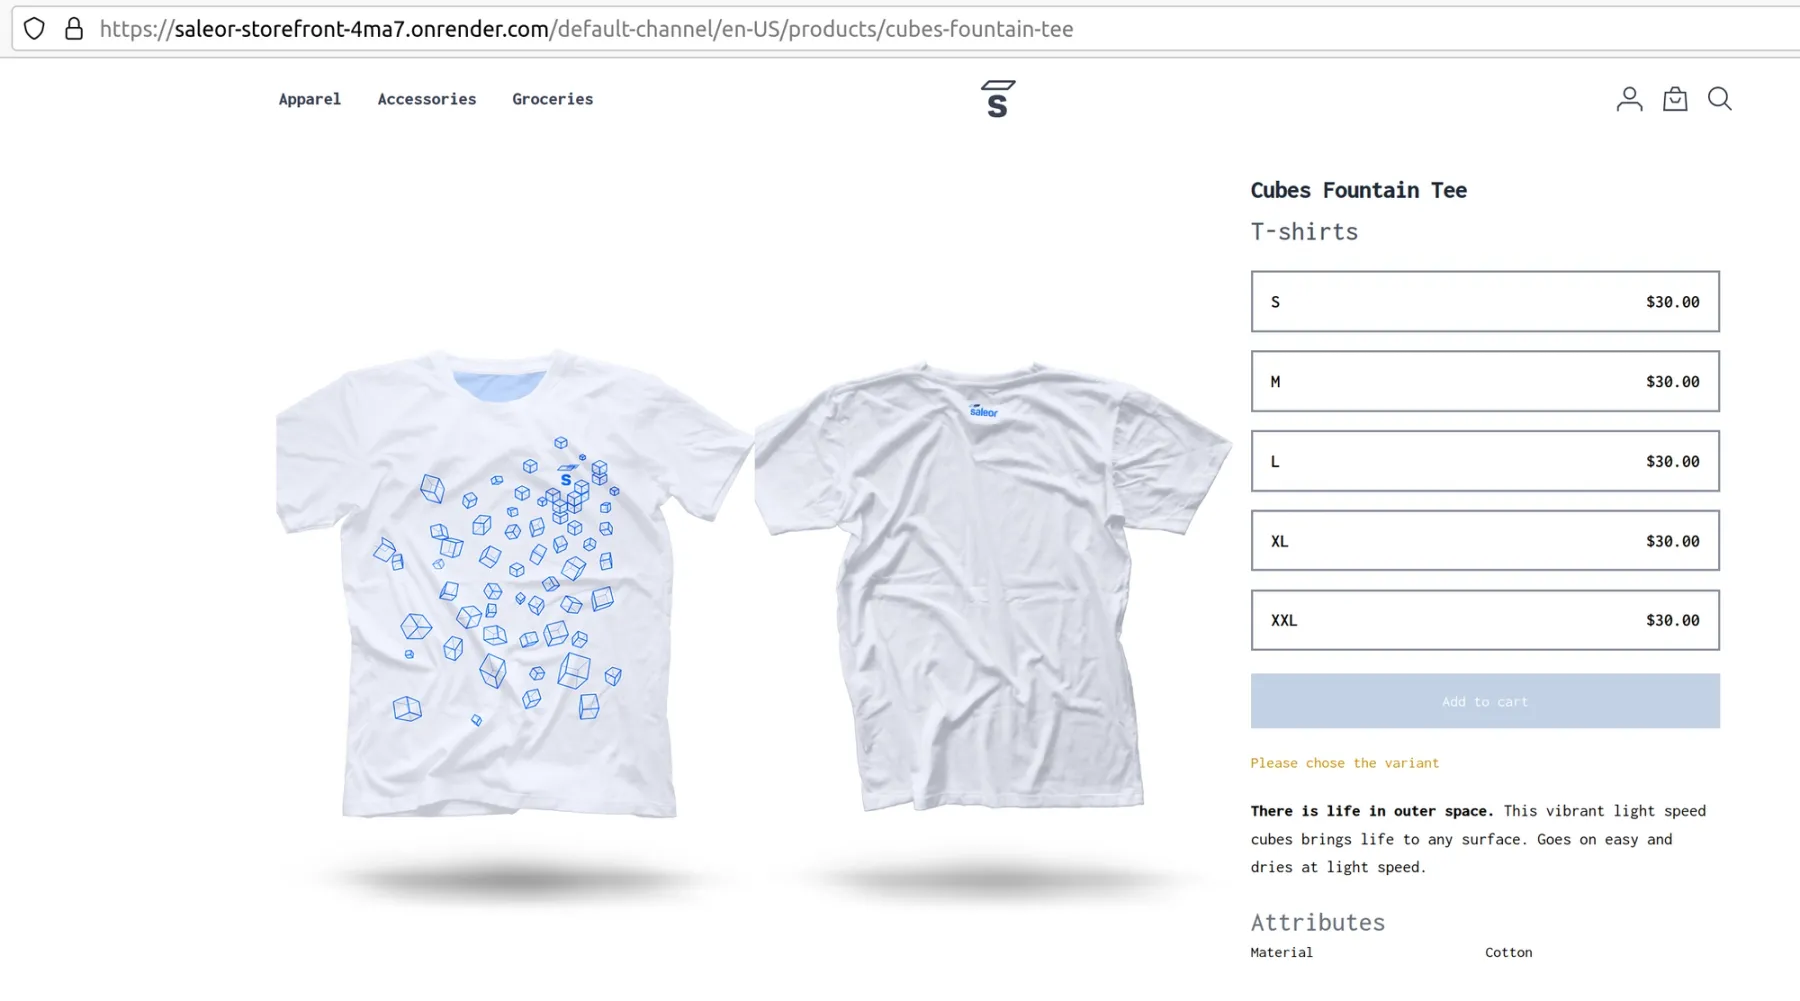
🎇 Get excited! 🎆 With a Dashboard and Storefront added to our Blueprint, we are ready to deploy our demo instance of Saleor. Pushing these changes will automatically deploy the storefront. Try it out if you're following along in your own repository.
Productionalizing a Django App on Render
As I mentioned earlier, while the deploy-to-Heroku resources that Saleor provides are suitable for a demo application, we would need to modify them to deploy a production-grade instance of the Saleor platform to Heroku. Instead, we’ll walk through productionalizing our Django e-commerce app on Render. We’ll now frame and hang our painting – or maybe you prefer imagining the addition of a majestic mountain or waterfall. Either way, now that we’re beyond Heroku, keep reading to tap some handy Render features, add power, and DRY it up. We'll finish with a hardened Saleor instance impervious to "happy accidents."
Add a Secret File
A production-grade instance of Saleor needs an RSA private key. Render’s Secret Files can help us securely store this key. To begin, we need to generate a key in the specified PEM format. We can do this locally: ssh-keygen -t rsa -b 4096 -m PEM
When generating the key, we should give it a unique name like saleor-key to avoid overwriting any existing SSH keys. No passphrase is required. With the newly-generated private key copied to the clipboard, we can navigate to our Saleor Core (API) Web Service in the Render Dashboard and create a Secret File. In Environment > Secret Files, we can add a Secret File by providing the filename as the key and pasting the private key into Contents.
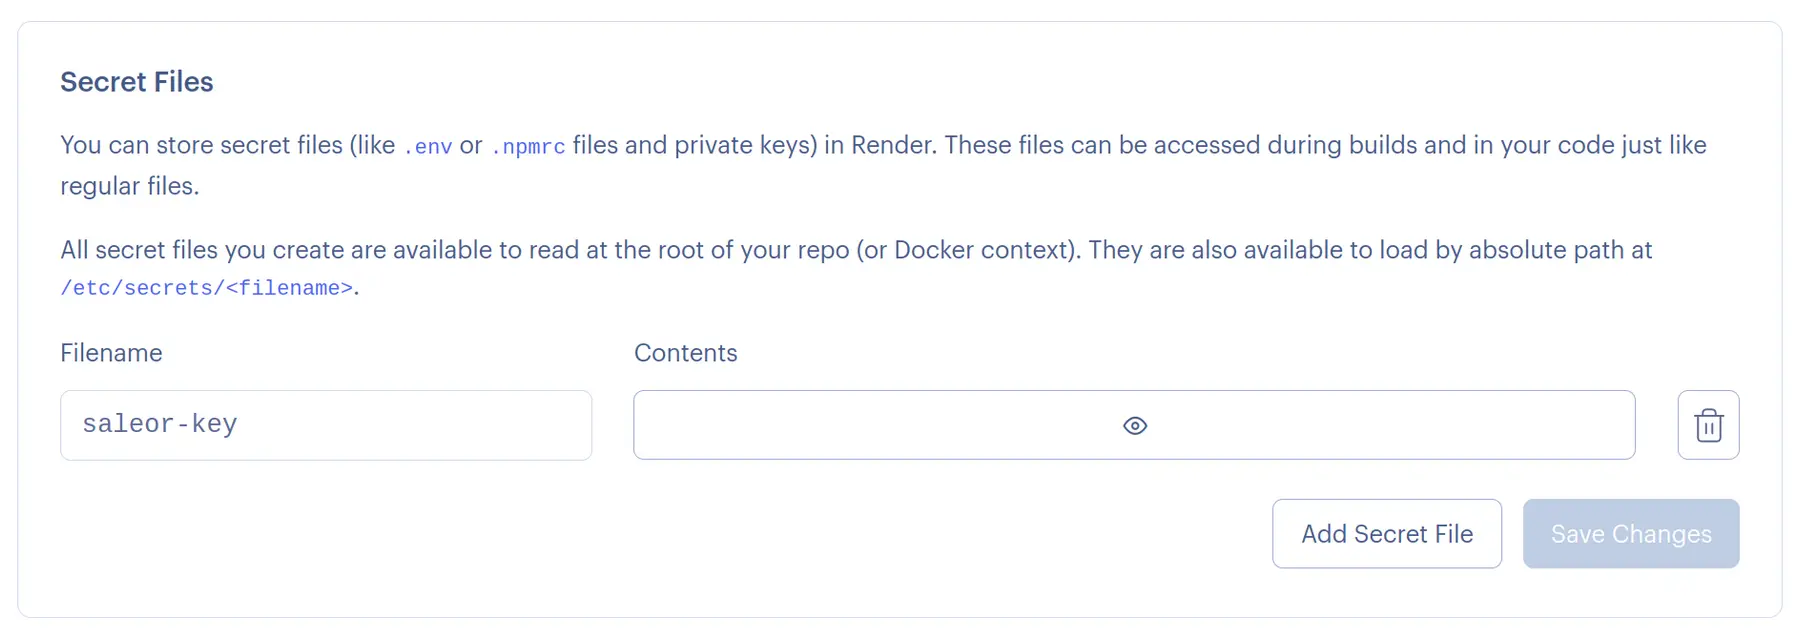
Now our private key is accessible at the absolute path /etc/secrets/saleor-key.
Add a Background Worker
In processing web requests to your Django app, it’s often useful to offload tasks to an asynchronous background worker. Our Heroku instance of Saleor used a celeryworker dyno, and we can provision a similar celery worker on Render. Let’s add a celery worker to our render.yaml.
The plan: standard attribute is set because the celery worker requires more memory than what's availabe in free instance types. Also, adding the same environment variables that our API process uses creates some duplication in our render.yaml, which we’ll also address in a later section.
Add a Cron Job
Saleor runs a command periodically to update currency exchange rates for sellers doing business internationally. Saleor’s demo app uses the Heroku Scheduler to run this daily. We can use a Cron Job to keep the exchange rates up to date. Let’s create a Render Cron Job to run the python manage.py update_exchange_rates --all command at 1 AM every day.
You may notice that the definition of the Cron Job looks very similar to that of the Web Service for our API. A Render Cron Job is not tied to a parent app or Web Service like Heroku’s Scheduler add-on. It is defined on its own. A Cron Job builds and runs code from any repository on a specified schedule, whereas the Heroku Scheduler can only execute a command using an existing deployed app. In this case, similarly to the background worker, the Cron Job needs to use many of the same environment variables as its fellow services, and we’ll address that duplication below.
A few other things to note about this Cron Job definition:
- The
scheduleproperty;scheduleis a cron expression that defines when to run the job – in this case, we’re running it every day at 1 am UTC. - The
OPENEXCHANGERATES_API_KEYis required to get exchange rates from the Open Exchange Rates API. You’ll need to sign up for a free Open Exchange Rates account to enable the integration. The value for yourOPENEXCHANGERATES_API_KEYshould be your Open Exchange Rates app ID. Read more in the Saleor documentation. Because this value should probably be kept secret, you should define it with the placeholdersync: falseso that you can add teh value securely in the dashboard.
With that, our Cron Job is in place to keep prices in local currencies updated, and we are fleshing out a promising landscape.
Update Build Script
Now, let’s update our build script to support the secret key and services we’ve added to get our instance of Saleor ready for production.
First, we set the RSA_PRIVATE_KEY environment variable to make it available in the build context.
We also add logic that checks the standard Render environment variable RENDER_SERVICE_TYPE to ensure that database migration only runs for the Web Service. This change helps us to avoid a race condition which would prevent one of the services from deploying successfully.
Add Runtime Script
Next, we’ll replace our original startCommand: in the Python services with a start script to accommodate our more complex deployment. We’ll use a subcommand to address the cases of starting the celery worker and cron job.
We explicitly set the RSA_PRIVATE_KEY environment variable since it is also required in Saleor’s run context. We also need a subcommand to tell the script to start either the web server or the celery worker. To finish this step, we’ll update the startCommand value for our Python services in render.yaml to reference the new start script; for our API, we’ll use ./render-start.sh server, for our worker, ./render-start.sh worker, and for our cron job, ./render-start.sh cron.
Add CloudAMQP
The Heroku deployment of Saleor uses CloudAMQP as an add-on for message brokering. To use CloudAMQP with our Render deployment, we first create a free CloudAMQP instance and note the URL.
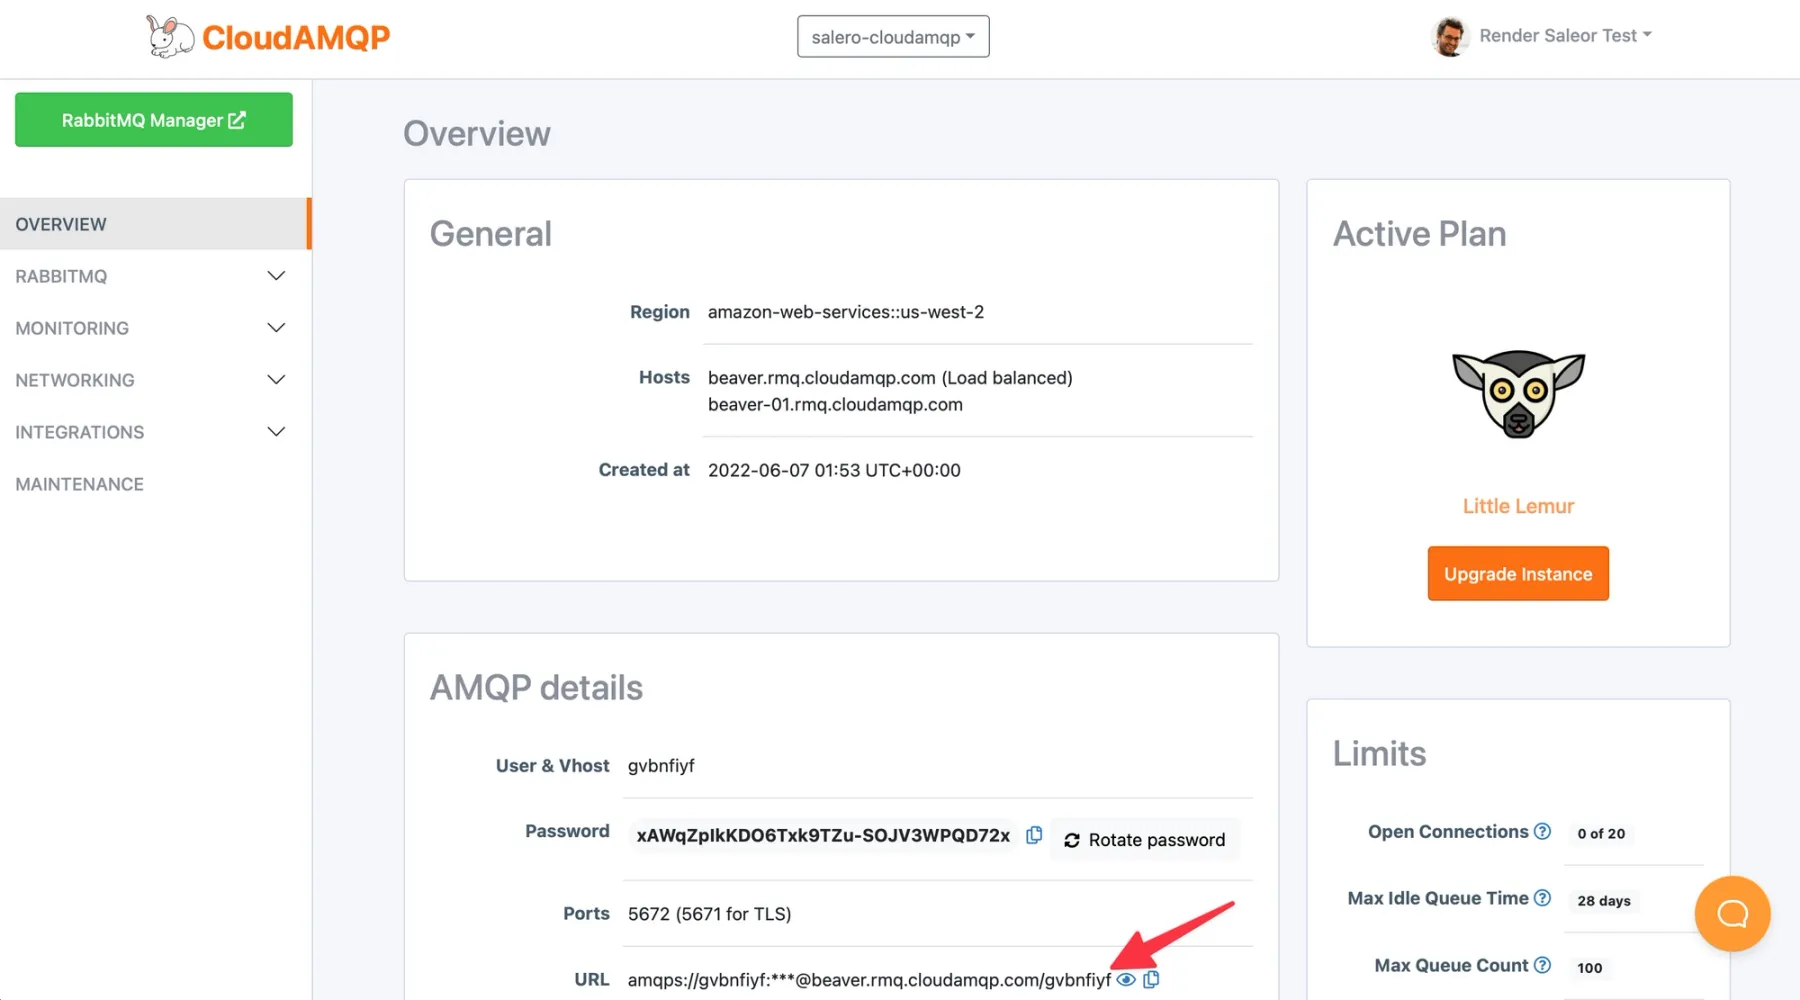
Then we set the value of the CLOUDAMQP_URL environment variable to the URL provided by the CloudAMQP dashboard.
DRY It Up
As I mentioned previously, there’s some duplication in the render.yaml between the Python services. On Render, we can add a happy little cloud to our environment – an Environment Group – to reduce some of this duplication. An Environment Group is a set of environment variables maintained in one place and shared with multiple services. Let’s move the SECRET_KEY, PYTHON_VERSION, DJANGO_SETTINGS_MODULE, DEBUG, NPM_CONFIG_PRODUCTION, DEFAULT_FROM_EMAIL, and ENABLE_ACCOUNT_CONFIRMATION_BY_EMAIL environment variables to an Environment Group. We're also going to add ALLOWED_CLIENT_HOSTS, which is required when we flip DEBUG from True to False in the next section.
Now we can remove the definition of those environment variables from the Python services and add the following property to their envVars objects:
- fromGroup: saleor-settings
To make the most of our environment group, note that we can also add our saleor-key secret file to our environment group so it’s accessible from each service’s environment. We need to do this in the Dashboard after the Environment Group creation is complete.
Help! (a Helper File for Derived Variables)
Our repetition of the RSA_PRIVATE_KEY export is another source of duplication in our deployment code. In addition to RSA_PRIVATE_KEY, Django apps and Saleor in particular also require a few other security-focused environment variables to run in production: the aforementioned ALLOWED_HOSTS, used to thwart HTTP Host header attacks, and ALLOWED_CLIENT_HOSTS, used to restrict API access to the target clients you define. To continue our DRYing kick and make these parameters centrally available, we can use a helper script and source it in both our render-build.sh and render-start.sh scripts. Let’s create a helper script.
Now we can replace the export lines in both render-build.sh and render-start.sh with source helpers/variables.sh and add any other programmatically derived environment variables to helpers/variables.sh in future.
To complete our de-duplication effort, we should add our RSA_PRIVATE_KEY to the Environment Group we created so it's shared among our Environment Group. We can do this in the Dashboard in Env Groups > saleor > Secret Files.
Drumroll, please: our happy little services, scripts, and tools now depict a complete landscape. With our production-ready environment variables now available in both the build and start contexts for all of our services, we are ready to flip the switch on our Saleor services in render.yaml to DEBUG=False, sync our Blueprint, and deploy!!
Next Steps
Bob Ross warned us, “If you do too much, it’s going to lose its effectiveness." At Render, we do a lot so that you can do just enough to build great things. If you're thinking about migrating your Django project to Render, you’re considering how to translate each component to the new environment, and the amount of work required. This post aims to provide good coverage of those tasks, but there is always room for growth : ) We’ll keep building, and in the meantime, we (and your fellow developers) would love to see your solutions for the following next steps:
- You may deploy RabbitMQ as a Private Service on Render instead of using an external RabbitMQ-as-a-service provider. A version of this project with a RabbitMQ instance added to the Blueprint would remove the need to sign up and pay the bill for another service. If you extend the project as such, please post in Render-Examples on the Render Community Site to share your work.
- At Render, when we think about what to paint in our next masterpiece, we always start with user feedback. Unsurprisingly, object storage is one of our most common product requests (upvote plz!) While we work on that, you can use S3 to store and serve static files for your Saleor instance.
- If you’re migrating an existing Django application from Heroku to Render, you likely have data in a database that you’ll need to export and import. We heard from readers and Render users that a detailed guide for these steps would provide critical context to support real migrations. Given their importance, we will dedicate a full blog post to those steps. Look out for a language and framework-agnostic guide to the data export and migration process in an upcoming post. Feel free to share about your own experience with data migration.
- This post touches on translating
app.jsonanddocker-compose.ymlfiles torender.yaml, but there’s more to say on the subject. We dream of automating this for our users. In the meantime, our community would love to read about your translation tricks.
I can’t wait to hear from you about whether this guide helped you migrate your application. If you’ve considered moving a Django app over from Heroku, or if you use Saleor or another open source e-commerce platform on Render, we’d love to see what you’ve built out. Post on your channel of choice, reach out on our community site, or hop into my DMs with your big ideas, or the unvarnished truth. We’re joined at the hip with our developer community and trust me, we want to hear from you!