
The code is on GitHub. Your web service still needs a Workflow service that runs those tasks, plus env vars so the web API can start the root task.
A Workflow service is separate from a web service. Blueprints do not create Workflows yet, so you create this one manually.
1. Create the Workflow service
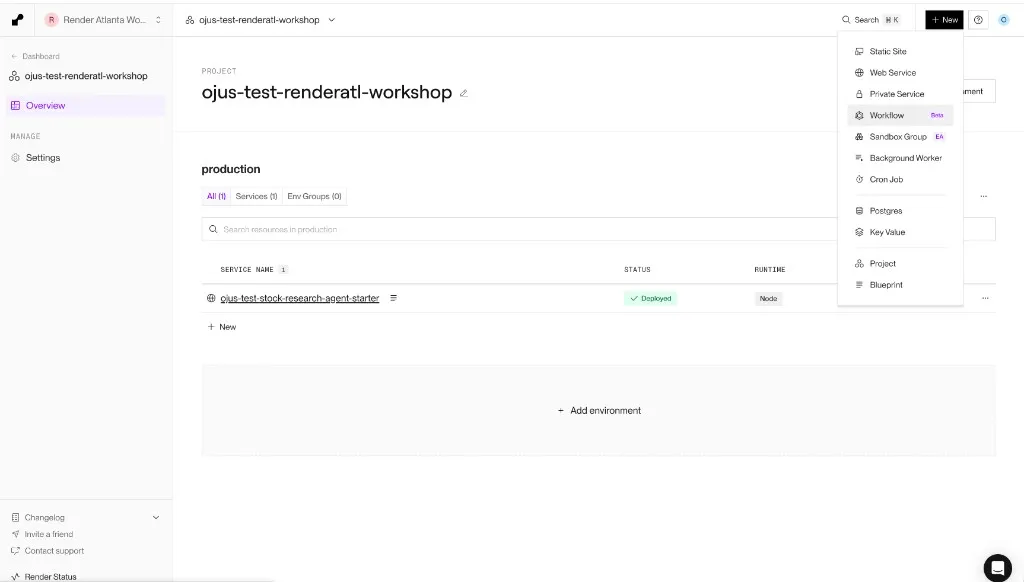
Your web service is already in the project. Leave it running. Add a Workflow next to it from + New.
Follow Create a workflow service if any Dashboard labels differ.
- New → Workflow In your project, click + New → Workflow.
- Choose My own workflow On the New Workflow page, select My own workflow (not Example workflow).
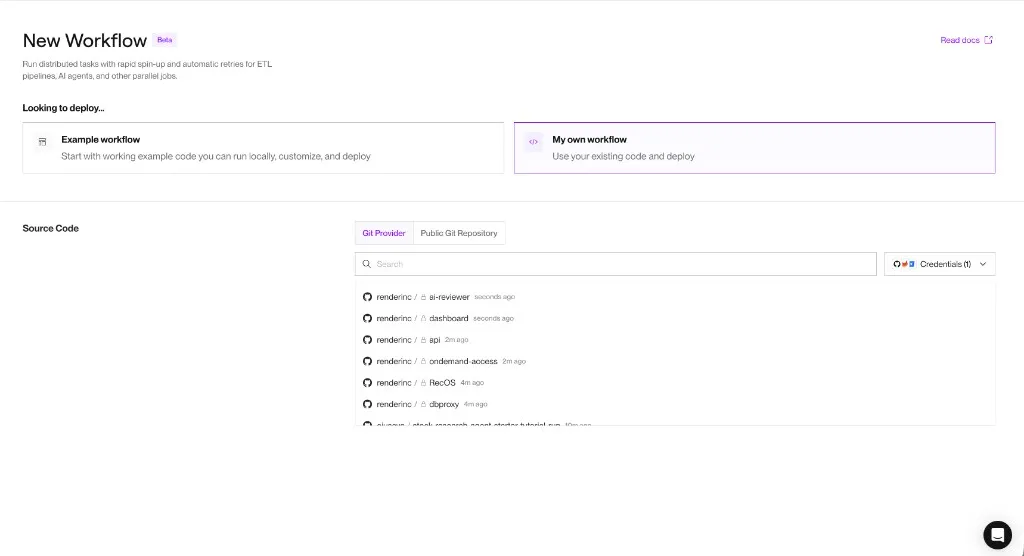
- Connect the same fork Under Git Provider, select your
stock-research-agent-starterfork (same repo as the web service). - Fill the form
Confirm at least:
Field Value Name e.g. stock-research-workflows(or keep the default)Project your username-cyc-workshopprojectLanguage Node Branch mainStart Command npm run workflow:startLeave Root Directory empty unless you changed the repo layout.
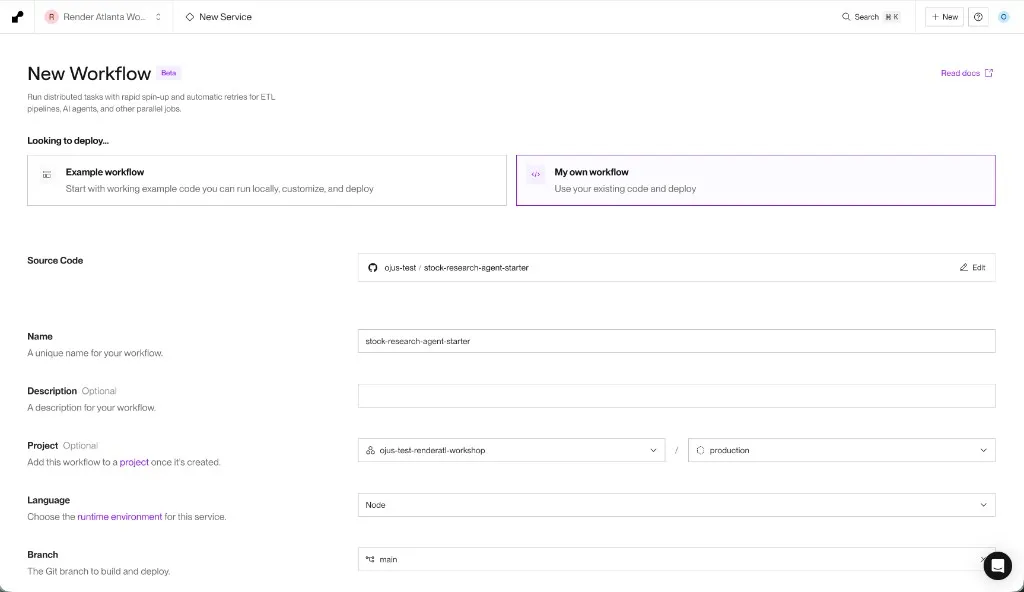
- Create Create the service and wait until it is ready (not failed).
After you pushed in the previous step, Auto-Deploy should rebuild the web service too. That deploy can fail or return 500 until the env vars below are set. That is expected.
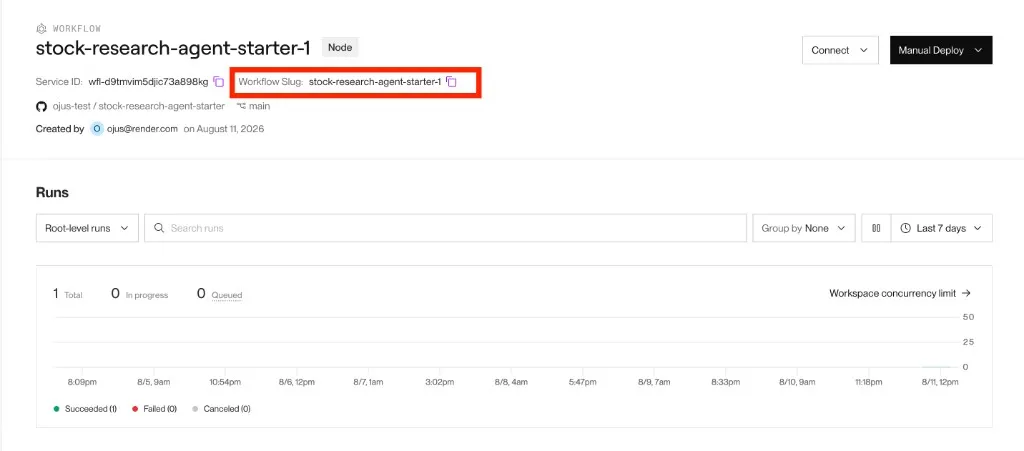
2. Copy the Workflow slug
On the Workflow service overview, find Workflow Slug and copy it. That value alone is WORKFLOW_SERVICE_SLUG.
3. Confirm the tasks and run the root once
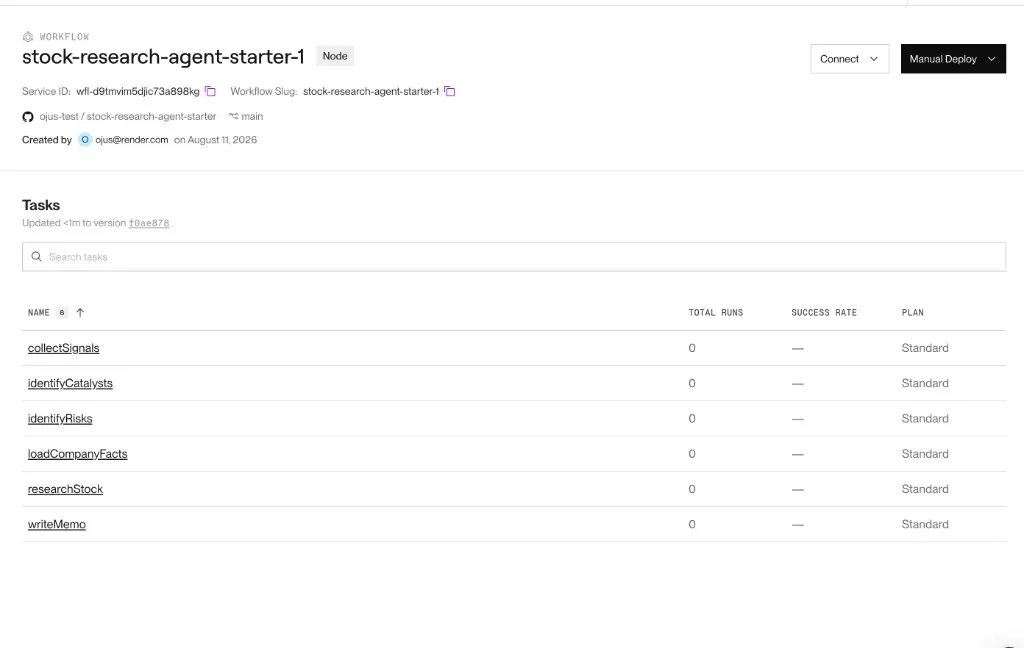
- Open Tasks Open the Workflow service → Tasks.
- Confirm six names Confirm six names are listed:
researchStock(root) plusloadCompanyFacts,collectSignals,identifyCatalysts,identifyRisks, andwriteMemo.
- Start the root task Click the root task
researchStock→ Start Task. (Do not start the step tasks by hand for this tutorial.) - Set the payload
For the payload, use a JSON array with one string (ticker case does not matter):
["NVDA"] - Start task Click Start task.
![Start Task modal for researchStock with JSON payload ["nvda"] ready to run.](/tutorials/_astro/render-start-researchstock-task.C42C4hUE_Z1gacVk.webp)
- Wait for success Wait until the run is done. The Dashboard may show Succeeded; the API/SDK may use
succeededorcompleted. Do not chase one label. - Open the run Open the run. You should see memo fields in the output (company, signals, catalysts, risks, summary). Child step runs may also appear under the root; the memo is still the root result.
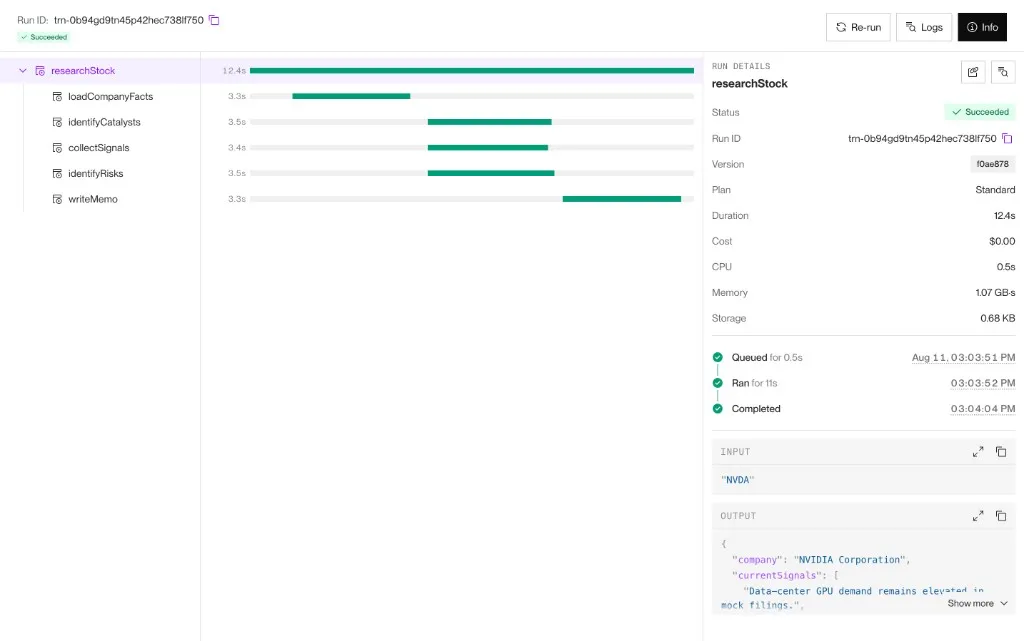
If Tasks is empty or you see fewer than six names: open Logs. You should not see the old placeholder line about no tasks registered yet. After a good deploy you should see a log that lists the six registered task names. Redeploy after confirming GitHub has the multi-task(...) file. Confirm Start Command is exactly npm run workflow:start.
4. Point the web service at the Workflow
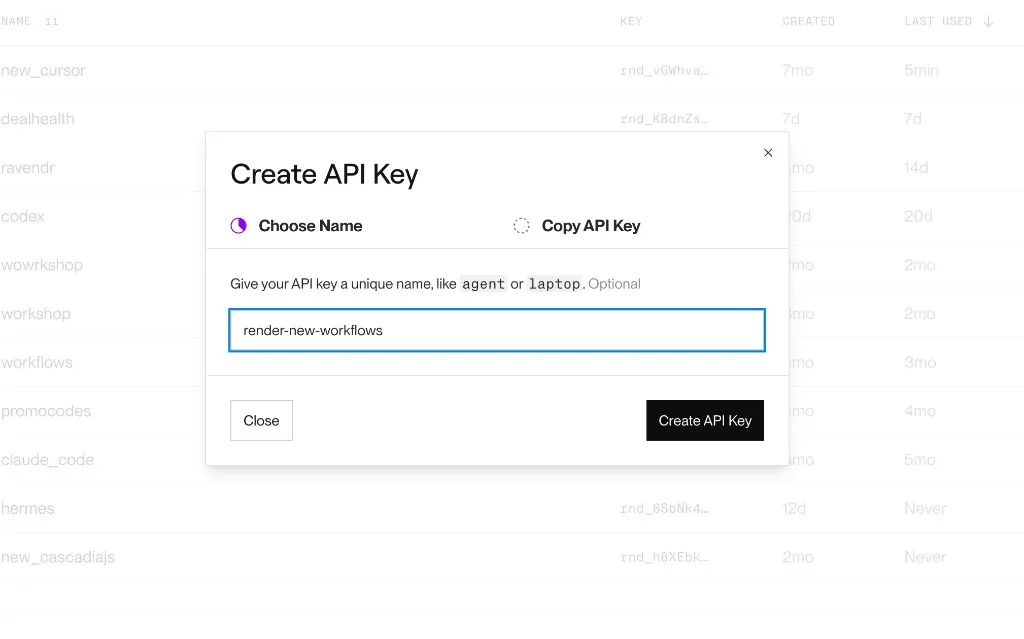
- Create an API key Dashboard → your avatar → Account Settings → API Keys → create a key. Copy it once.
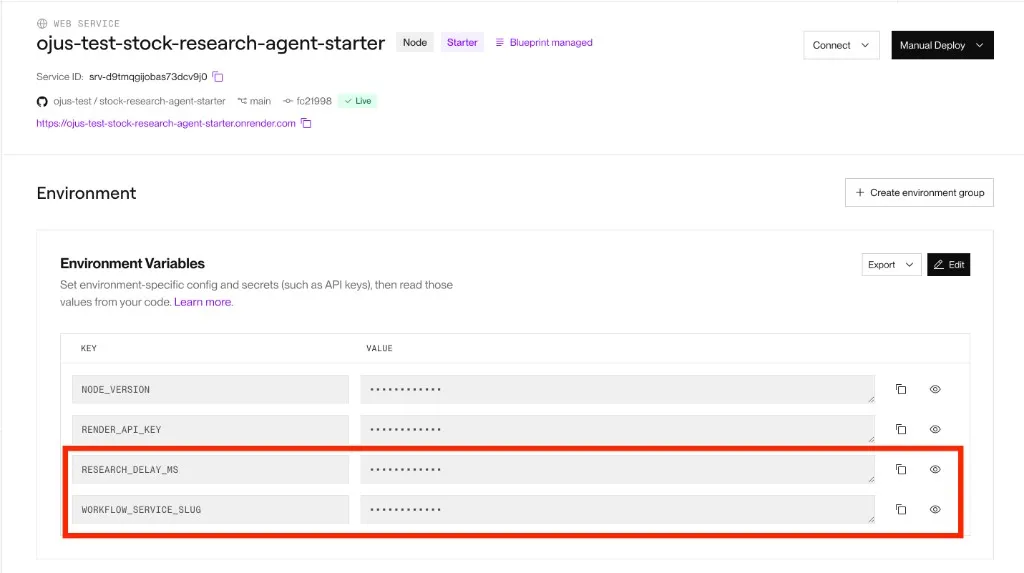
- Open the web service env Open your web service (not the Workflow) → Environment.
- Add two variables
Key Value RENDER_API_KEYthe API key you just created WORKFLOW_SERVICE_SLUGthe Workflow Slug you copied above (slug only, not slug/researchStock) - Save Save. Wait for the web service to redeploy.
Revoke the key when you finish the tutorial. Do not commit it to GitHub.
5. Confirm POST returns a task-run ID
curl -s -X POST https://YOUR-WEB-SERVICE.onrender.com/api/research \ -H 'content-type: application/json' \ -d '{"ticker":"NVDA"}'Expected: JSON with taskRunId (and statusUrl) within a couple of seconds. That ID is for the root researchStock run. Not the full memo.
If you get 500 / auth errors: confirm RENDER_API_KEY and WORKFLOW_SERVICE_SLUG are on the web service, then redeploy.
Troubleshooting
Input format errors. The root task takes one string argument. Send ["NVDA"], not NVDA or {"ticker":"NVDA"}.
Run fails in logs. Confirm data/mock-stocks.json is in the repo and the ticker is NVDA, AAPL, or MSFT.
Wrong repo connected. The Workflow must use the same fork you pushed workflows.ts to.
Still seeing the placeholder. Logs should list several registered tasks (root plus step tasks), not a “no tasks registered” placeholder. Confirm main has the full multi-task workflows.ts.
What you learned
- Several Workflow tasks registered; you ran the root once
- Web service env set; POST returns one root taskRunId
- Next: close the tab mid-run and recover the memo