
Prerequisites
- A Render account
- Free signup
- You will create paid starter services for this tutorial; delete them when you finish
- A GitHub account
1. Fork the repo
- Open the starter Go to ojusave/stock-research-agent-starter.
- Fork it Click Fork → create the fork under your GitHub account.
2. Namespace the Blueprint
On your fork, run the Setup attendee Blueprint names GitHub Actions workflow so render.yaml uses a username-prefixed project (for example {username}-cyc-workshop).
This is a GitHub Actions workflow (YAML under .github/workflows/). It is not a Render Workflows service.
- Open your fork Open your
stock-research-agent-starteron GitHub. - Open Actions Click the Actions tab at the top of the repo.
- Enable Actions if asked If GitHub shows a banner to enable Actions on this fork, click I understand my workflows, go ahead and enable them.
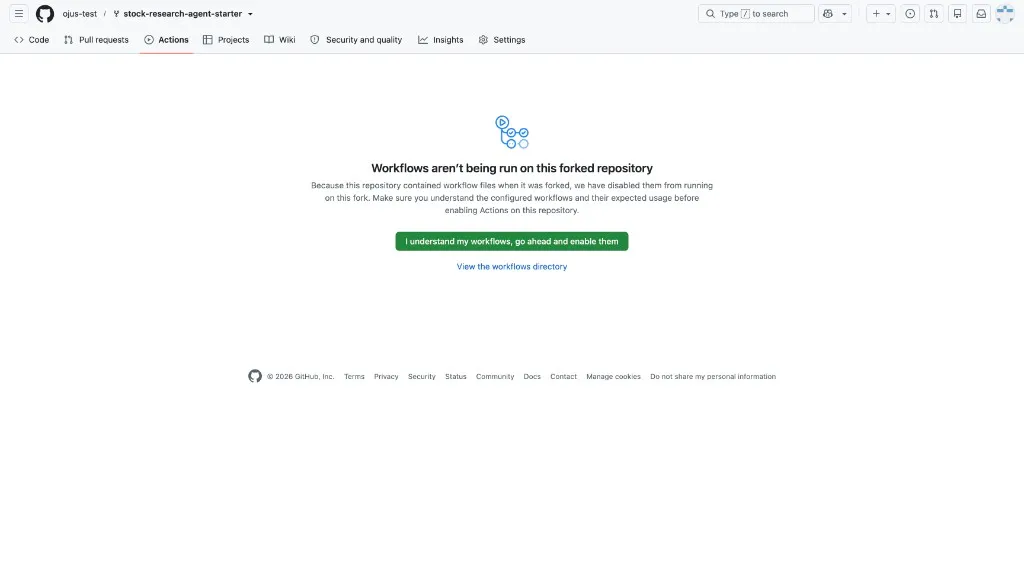
- Select the workflow In the left sidebar, click Setup attendee Blueprint names.
- Open Run workflow On the right, click the Run workflow dropdown. Leave Branch: main selected.
- Start the run Click the green Run workflow button.
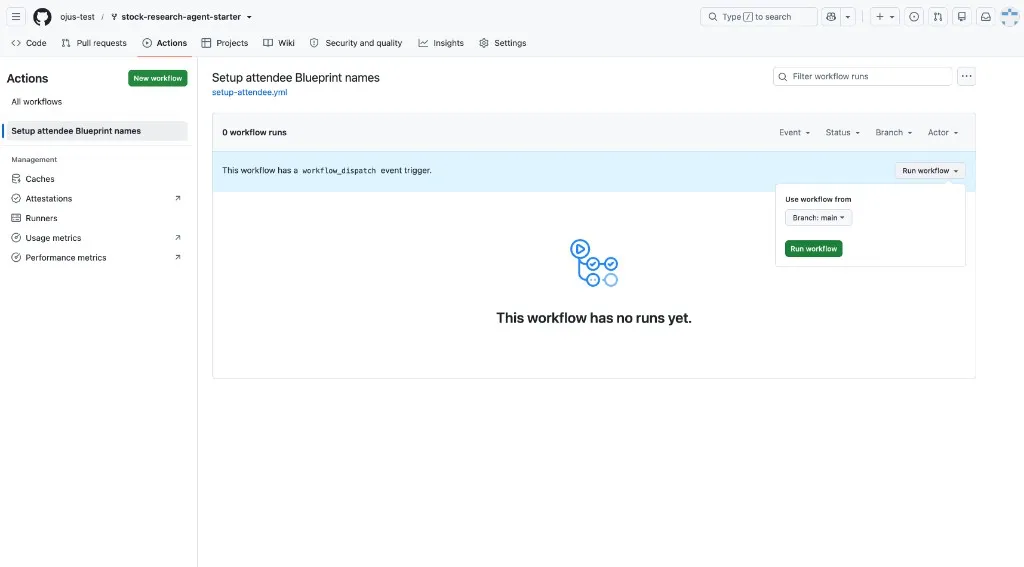
- Wait for success Open the new run in the list. Wait until it shows a green check (usually under a minute).
- Confirm render.yaml
Go to the Code tab → open
render.yamlonmain. You should see a new commit fromgithub-actions[bot], and names like project{username}-cyc-workshopand web service{username}-stock-research-agent-starter. GitHub usernames are lowercased for Render names (for exampleAda.Lovelacebecomesada-lovelace-cyc-workshop). The starter Action namespaces to{username}-cyc-workshop.
3. What the starter does today
Research still runs inside POST /api/research. The handler awaits researchStock(ticker) and only then returns the memo:
const memo = await researchStock(ticker)res.json(memo)Inside researchStock, the mock pipeline already has named steps: load company facts, then run signals / catalysts / risks together with Promise.all, then write the memo. The live tracker labels match those steps. All of that still happens under one pending HTTP request. There is no taskRunId yet.
stock-research-agent-starter/├── src/│ ├── server.ts # Express; awaits researchStock in the request│ ├── research-stock.ts # Multi-step mock pipeline (do not rewrite; tutorial wraps)│ └── workflows.ts # Placeholder; register several research tasks later├── public/│ ├── index.html # Ticker form│ ├── app.js # Starts research; already knows taskRunId mode│ └── tracker.js # Live progress UI during a run├── data/mock-stocks.json # Built-in sample dataset├── scripts/setup-attendee.js├── .github/workflows/setup-attendee.yml├── package.json # express, @renderinc/sdk@1.0.0, yaml└── render.yaml # Project + web service Blueprint4. Deploy with a Blueprint
A Blueprint is a render.yaml file that tells Render which services to create. After the namespace step, this repo’s Blueprint creates one project with one web service.
It does not create a workflow service. You add that later in the Dashboard.
- Open the Dashboard Sign in at dashboard.render.com.
- New → Blueprint Click + New → Blueprint.
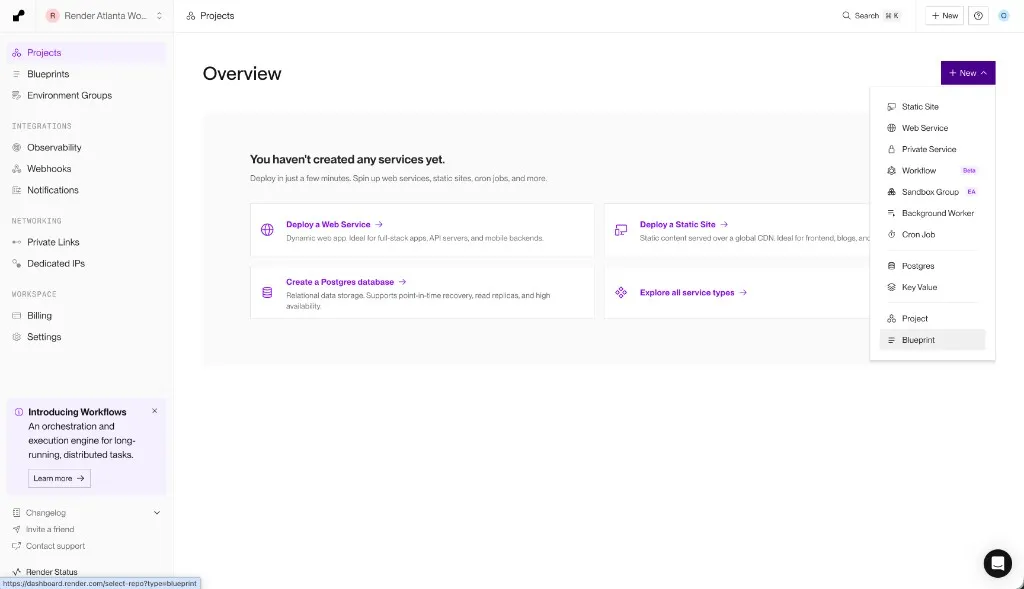
- Connect GitHub If prompted, connect GitHub and grant access to your fork (or all repos).
- Select the fork Choose your
stock-research-agent-starter. - Deploy Leave Blueprint path as
render.yaml(repo root). Click Deploy Blueprint / Apply.
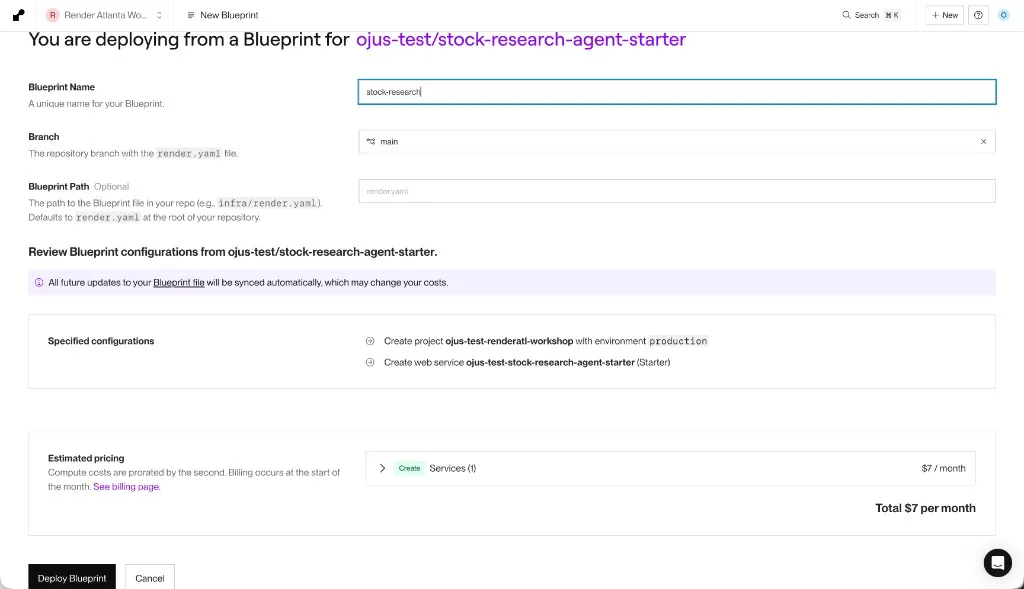
- Wait for live Open the new web service. Wait until status is Live (first build often takes a few minutes).
Copy the public URL (ends in .onrender.com). You will use it for the rest of the tutorial.
5. Confirm the UI
Open the public URL. You should see a ticker field and a Research button.
Form loading is enough for this page.
Blank page or 502: wait another minute for boot, then check Logs. Confirm the service is linked to your fork.
Troubleshooting
I deployed the upstream repo. Delete that Blueprint/service and redeploy from your fork. Later pushes only update the connected repo.
Where is Auto-Deploy? On the service → Settings. Leave Auto-Deploy on so pushes rebuild the service.
Build fails on Node. Confirm env NODE_VERSION is 20.
What you learned
- Fork deployed as one web service
- Multi-step mock pipeline still runs inside one HTTP request
- Next: run research and close the browser mid-run